EFI boot app in C#

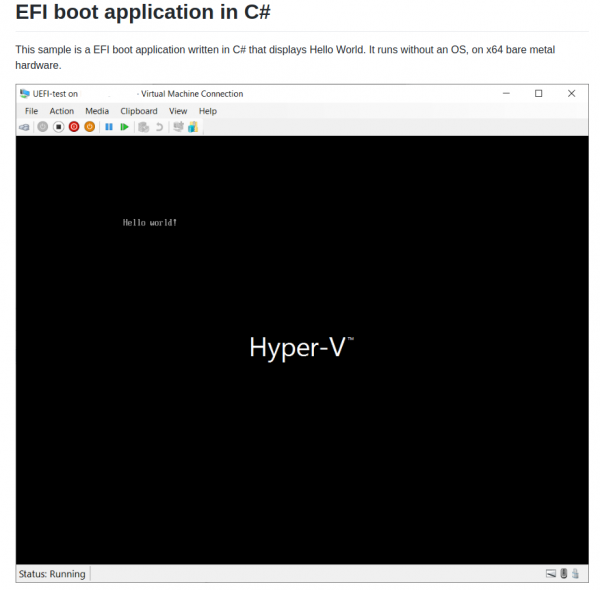
Zero-Sharp is using the CoreRT runtime to very impressively demonstrate how to get down to bare-metal application operation using C#. It compiles programs into native code…

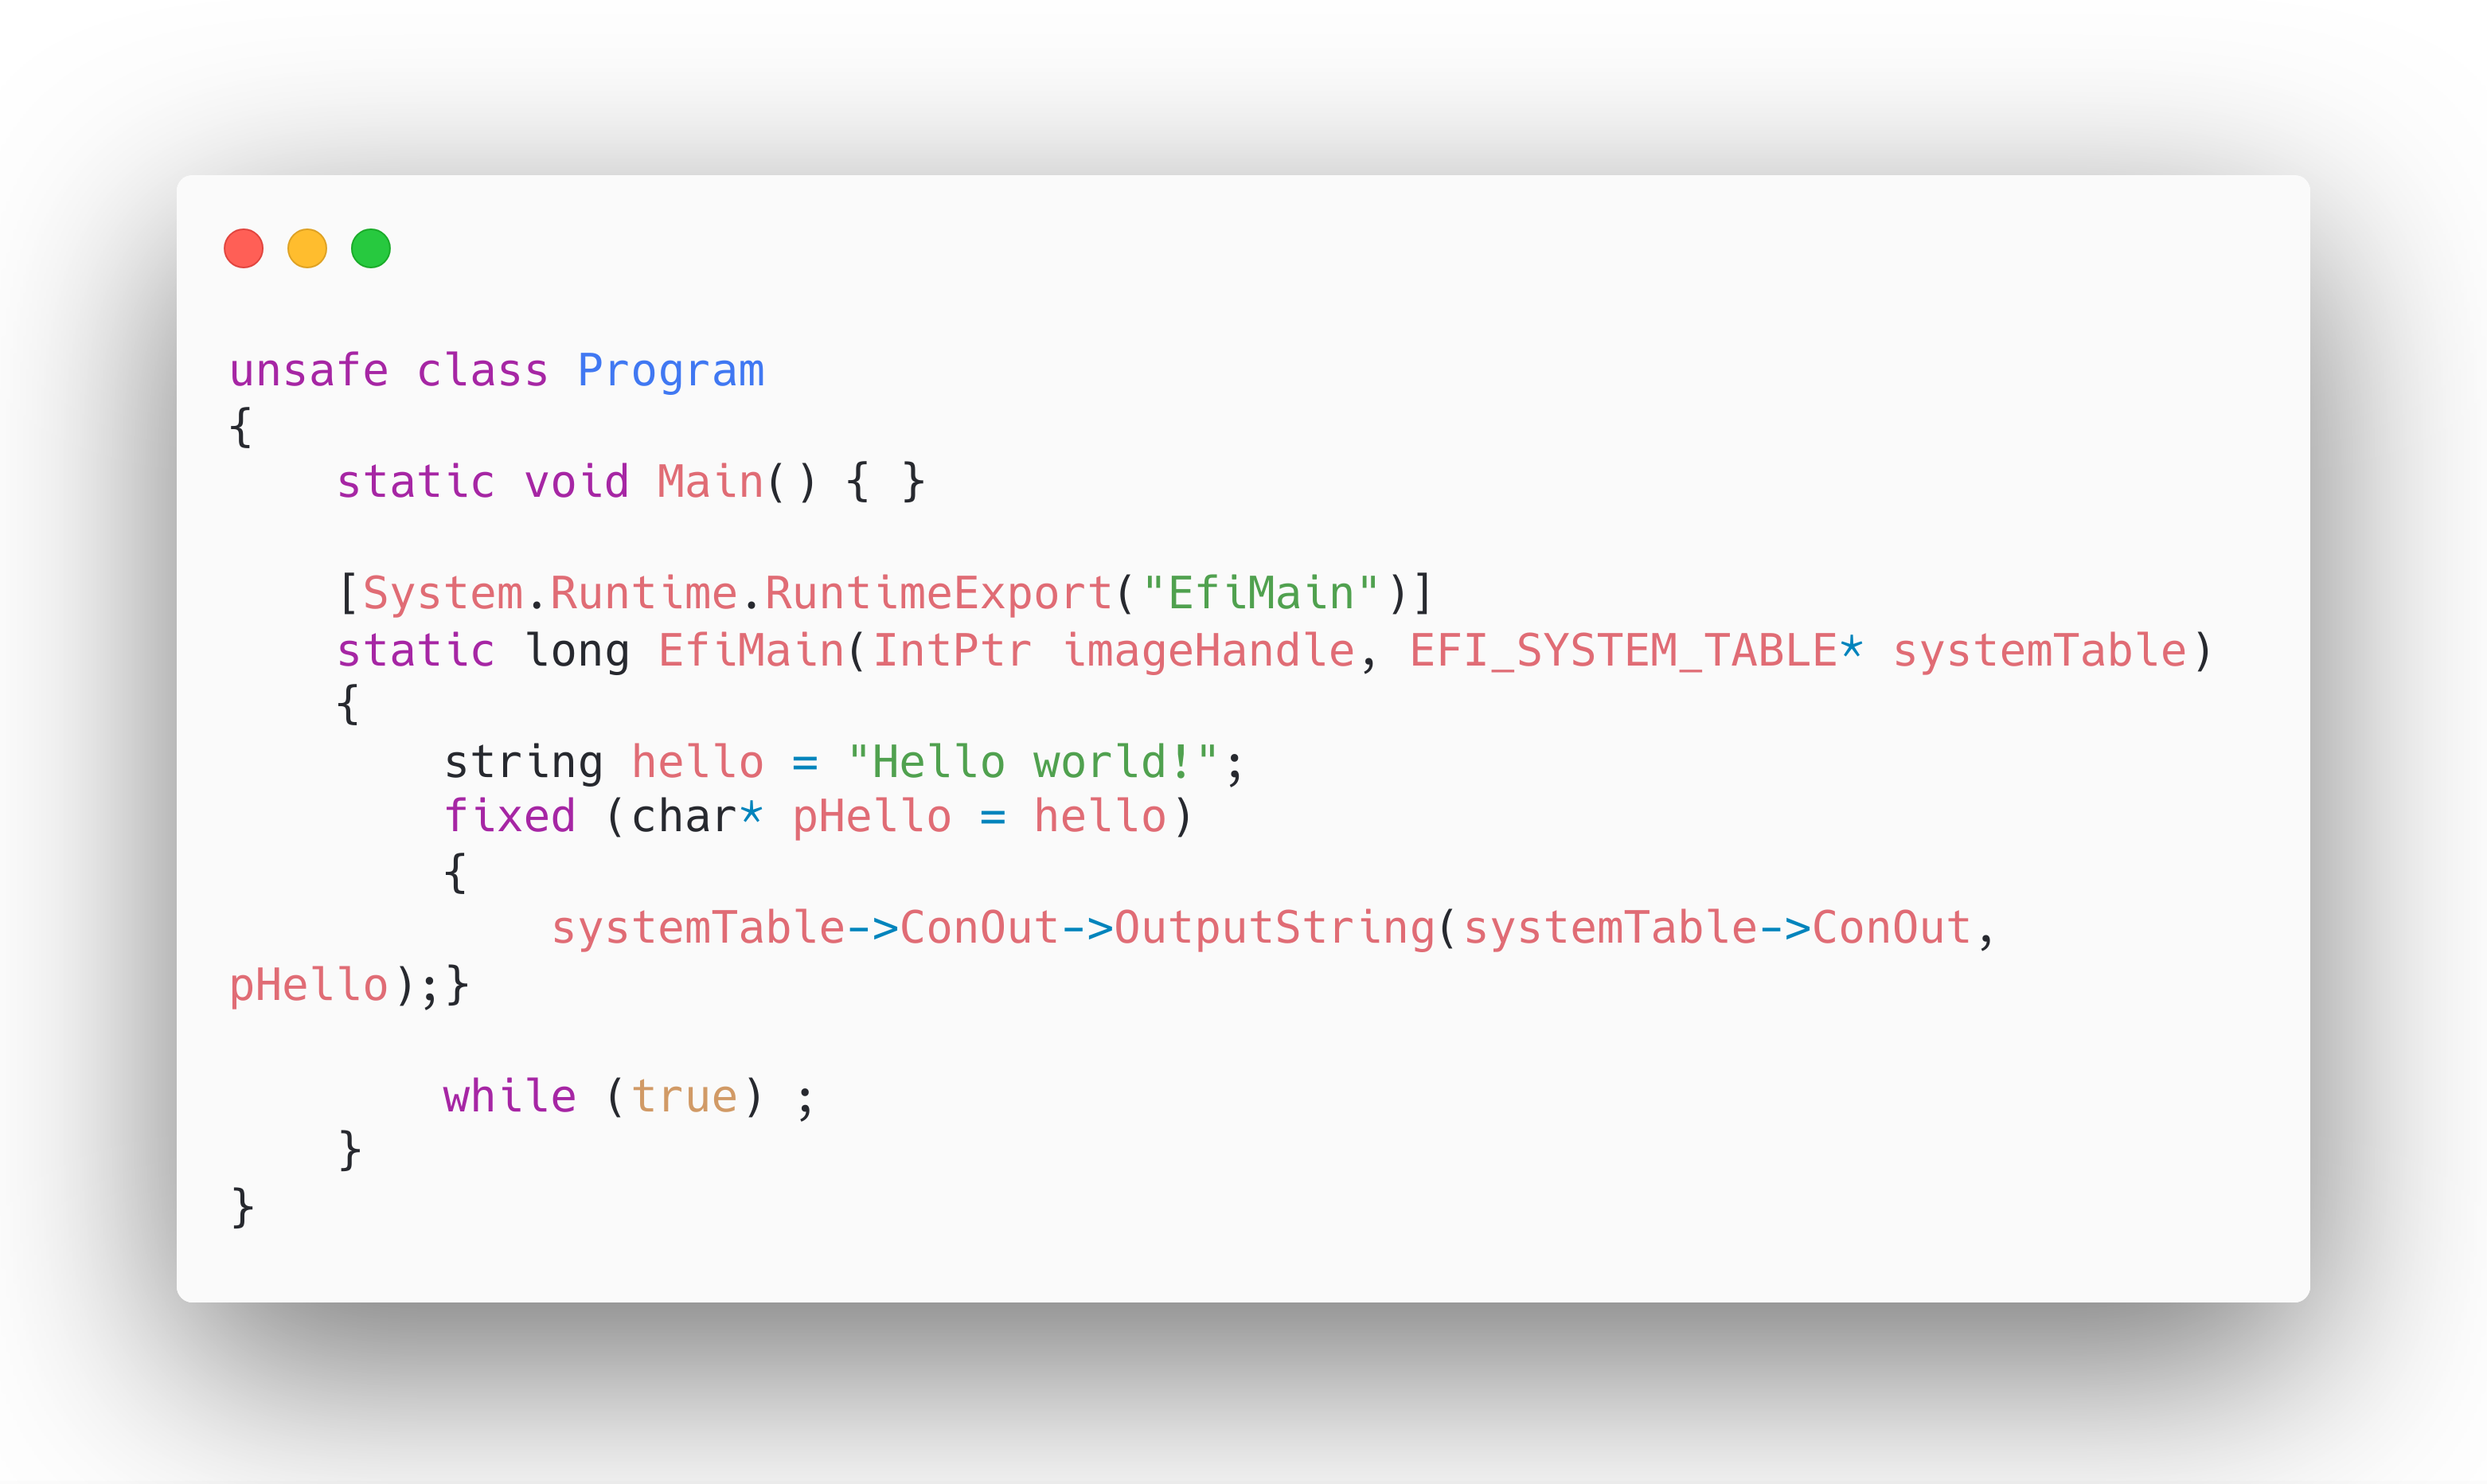
Everything you wanted to know about making C# apps that run on bare metal, but were afraid to ask:

A complete EFI boot application in a single .cs file.

Michal Stehovsky on Twitter

This is seriously impressive and the screenshot says it all:

a very cool “Hello World“.

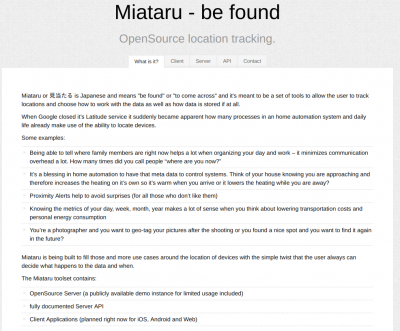
Miataru – open source location tracking

Not a lot of things are more private than your location.

Yet sometimes you wish to share your location with friends and family. May it be during an event or regularly. Maybe you want to

To allow the tech-minded audience to be in full control of what data is aggregated and stored regarding these needs I’ve created Miataru back in 2013 as an open-source project from end-2-end.

With the protocol being completely open and ready to be integrated into any home automation interested users can either utilize the publicly available (stores-nothing-on-disk) server or host your own.

Everything from the server to the clients is available in source and there’s a ready-to-go version of the client app on the AppStore.

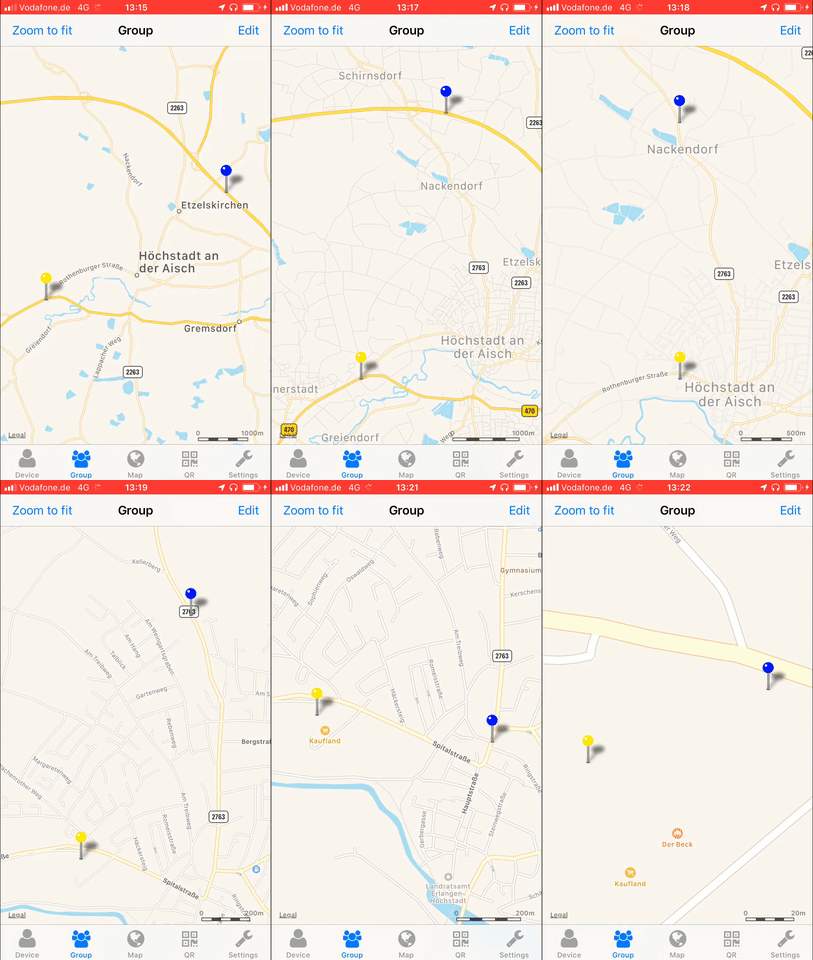
this is a location sharing session when the blue pin met the yellow pin

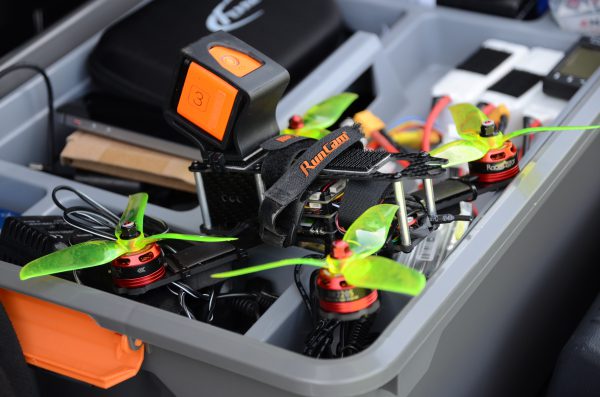
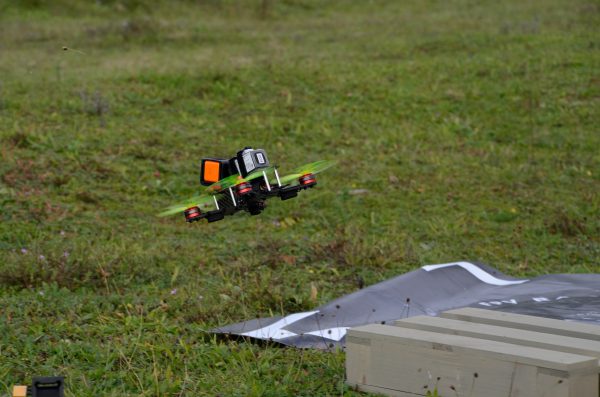
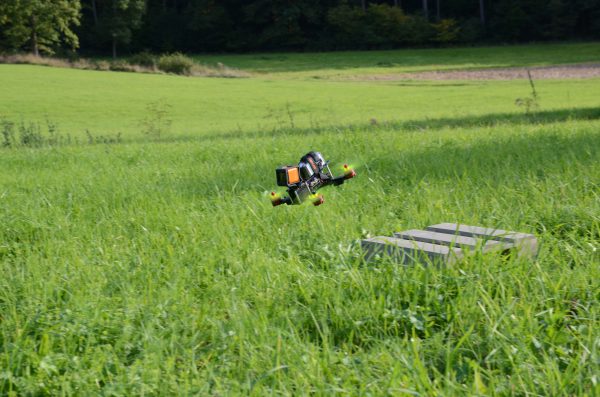
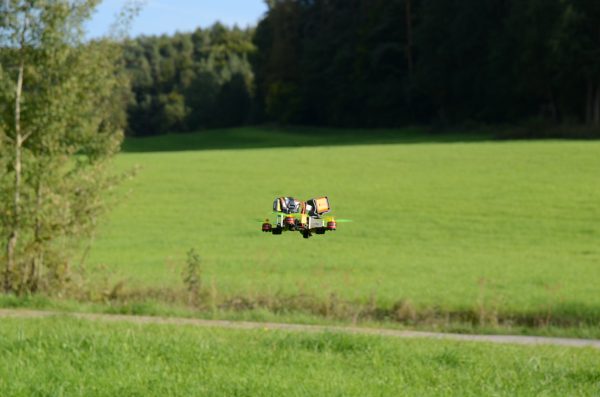
idea: in-flight convertible mini-quadcopter (add wings!)

About a year ago there were some very interesting reports about a german inventor and his invention: a highly futuristic, transforming smartphone airbag.

It would be attached to your phone and when you drop it, it would automatically deploy and dampen the impact.

Like so:

Impressive, right? There’s now a Kickstarter campaign behind this to deliver it as a product. All very nice and innovative.

I have no usue of a smartphone airbag of some sort. But hear me out on my train of thought:

I do partake in the hobby of quadcopter flying. I’ve built some myself in the past.

Now these quadcopters are very powerful and have very short flight times due to their power-dynamics. 4-5 Minutes and you’ve emptied a LiPo pack.

Model airplanes, essentially everything with wings, flys much much longer.

My thought now: Why not have a convertible drone.

When the pilot wants a switch could be flipped and it would convert a low-profile quadcopter to a low-profile quadcopter with wings. Similar to how the above mentioned smartphone “airbag”.

I don’t know anything about mechanics. I have no clue whatsoever. So go figure. But what I do know: the current path of the mini-quad industry is to create more powerful and bigger “mini”-quadcopters. And this is a good direction for some. It’s not for me. Having a 10kg 150km/h 50cm projectile in the air that also delivers a 1kg Lithium-Polymer, highly flammable and explosion-ready battery pack does frighten me.

Why not turn the wheel of innovation into the convertible-in-air-with-much-longer-flight-times direction and make the mini-quadcopters even more interesting?

pushing your myfitnesspal data to MQTT

MyFitnessPal is a great online service we are using to track what we eat. It’s well integrated into our daily routine – it works!

Unfortunately MyFitnessPal is not well set-up to interface 3rd party applications with it. In fact it appears they are actively trying to make it harder for externals to utilize the data there.

To access your data there’s an open source project called “python-myfitnesspal” which allows you to interface with MyFitnessPal from the command line. This project uses web-scraping to extract the information from the website and will break everytime MyFitnessPal is changing the design/layout.

Since the output for this would be command line text output it is not of great use for a standardized system. What is needed is to have the data sent in a re-useable way into the automation system.

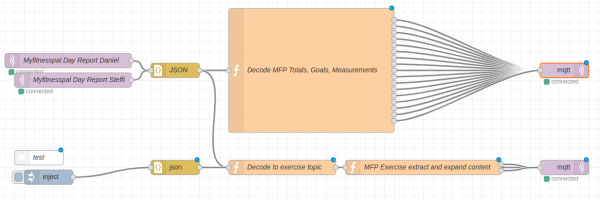
This is why I wrote the additional tool “myfitnesspal2mqtt“. It takes the output provided by python-myfitnesspal and sends it to an MQTT topic. The message then can be decoded, for example with NodeRed, and further processed.

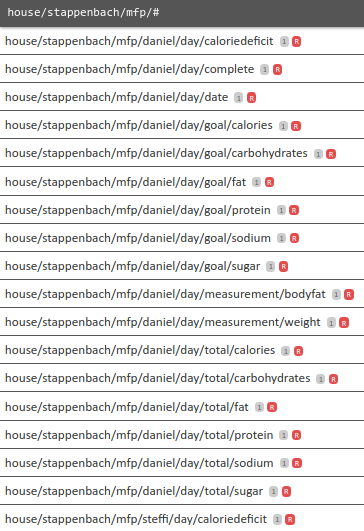
As you can see in the image above I am taking the MQTT message coming from myfitnesspal2mqtt and decoding it with a bit of javascript and outputting it back to MQTT.

var complete = {};
var sodium = {};
var carbohydrates = {};
var calories = {};
var daydate = {};
var fat = {};
var sugar = {};
var protein = {};

var weight = {};
var bodyfat = {};


var goalsodium = {};
var goalcarbohydrates = {};
var goalcalories = {};
var goalfat = {};
var goalsugar = {};
var goalprotein = {};

var caloriesdiff = {};

var ttopic = msg.topic.toLowerCase();

var firstobject = Object.keys(msg.payload)[0];

complete.payload = msg.payload[firstobject].complete;
complete.topic = ttopic+'/complete';

sodium.payload = msg.payload[firstobject].totals.sodium;
sodium.topic = ttopic+'/total/sodium';
carbohydrates.payload = msg.payload[firstobject].totals.carbohydrates;
carbohydrates.topic = ttopic+'/total/carbohydrates';
calories.payload = msg.payload[firstobject].totals.calories;
calories.topic = ttopic+'/total/calories';
fat.payload = msg.payload[firstobject].totals.fat;
fat.topic = ttopic+'/total/fat';
sugar.payload = msg.payload[firstobject].totals.sugar;
sugar.topic = ttopic+'/total/sugar';
protein.payload = msg.payload[firstobject].totals.protein;
protein.topic = ttopic+'/total/protein';

weight.payload = msg.payload[firstobject].measurements.weight;
weight.topic = ttopic+'/measurement/weight';
bodyfat.payload = msg.payload[firstobject].measurements.bodyfat;
bodyfat.topic = ttopic+'/measurement/bodyfat';

goalsodium.payload = msg.payload[firstobject].goals.sodium;
goalsodium.topic = ttopic+'/goal/sodium';
goalcarbohydrates.payload = msg.payload[firstobject].goals.carbohydrates;
goalcarbohydrates.topic = ttopic+'/goal/carbohydrates';
goalcalories.payload = msg.payload[firstobject].goals.calories;
goalcalories.topic = ttopic+'/goal/calories';
goalfat.payload = msg.payload[firstobject].goals.fat;
goalfat.topic = ttopic+'/goal/fat';
goalsugar.payload = msg.payload[firstobject].goals.sugar;
goalsugar.topic = ttopic+'/goal/sugar';
goalprotein.payload = msg.payload[firstobject].goals.protein;
goalprotein.topic = ttopic+'/goal/protein';

caloriesdiff.payload = msg.payload[firstobject].goals.calories - msg.payload[firstobject].totals.calories;
caloriesdiff.topic = ttopic+'/caloriedeficit';

daydate.payload = firstobject;
daydate.topic = ttopic+"/date";

return [complete, sodium, carbohydrates, calories, fat, sugar, protein, weight, bodyfat, goalsodium, goalcarbohydrates, goalcalories, goalfat, goalsugar, goalprotein, daydate, caloriesdiff];

In the end it expands into a multitude of topics with one piece of information per MQTT topic.

And with just that every time the script is run (which I do in a docker container and with a cronjob) the whole lot of pieces of information about nutrition and health stats are being pushed and stored in the home automation system.

This way they are of course also available to the home automation system to do things with it.

Like locking the fridge.

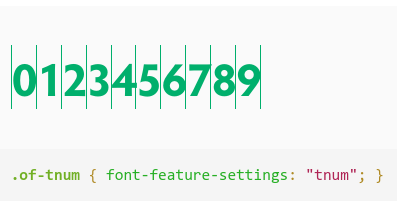
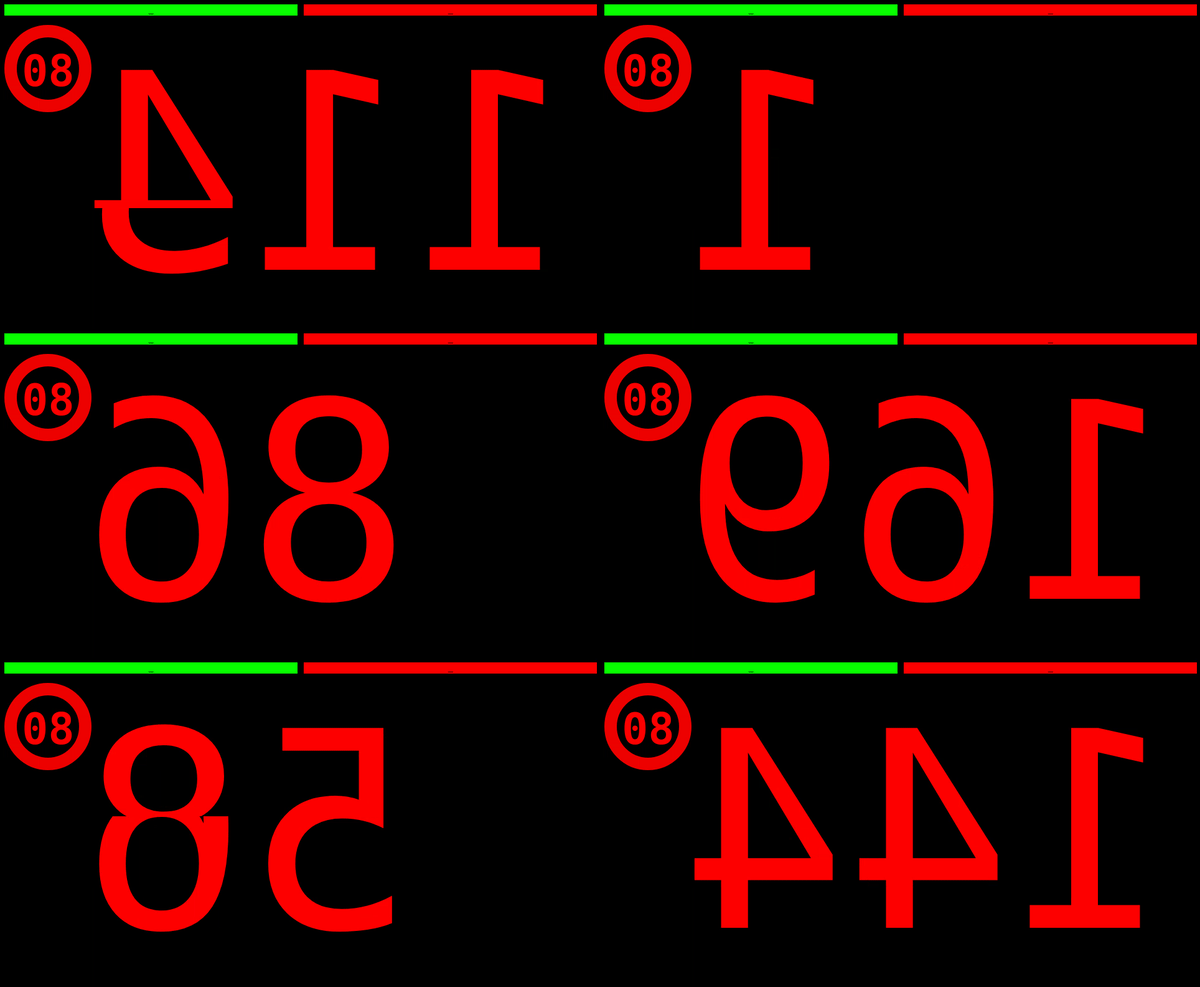
css font-feature “tnum”

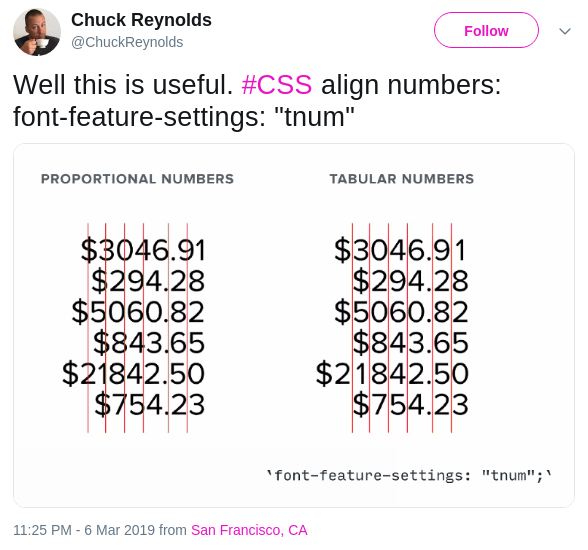
Oh this is so useful for my head-up-display prototype implementation:

This feature replaces numeral glyphs set on glyph-specific (proportional) widths with corresponding glyphs set on uniform (tabular) widths. Note that some fonts may contain tabular figures by default, in which case enabling this feature may not appear to affect the width of glyphs.

tabular figures: tnum

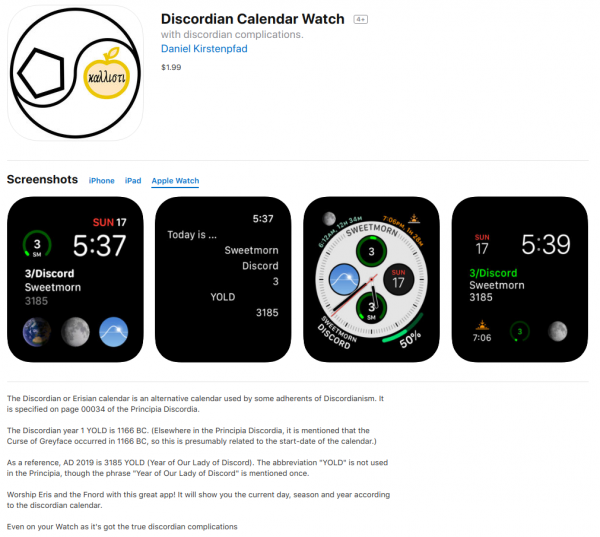
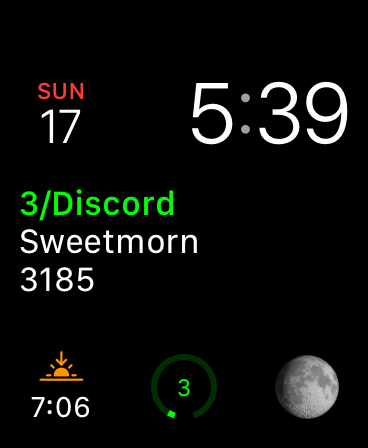
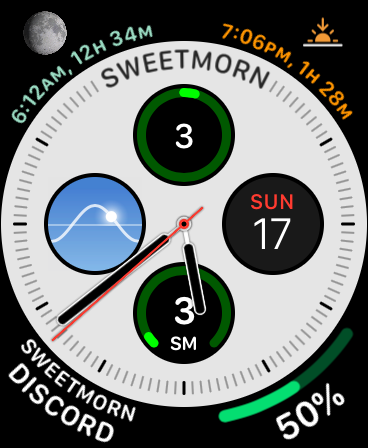
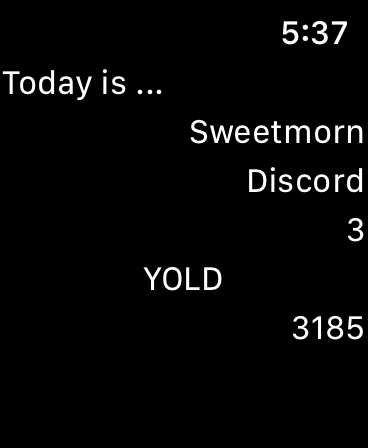
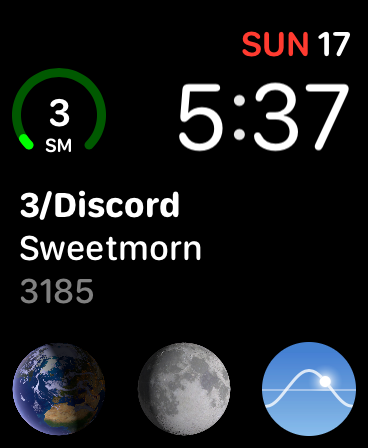
the discordian calendar on your wrist

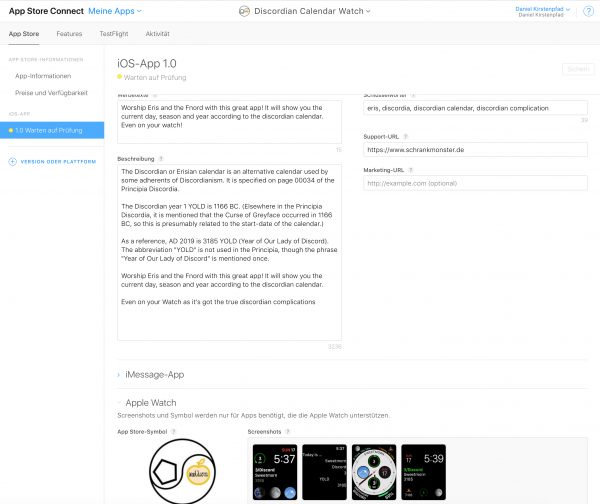
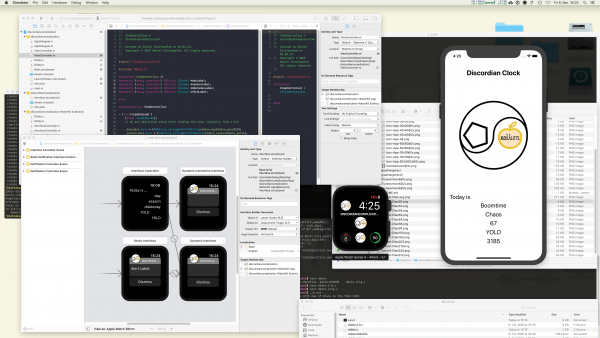
I’ve finished my little coding exercise today. With a good sunday afternoon used to understand and develop an iOS and Watch application from scratch I just handed it in for Apple AppStore approval.

The main purpose, aside from the obvious “learning how it’s done”, is that I actually needed a couple of complications on my watch that would show me the current day/date in the discordian calendar.

I have to say that the overall process of developing iOS and Watch applications is very streamlined. Much much easier than Android development.

The WatchKit development was probably the lesser great experience in this project. There simply is not a lot of code / documentation and examples for WatchKit yet. And most of them are in Swift – which I have not adapted yet. I keep to Objective-C for now still. With Swift at version 5 and lots of upgrades I would have done in the last years just to keep up with the language development… I guess with my choice to stick to Objective-C I’ve avoided a lot of work.

Anyhow! As soon as the app is through AppStore approval I will write again. Maybe somebody actually wants to use it also? :-)

With writing the app I just came up with the next idea for a complication I just really really would need.

In a nutshell: A complication that I can configure to track a certain calendar. And it will show the time in days/hours/minutes until the next appointment in that specific calendar. I will have it set up to show “how many hours till wakeing up”.

IoP – the internet of pets – predictive maintenance of a cat

In the interesting field of IoT a lot of buzz is made around the predictive maintenance use cases. What is predictive maintenance?

The main promise of predictive maintenance is to allow convenient scheduling of corrective maintenance, and to prevent unexpected equipment failures.

The key is “the right information in the right time”. By knowing which equipment needs maintenance, maintenance work can be better planned (spare parts, people, etc.) and what would have been “unplanned stops” are transformed to shorter and fewer “planned stops”, thus increasing plant availability. Other potential advantages include increased equipment lifetime, increased plant safety, fewer accidents with negative impact on environment, and optimized spare parts handling.

Wikipedia

So in simpler terms: If you can predict that something will break you can repair it before it breaks. This improvse reliability and save costs, even though you repaired something that did not yet need repairs. At least you would be able to reduce inconveniences by repairing/maintaining when it still is easy to be done rather than under stress.

You would probably agree with me that these are a very industry-specific use cases. It’s easy to understand when it is tied to an actual case that happened.

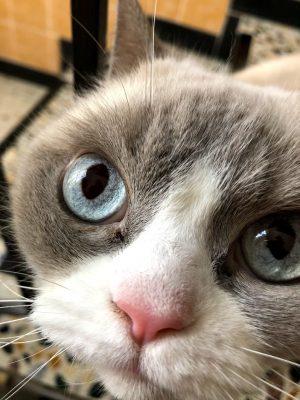
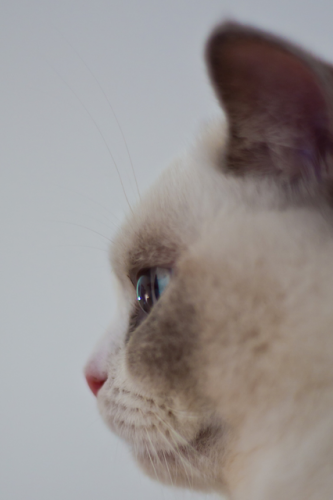
Let me tell you a case that happened here last week. It happened to Leela – a 10 year old white British short hair lady cat with gorgeous blue eyes:

Ever since her sister had developed a severe kidney issue we started to unobtrusively monitor their behavior and vital signs. Simple things like weight, food intake, water intake, movement, regularities (how often x/y/z).

I’ve built hardware to allow us to do that in the most simple and automated way. In the case of getting to know their weight we would simply put the kitty litter box on a heavily modified persons scale. I wrote about that already back int 2016.

When Leela now visits her litter box she is automatically weighed and it’s taken note that she actually used it.

A lot of data is aggregated on this and a lot of things are being done to that data to generate indications of issues and alerts.

This alerted us last weekend that there could be an issue with Leelas health as she was suddenly visiting the litter box a lot more often across the day.

We did not notice anything with Leela. She behaved as she would everyday, but the monitoring did detect something was not right.

What had happened?

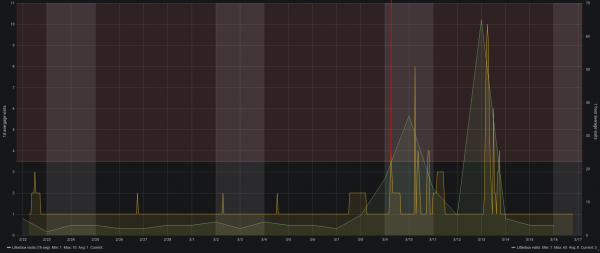
The chart shows the hourly average and daily total visits to the litterbox.

On the morning of March 9th Leela already had been to the litter box above average. So much above average that it tripped the alerting system. You can see the faded read area in the top of the graph above showing the alert threshold. The red vertical line was drawn in by me because this was when we got alerted.

Now what? She behaved totally normal just that she went a lot more to the litter box. We where concerned as it matched her sisters behavior so we went through all the checklists with her on what the issue could be.

We monitored her closely and increased the water supplied as well as changed her food so she could fight a potential bladder infection (or worse).

By Monday she did still not behave different to a degree that anyone would have been suspicious. Nevertheless my wife took her to the vet. And of course a bladder infection was diagnosed after all tests run.

She got antibiotics and around Wednesday (13th March) she actually started to behave much like a sick cat would. By then she already was on day 3 of antibiotics and after just one day of presumable pain she was back to fully normal.

Interestingly all of this can be followed up with the monitoring. Even that she must have felt worse on the 13th.

With everything back to normal now it seems that this monitoring has really lead us to a case of “predictive cat maintenance”. We hopefully could prevent a lot of pain with acting quick. Which only was possible through the monitoring in place.

Monitoring pets is seemingly becoming a thing – which lead to my rather funky post title declaration of the “Internet of Pets”. I know about a certain Volker Weber who even wrote in the current c’t magazine about him monitoring his dogs location.

Health is a huge topic for the future of devices and gadgets. Everyone will casually start to have more and more devices in their daily lifes. Unfortunately most of those won’t be under your own control if you do not insist on being in control.

You do not have to build stuff yourself like I did. You only need to make the right purchase decisions according to things important to you. And one of these things on that checklist should be: “am I in full control of the data flow and data storage”.

If you are not. Do not buy!

By coincidence the idea of having the owner of the data in full control of the data itself is central to my current job at MindSphere. With all the buzz and whistles around the Industry IoT platform it all breaks down to keep the actual owner of the data in control and in charge. A story for another post!

exercise: develop a Watch app + complication

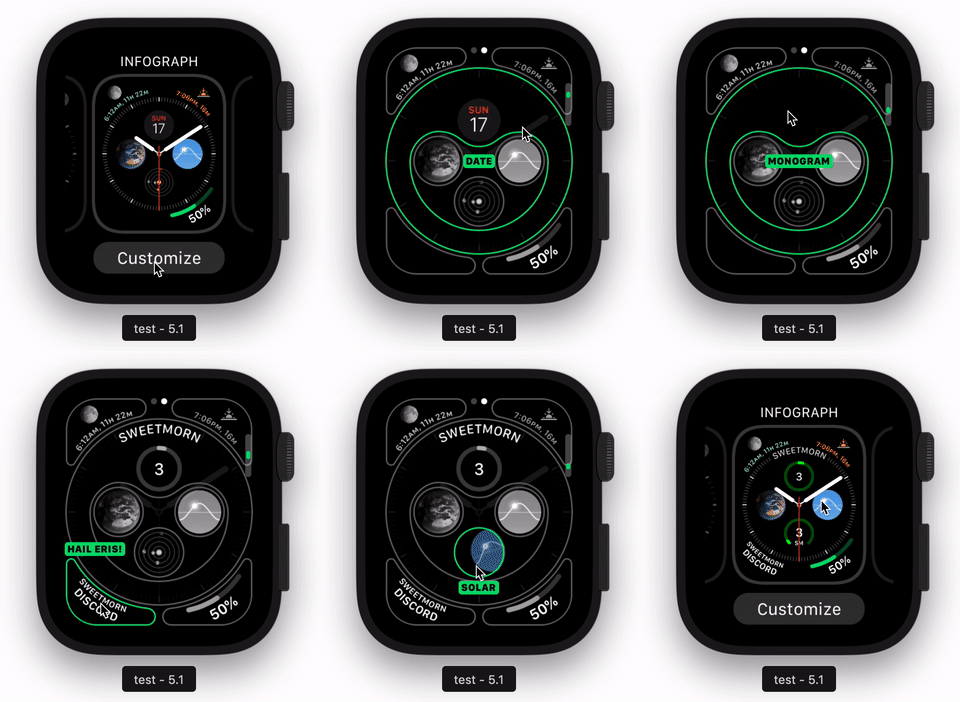
I’ve started to write a watch app for iOS/WatchOS which is going to display the current calendar information according to the discordian calendar.

Since there’s no watch support on any of the calendar apps in the AppStore and I wanted to have easy to use watchface support I had to try it myself.

I will update here on the progress but so far it looks like this:

two factor mandatory for apple developers

Apple has started to force developers that want to develop and publish on the MacOS and iOS platform to enable two-factor authentication.

Two-factor authentication (also known as 2FA) is a type, or subset, of multi-factor authentication. It is a method of confirming users’ claimed identities by using a combination of two different factors: 1) something they know, 2) something they have, or 3) something they are.

wikipedia

When I just got around enabling it for one of the apple accounts I’ve got there seems to be a much much higher security barrier in place already…

That’s probably some sort of zero-factor no-authentication. I guess. Anyway: Kudos to Apple for finally forcing people to minimum standards. Properly integrating the second factor will make this so much simpler for users. Apples ecosystem solution already is quite well integrated.

Have you switched all your daily used services to two-factor authentication yet?

fonts for your programming needs

We are looking at our screens more and more time of the day and most of that time we are reading or writing text. Text needs to look pretty for our eyes not to get sore – apart from the obvious “being able to tell what letter that is” there is a big portion of personal taste and preference when it comes to the choice of the font.

Most of the texts I am writing benefit from monospaced fonts.

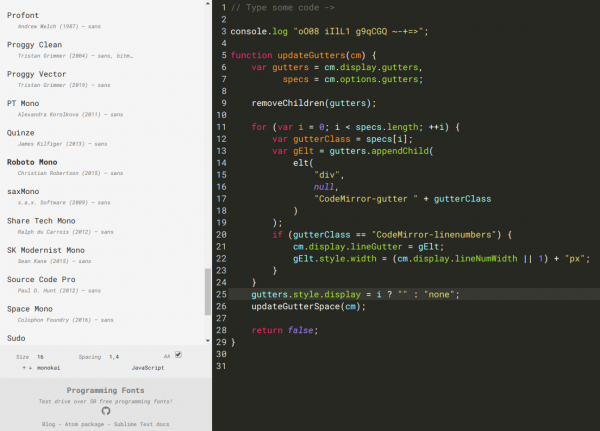
This blog celebrates monospaced fonts for programming.
So many fonts have popped up in recent years.

programmingfonts.org/about

Of course there’s a nice page available that previews the fonts right in your browser:

Head Up Display esthetics

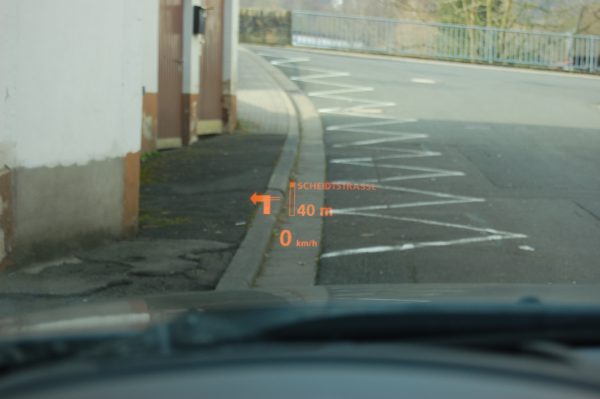
Many cars these days come with head up displays. These kind of displays are used to make information like the current speed appear “floating” over the street ahead right in your field of vision.

This has the clear advantage that the driver can stay focused on the street rather than looking away from the street and to the speedometer.

As practical as it seems these displays are not easy to build and seemingly not easy to design. Every time I came across one it’s built-in functionalities where limited in a way that I only can assume not a lot of thought had gone into what exactly would the driver like to see and how that would be displayed. There was always so much left to desire.

Apparently the technology behind these HUDs is at a point where it’s quite affordable to start playing with some ideas to retrofit a car with a more personal and likeable version.

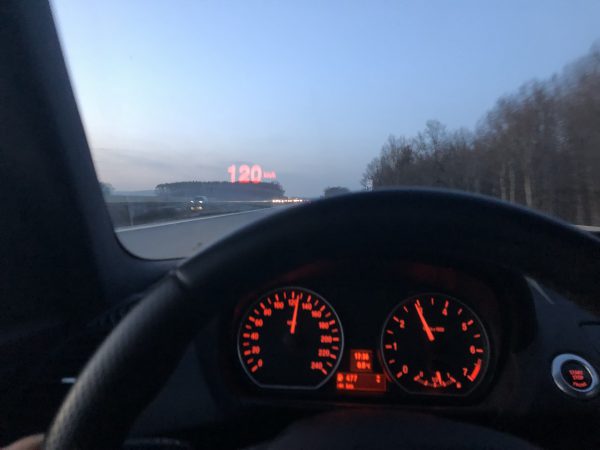
So I started to take a look at what is available – smart phones have bright displays and I had never tried to see what happens when you try to utilize them to project information into the windshield. So I tried.

As you can see – bright enough, readable but hazy and not perfectly sharp. The reason is quite simple:

“In the special windshield normally used, the transparent plastic safety material sandwiched in between the two pieces of glass must have a slight and very precise wedge, so that the vehicle operator does not see a HUD double image.”

laserfocusworld

There are some retrofit adhesive film solutions available that claim to help with that. I have not tried any yet. To be honest: to my eye the difference is noticeable but not a deal-breaker.

So I’ve tried apps available. They work. But they do a lot of things different from how I would have expected or done them. They are bearable, but I think it could be done better.

tldr: I started prototyping away and made a list of things that need to be done about the existing HUD applications.

mirrored basic html prototype, not well adjusted, just to play…

Here’s my list of what I want to achieve:

  • display orientation according to driving direction – I had expected all HUD applications to do this. They know the driving direction. They know how the device is oriented in space. They can tell which direction the windshield is. They know how to correctly turn the screen. They do not do that. None of them.
  • fonts and numbers – I cannot stand the numbers jumping around when they change up and down
  • speed steps interpolation – GPS only delivers a speed update every second or so. In this time speed might jump up and down by more than +1. The display has 60 fps and gyros to play with and interpolate… I want smooth number transitions.
  • have an “eco-meter” – using gyros the HUD would be able to display harsh accelleration and breaking. Maybe display a color-coded bar and whatever is measured is reflected in the bar going left or right…
  • speed-limit display – apparently this is a huge issue looking at the data availability. There seems to be open-street-map data and options to contribute. Maybe that can be added.
  • have a non-hud mode – non mirrored to use for example to set speed limits and contribute to OpenStreetMap this way!
  • automatically switch between HUD and non-HUD mode – because the device knows it’s orientation in space – if you pick it up from the dashboard and look into it, why not automatically switch?
  • speed zones color coding – change the color of the speed display depending on configurable speed regions. 0-80 is green, 80-130 is yellow, 130-250 is red.
  • turn display off when car stopped – if there’s nothing displayed or needs to be displayed, for example because the car stopped the display can be turned off completely on it’s own.

Navigation is of limited value as the only way I could think of adding value would be a serious AR solution that uses the whole windshield. Now I’ve got these small low-power projectors around… that get’s me thinking…

What would you want to have in such a HUD in your car?

Apple Airplay for SONOS (in Docker)

We’ve got a couple of SONOS based multi-room-audio zones in our house and with the newest generation of SONOS speakers you can get Apple Airplay. Fancy!

But the older hardware does not support Apple Airplay due to it’s limiting hardware. This is too bad.

So once again Docker and OpenSource + Reverse-Engineering come to the rescue.

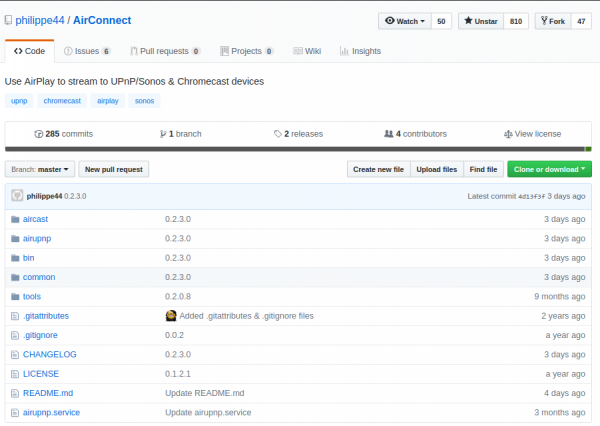
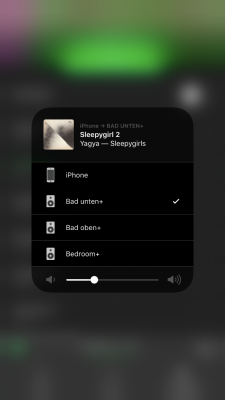
AirConnect is a small but fancy tool that bridges SONOS and Chromecast to Airplay effortlessly. Just start and be done.

It works a treat and all of a sudden all those SONOS zones become Airplay devices.

There is also a nice dockerized version that I am using.

small and cheap multi-sensor nodes for home automation

I had reported on my efforts to develop an indoor location tracking system previously. Back in 2017 when I started to work on this I only planned to utilize inexpensive EspressIf ESP32 SoCs to look for bluetooth beacons.

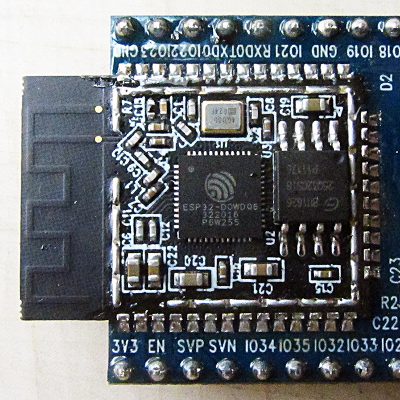
In the time between I figured that I could, and should, also utilize the multiple digital and analog input/output pins this specific SoC offers. And what better to utilize it with then a range of sensors that also now could feed their measurements into an MQTT feed along with the bluetooth details.

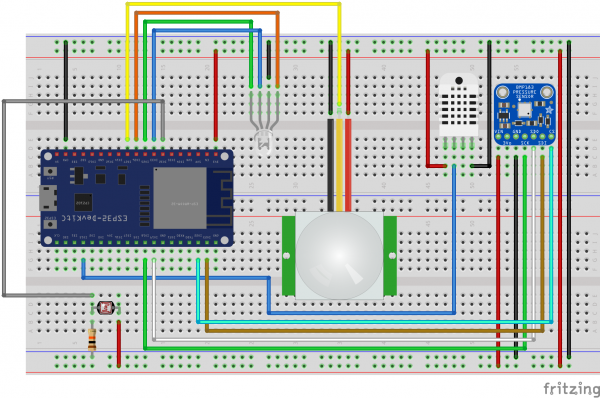
And there is a whole lot of sensors that I’ve added. On a breadboard it looks like this:

So what do we have here:

  • Motion sensor
  • Temperature sensor
  • Humidity sensor
  • Light sensor
  • Barometric pressure sensor
  • and of course an RGB LED to show a status

The software I’ve done already and after 3 weeks of extensive testing it seems that it’s stable. I will release this eventually later in the process.

I’ve also found plastic cases that fill fit this amount of sensory over the sensor cases I had already bought for the ESP32 alone. For now I’ll close this article with some pictures.

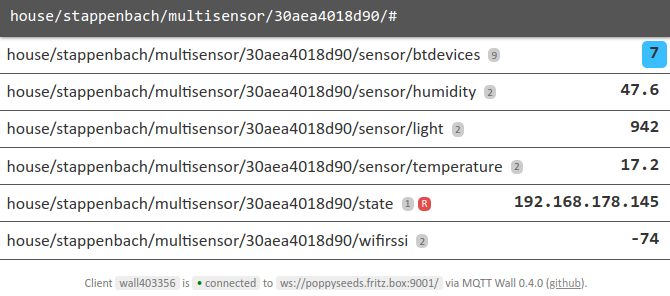
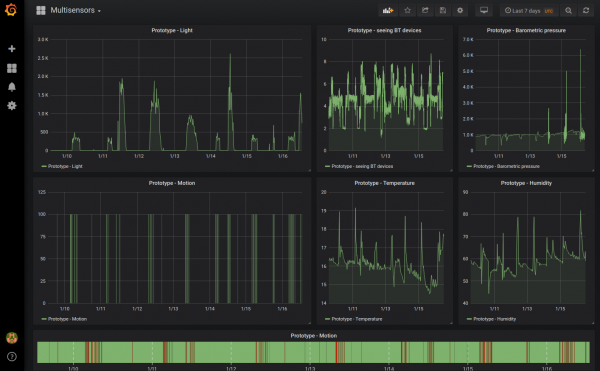
The MQTT feed one of these nodes produces…

…and the Grafana dashboard I am using for this specific prototype device.

progressive web applications

These days even heise online is writing up about the wonders of PWA (progressive web applications).

PWA simply put is a standardized way to add some context to websites and package them up so they behave as much like a native mobile application. A mobile application that you are used to install onto your phone or tablet most likely using an app store of some sort.

The aim of PWA is to provide a framework and tooling so that the website is able to provide features like push notifications, background updates, offline modes and so on.

Very neat. I’ve just today have enabled the PWA mode of this website, so you’re now free to add it to your home screen. But fear not: You won’t be pestered with push notifications or any background stuff taking place. It’s merely a more convenient optional shortcut.

Join me implementing a neural network to improve accuracy of an OpenSource indoor location tracking system

To all techies reading this:

GIST: I am looking for interested hackers who want to help me implement a neural network that improves the accuracy of bluetooth low energy based indoor location tracking.

Longer version:

I am currently applying the last finishing touched to a house wide bluetooth low energy based location tracking system. (All of which will be opensourced)

The system consists of 10+ ESP-32 Arduino compatible WiFi/Bluetooth system-on-a-chip. At least one per room of a house.

These modules are very low powered and have one task: They scan for BLE advertisements and send the mac and manufacturer data + the RSSI (signal strength) over WiFi into specific MQTT topics.

There is currently a server component that takes this data and calculates a probable location of a seen bluetooth low energy device (like the apple watch I am wearing…). It currently is using a calibration phase to level in on a minimum accuracy. And then simple calculation matrices to identify the most probable location.

This all is very nice but since I got interested in neural networks and KI development – and I think many others might as well – I am asking here for also interested parties to join the effort.

I do have an existing set-up as well as gigabytes of log data.

I know about previous works like „Indoor location tracking system using neural network based on bluetooth

Now I am totally new to the overal concepts and tooling and I start playing with TensorFlow right now.

If you want to join, let me know by commenting!

Source: http://ieeexplore.ieee.org/document/7754772/

“making your home smarter” – use case #12 – How much time do I have until…?

Did you notice that most calendars and timers are missing an important feature. Some information that I personally find most interesting to have readily available.

It’s the information about how much time is left until the next appointment is coming up. Even smartwatches, which should should be jack-of-all-trades in regards of time and schedule, do not display the “time until the next event”.

Now I came across this shortcoming when I started to look for this information. No digital assistant can tell me right away how much time until a certain event is left.

But the connected house also is based upon open technologies, so one can add these kind of features easily ourselves. My major use cases for this are (a) focussed work, plan quick work-out breaks and of course making sure there’s enough time left to actually get enough sleep.

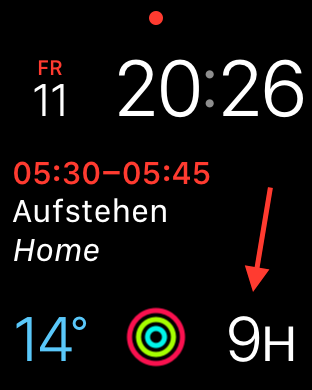
As you can see in the picture attached my watch will always show me the hours (or minutes) left until the next event. I use separate calendars for separate displays – so there’s actually one for when I plan to get up and do work-outs.

Having the hours left until something is supposed to happen at a glance – and of course being able to verbally ask through chat or voice in any room of the house how long until the next appointment gives peace of mind :-).


How to weigh your cat! – the IoT version

This is Leela. She is a 7 year old lilac white British short hair cat that lives with us. Leela had a sister who used to live with us as well but she developed a heart condition and passed away last year. Witnessing how quickly such conditions develop and evaluate we thought that we can do something to monitor Leelas health a bit to just have some sort of pre-alert if something is changing.

Kid in a Candystore

As this Internet of Things is becoming a real thing these days I found myself in a candy store when I’ve encountered that there are a couple of really really cheap options to get a small PCB with input/output connectors into my house WiFi network.

One of the main actors of this story is the so called ESP8266. A very small and affordable system-on-a-chip that allows you to run small code portions and connect itself to a wireless network. Even better it comes with several inputs that can be used to do all sorts of wonderful things.

And so it happened that we needed to know the weight of our cat. She seemed to get a bit chubby over time and having a point of reference weight would help to get her back in shape. If you every tried to weigh a cat you know that it’s much easier said than done.

The alternative was quickly brought up: Build a WiFi-connected scale to weigh her litter box every time she is using it. And since I’ve recently bought an evaluation ESP8266 I just had to figure out how to build a scale. Looking around the house I’ve found a broken human scale (electronics fried). Maybe it could be salvaged as a part donor?

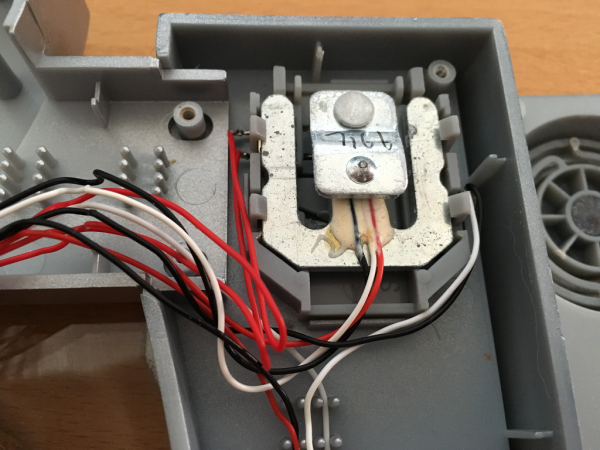
A day later I’ve done all the reading on that there is a thing called “load-cell”. Those load cells can be bought in different shapes and sizes and – when connected to a small ADC they deliver – well – a weight value.

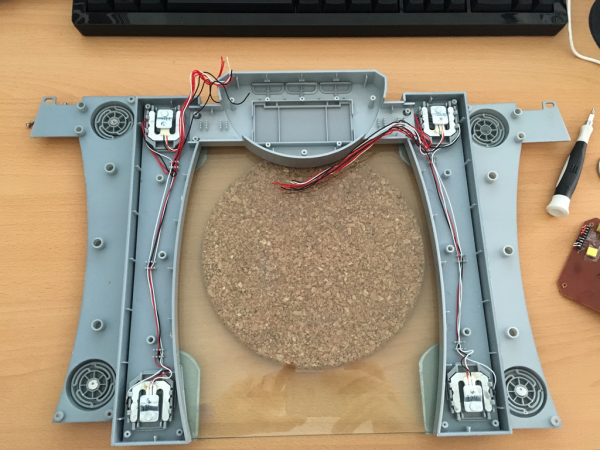
I cracked the human scale open and tried to see what was broken. It luckily turned out to have completely fried electronics but the load-cells where good to go.
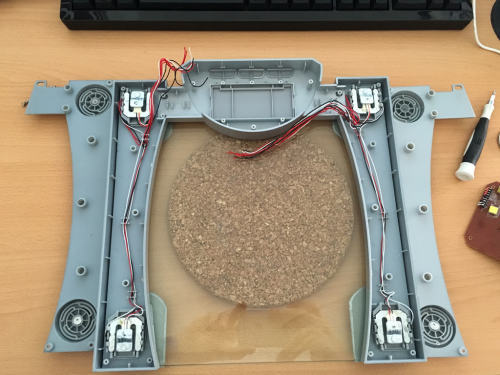
Look at this load cell:
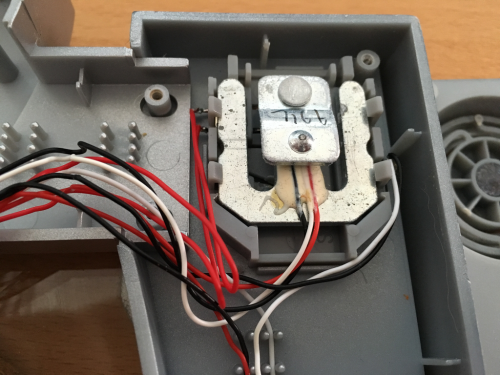
Hardware

That brought down the part list of this project to:

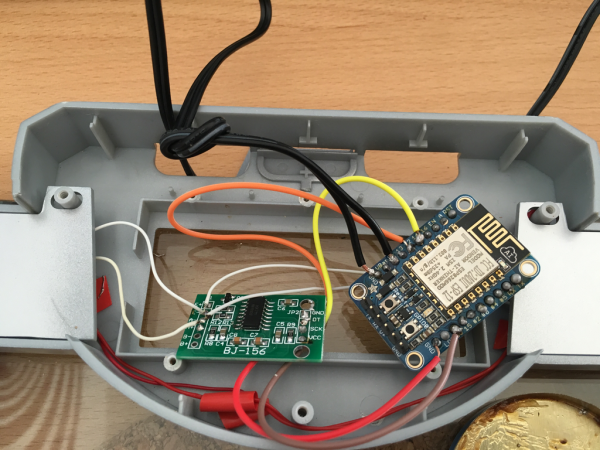
  • an ESP8266 – an Adafruit Huzzah in my case
  • a HX711 ADC board to amplify and prepare the signal from the load-cells
  • a human scale with just enough space in the original case to fit the new electronics into and connect everything.

The HX711 board was the only thing I had to order hardware wise – delivered the next day and it was a matter of soldering things together and throwing in a small Arduino IDE sketch.

My soldering and wiring skills are really sub-par. But it worked from the get-go. I was able to set-up a small Arduino sketch and get measurements from the load-cells that seemed reasonable.
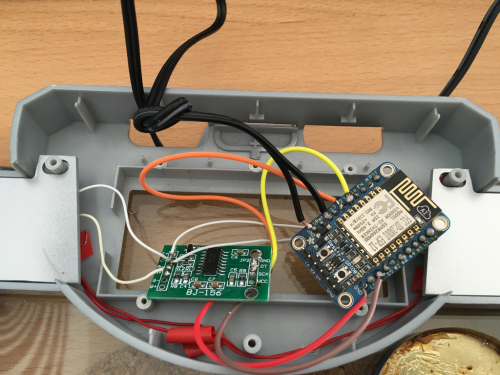
Now the hardware was all done – almost too easy. The software would be the important part now. In order to create something flexible I needed to make an important decision: How would the scale tell the world about it’s findings?

Software

Two basic options: PULL or PUSH?

Pull would mean that the ESP8266 would offer a webservice or at least web-server that exposes the measurements in one way or the other. It would mean that a client needs to poll for a new number in regular intervals.

Push would mean that the ESP8266 would connect to a server somewhere and whenever there’s a meaningful measurement done it would send that out to the server. With this option there would be another decision of which technology to use to push the data out.

Now a bit of history: At that time I was just about to re-implement the whole house home automation system I was using for the last 6 years with some more modern/interoperable technologies. For that project I’ve made the decision to have all events (actors and sensors) as well as some additional information being channeled into MQTT topics.

Let’s refer to Wikipedia on this:

“MQTT1 (formerly MQ Telemetry Transport) is an ISO standard (ISO/IEC PRF 20922) publish-subscribe-based “lightweight” messaging protocol for use on top of the TCP/IP protocol. It is designed for connections with remote locations where a “small code footprint” is required or the network bandwidth is limited. The publish-subscribe messaging pattern requires a message broker. Thebroker is responsible for distributing messages to interested clients based on the topic of a message. Andy Stanford-Clark and Arlen Nipper of Cirrus Link Solutions authored the first version of the protocol in 1999.”

Something build for oil-pipelines can’t be wrong for your house – can it?

So MQTT uses the notation of a “topic” to sub-address different entities within it’s network. Think of a topic as just a simple address like “house/litterbox/weight”. And with that topic MQTT allows you to set a value as well.

The alternative to MQTT would have been things like WebSockets to push events out to clients. The decision for the home-automation was done towards MQTT and so far it seems to have been the right call. More and more products and projects available are also focussing on using MQTT as their main message transport.

For the home automation I had already set-up a demo MQTT broker in the house – and so naturally the first call for the litterbox project was to utilize that.

The folks of Adafruit provide the MQTT library with their hardware and within minutes the scale started to send it’s measurements into the “house/litterbox/weight” topic of the house MQTT broker.

Some tweaking and hacking later the litterbox was put together and the actual litterbox set on-top.

Since Adafruit offers platform to also send MQTT messages towards and create neat little dashboards I have set-up a little demo dashboard that shows a selection of data being pushed from the house MQTT broker to the Adafruit.io MQTT broker.

These are the raw values which are sent into the weight topic:

You can access it here: https://io.adafruit.com/bietiekay/stappenbach

So the implementation done and used now is very simple. On start-up the ESP8622 initialises and resets the weight to 0. It’ll then do frequent weight measurements at the rate it’s configured in the source code. Those weight measurements are being monitored for certain criteria: If there’s a sudden increase it is assumed that “the cat entered the litterbox”. The weight is then monitored and averaged over time. When there’s a sudden drop of weight below a threshold that last “high” measurement is taken as the actual cat weight and sent out to a /weight topic on MQTT. The regular measurements are sent separately to also a configurable MQTT topic.

You can grab the very ugly source code of the Arduino sketch here: litterbox_sourcecode

And off course with a bit of logic this would be the calculated weight topic:
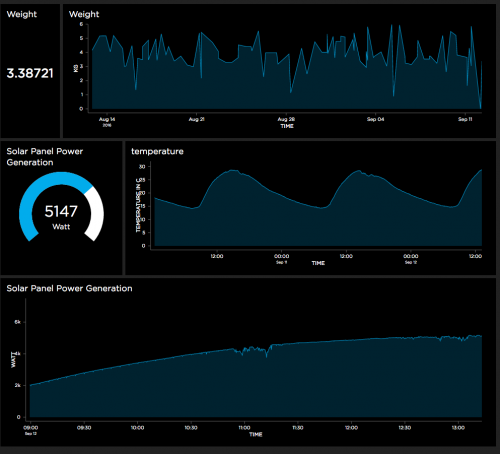
Of course it is not enough to just send data into MQTT topics and be done with it. Of course you want things like logging and data storage. Eventually we also wanted to get some sort of notification when states change or a measurement was taken.

MQTT, the cloud and self-hosted

Since MQTT is enabling a lot of scenarios to implement such actions I am going to touch just the two we are using for our house.

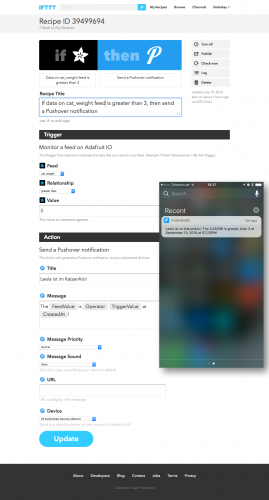
  1. We wanted to get a push notification to our phones whenever a weight measurement was taken – essentially whenever the cat has done something in the litterbox. The easiest solution: Set-Up a recipe on If This Than That (IFTTT) and use PushOver to send out push notifications to whatever device we want.
  2. To log and monitor in some sort of a dashboard the easiest solution seemed to be Adafruits offer. Of course hosted inside our house a combination of InfluxDB to store, Telegraf to gather and insert into InfluxDB and Chronograf to render nice graphs was the best choice.

Since most of the above can be done in the cloud (as of: outside the house with MQTT being the channel out) or inside the house with everything self-hosted. Some additional articles will cover these topics on this blog later.

There’s lots of opportunity to add more logic but as far as our experiments and requirements go we are happy with the results so far – we now regularly get a weight and the added information of how often the cat is using her litterbox. Especially for some medical conditions this is quite interesting and important information to have.
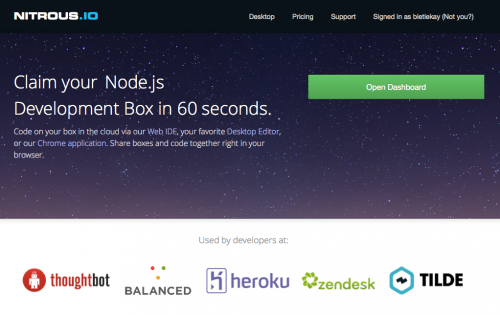
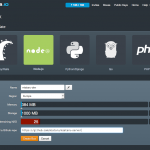
Nitrous – full IDE in your browser – with Collaboration!

“Nitrous is a backend development platform which helps software developers save time by cutting out the repetitive parts of creating development environments and automating them.

Once you create your first development environment, there are many features which will make development easier.”

Bildschirmfoto 2014-07-06 um 11.38.49

So what you’re getting is:

  • a virtual machine operated for you and set-up with a single click
  • A full-featured IDE in your browser
  • Code-Collaboration by inviting others to edit your project
  • a debugging environment in which you can test-run and work with your code

Here are some screenshots to get you a feel for it:

Source: https://www.nitrous.io/

Scaling Linux: Perfomance Tools and Measurements


If you ever experienced a missmatch between the performance you expected from a server or application running on Linux you probably started to debug your way into it why the applications performance is not on the expected levels.

With Linux being very mature you get an enormous amounts of helpers and interfaces to debug the performance aspects of the operating system and the applications.

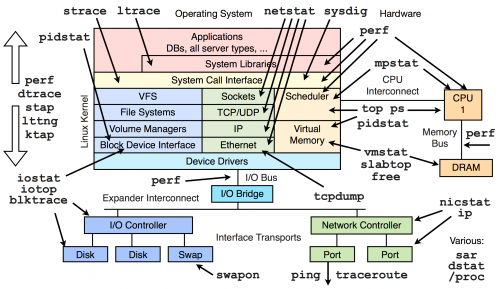
Want to see proof? Here – a map of almost all the thingies and interfaces you got:linuxperftools

Thankfully Brendan Gregg put together a page with videos and further links to drill into those interfaces and methods above.

Source: http://www.brendangregg.com/linuxperf.html

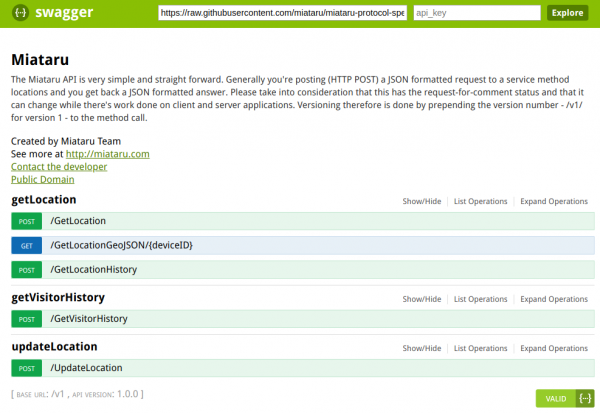
document your REST interfaces with style: Swagger

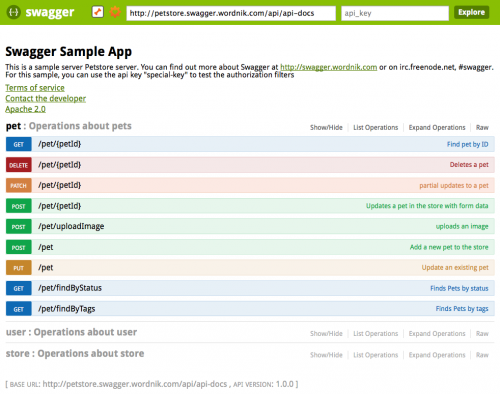
Swagger is a specification and complete framework implementation for describing, producing, consuming, and visualizing RESTful web services. The overarching goal of Swagger is to enable client and documentation systems to update at the same pace as the server. The documentation of methods, parameters, and models are tightly integrated into the server code, allowing APIs to always stay in sync. With Swagger, deploying managing, and using powerful APIs has never been easier.”

Bildschirmfoto 2014-03-15 um 22.35.09

Source 1: https://helloreverb.com/developers/swagger
Source 2: https://github.com/wordnik/swagger-core
Source 3: http://petstore.swagger.wordnik.com/#!/pet

“Compressing” JSON to JSON

JSON_logo
JSON Logo

The internet and all those browsers and javascript applications brought data structures that are pretty straight-forward. One of them is JSON.

The wikipedia tells about JSON:

“JSON (/ˈdʒeɪsɒn/ JAY-soun, /ˈdʒeɪsən/ JAY-son), or JavaScript Object Notation, is an open standard format that uses human-readable text to transmit data objects consisting of attribute–value pairs. It is used primarily to transmit data between a server and web application, as an alternative to XML.”

Unfortunately complex JSON can get a bit heavy on the structure itself with over and over repetitions of data-schemes and ids.

There’s RJSON to the rescue on this. It’s backwards compatible and makes your JSON more compressible:

“RJSON converts any JSON data collection into more compact recursive form. Compressed data is still JSON and can be parsed with JSON.parse. RJSON can compress not only homogeneous collections, but also any data sets with free structure.

RJSON is single-pass stream compressor, it extracts data schemes from document, assign each schema unique number and use this number instead of repeating same property names again and again.”

Of course this is all open-source and you can get your hands dirty here.

Source 1: http://en.wikipedia.org/wiki/JSON
Source 2: http://www.cliws.com/e/06pogA9VwXylo_GknPEeFA/
Source 3: https://github.com/dogada/RJSON

full text transcripts of the Apple World Wide Developer Conference (wwdc)

Since I’ve become sort of an iOS developer lately I had my fair share of WWDC recordings to get started with this whole CocoaTouch and Objective-C development stuff.

Now a tool that is pretty handy is a this website that offers a full-text transcript search of all WWDC recordings. Awesome!

Bildschirmfoto 2013-11-02 um 00.54.36

Source 1: http://asciiwwdc.com/
Source 2: http://miataru.com/ios

a kilobyte of javascript – js1k

What do you think can you do with 1 kilobyte of javascript? Not a lot you might think. In fact it’s quite a lot!

js1k

Similar to the 4k and 64k demo awards now there is a 1k javascript competition:

“This is a competition about JavaScript scripts no larger than 1k. Starting out as a joke, the first version ended with a serious amount of submissions, prizes and quality.”

So what can you do with 1k of javascript? A lot! Click your way through the demos on the js1k.com site and find a lot like this:

Bildschirmfoto 2013-05-04 um 20.50.54

Source 1: http://js1k.com/
Source 2: http://scene.org/
Source 3: http://awards.scene.org/nominees.php?cat=9

Adobe Photoshop version 1 source code

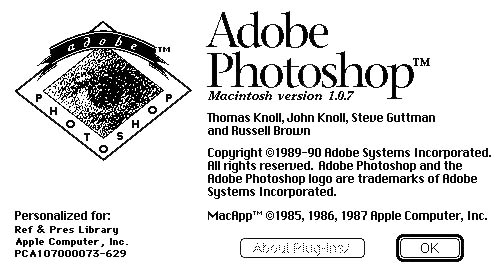
It’s becoming a fashion lately to release the source code of older but legendary commercial products to the public. Now Adobe decided to gift the source code of their flagship product Photoshop in it’s first version from 1990 to the Computer History Museum.

splashscreen

“That first version of Photoshop was written primarily in Pascal for the Apple Macintosh, with some machine language for the underlying Motorola 68000 microprocessor where execution efficiency was important. It wasn’t the effort of a huge team. Thomas said, “For version 1, I was the only engineer, and for version 2, we had two engineers.” While Thomas worked on the base application program, John wrote many of the image-processing plug-ins.”

Source: http://www.computerhistory.org/atchm/adobe-photoshop-source-code/

Automated Picture Tank and Gallery for a photographer

Since my wife started working as a photographer on a daily basis the daily routine of getting all the pictures off the camera after a long day filled with photo shootings got her bored quickly.

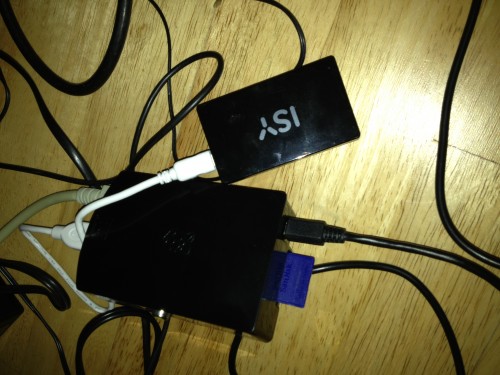
Since we got some RaspberryPis to spare I gave it a try and created a small script which when the Pi gets powered on automatically copies all contents of the attached SD card to the houses storage server. Easy as Pi(e) – so to speak.

IMG_2322

So this is now an automated process for a couple of weeks – she comes home, get’s all batteries to their chargers, drops the sd cards into the reader and poweres on the Pi. After it copied everything successfully the Pi sends an eMail with a summary report of what has been done. So far so good – everything is on our backuped storage server then.

Now the problem was that she often does not immediately starts working on the pictures. But she wants to take a closer look without the need to sit in front of a big monitor – like taking a look at her iPad in the kitchen while drinking coffee.

So what we need was a tool that does this:

  • take a folder (the automated import folder) and get all images in there, order them by day
  • display an overview per day of all pictures taken
  • allow to see the fullsized picture if necessary
  • work on any mobile or stationary device in the household – preferably html5 responsive design gallery
  • it should be fast because commonly over 200 pictures are done per day
  • it should be opensource because – well opensource is great – and probably we would need to tweak things a bit

Since I did not find anything near what we had in mind I sat down this afternoon and wrote a tool myself. It’s opensourced and available for you to play with it. Here’s a short description what it does:

It’s called GalleryServer and basically is an embedded http server which takes all .jpg files from a folder (configurable) and offers you some handy tool urls which respons with JSON data for you to work with. I’ve written a very small html user interface with a bit of javascript (using the great html5 kickstart) that allows you to see all available days and get a nice thumbnail overview of each day – when you click on it it opens the full-size image in a new window.

It’s pretty fast because it’s not actively resizing the images – instead it’s taking the thumbnail picture from the original jpg file which the camera placed there during storing the picture. It’s got some caching and can be run on any operating system where mono / .net is available – which is probably anything – even the RaspberryPi.

Source 1: my wifes page
Source 2: 99lime html5 kickstart boilerplate
Source 3: https://github.com/bietiekay/GalleryServer

Security Engineering — The Book

The second edition of the book “Security Engineering” by Ross Anderson is available as a full download. It’s quite a reference and a must-read for anybody with an interest in security (which for example all developers should have).

“When I wrote the first edition, we put the chapters online free after four years and found that this boosted sales of the paper edition. People would find a useful chapter online and then buy the book to have it as a reference. Wiley and I agreed to do the same with the second edition, and now, four years after publication, I am putting all the chapters online for free. Enjoy them – and I hope you’ll buy the paper version to have as a conveient shelf reference.”
book2coversmall

Source 1: http://www.cl.cam.ac.uk/~rja14/book.html

a good source of all things javascript libraries

Choosing the right javascript library is one of the key elements to create a good prototype in very short times – productive applications even. If you want to get new impressions, hints and links to those javascript libraries that will render your next project a success look no further:

Bildschirmfoto 2013-02-02 um 20.50.49

Source 1: http://pinterest.com/0x0/webdev/

You shall not interrupt a programmer

A programmer is likely to get just one uninterrupted 2-hour session in a day” is one of the statements this great blog article makes on the matter of interruption of professionals while they do their hard work.

It’s an important thing to understand how that idea to code conversion thing happens. For anyone without that experience: Think of it like being very very concentrated and juggling things. When you get abstracted it’s very likely that you drop something. In the worst case you never even get something to juggle…

Source 1: http://blog.ninlabs.com/2013/01/programmer-interrupted/