And if you want it too, there is the how-to available on the RaspberryPi forum.
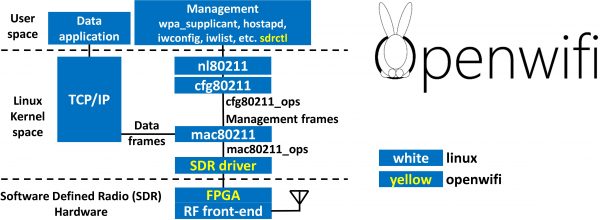
Linux mac80211 compatible full-stack Wi-Fi design based on SDR
In a tweet we were given an early christmas present – open-sdr released an open source software Wi-Fi stack that utilizes software-defined-radio technology to implement actual working Wi-Fi.
Features:
- 802.11a/g; 802.11n MCS 0~7; 20MHz
- Mode tested: Ad-hoc; Station; AP
- DCF (CSMA/CA) low MAC layer in FPGA
- Configurable channel access priority parameters:
- duration of RTS/CTS, CTS-to-self
- SIFS/DIFS/xIFS/slot-time/CW/etc
- Time slicing based on MAC address
- Easy to change bandwidth and frequency:
- 2MHz for 802.11ah in sub-GHz
- 10MHz for 802.11p/vehicle in 5.9GHz
- On roadmap: 802.11ax
See this demonstration:
RaspberryPis to Access Points!
Current generations of RaspberryPi single board computers (from 3 up) already got WiFi on-board. Which is great and can be used, in combination with the internal ethernet or even additional network interfaces (USB) to create a nice wired/wireless router. This is what this RaspAP project is about:
This project was inspired by a blog post by SirLagz about using a web page rather than ssh to configure wifi and hostapd settings on the Raspberry Pi. I began by prettifying the UI by wrapping it in SB Admin 2, a Bootstrap based admin theme. Since then, the project has evolved to include greater control over many aspects of a networked RPi, better security, authentication, a Quick Installer, support for themes and more. RaspAP has been featured on sites such as Instructables, Adafruit, Raspberry Pi Weekly and Awesome Raspberry Pi and implemented in countless projects.
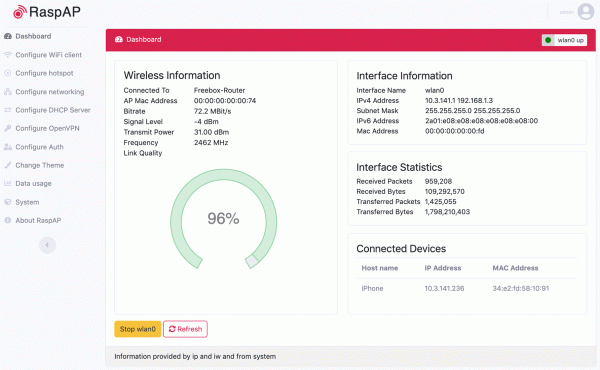
This really is going to be very useful while on travels. I plan to replace my GL-INET router, which shows signs of age.
collection of pure bash alternatives to external processes
The goal of this book is to document commonly-known and lesser-known methods of doing various tasks using only built-in
https://github.com/dylanaraps/pure-bash-biblebashfeatures. Using the snippets from this bible can help remove unneeded dependencies from scripts and in most cases make them faster. I came across these tips and discovered a few while developing neofetch, pxltrm and other smaller projects.
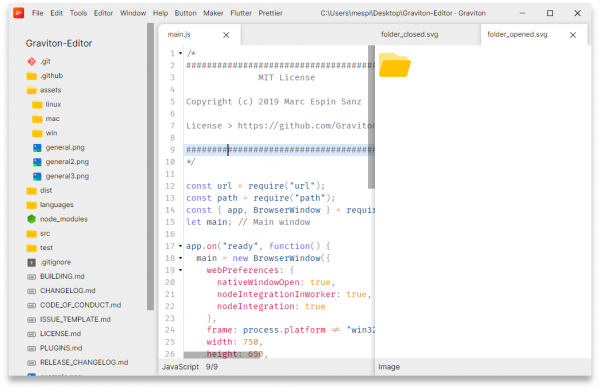
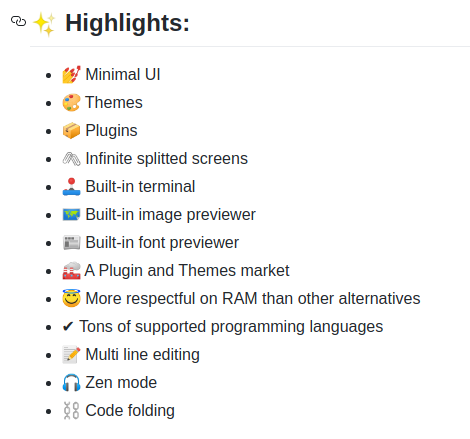
Graviton: another javascript based code editor
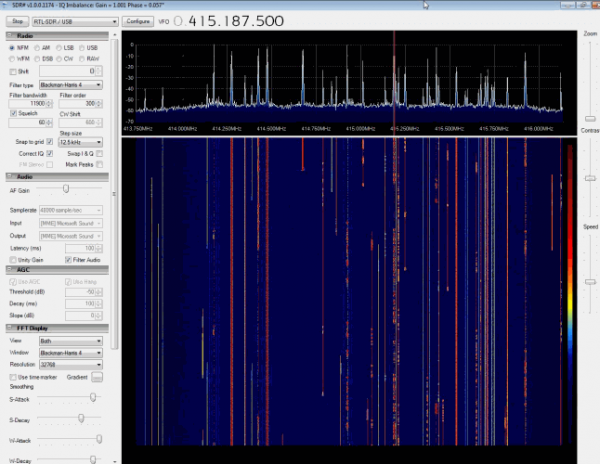
the big list of RTL-SDR supported software
RTL-SDR is a very cheap ~$25 USB dongle that can be used as a computer based radio scanner for receiving live radio signals in your area (no internet required). Depending on the particular model it could receive frequencies from 500 kHz up to 1.75 GHz. Most software for the RTL-SDR is also community developed, and provided free of charge.
The origins of RTL-SDR stem from mass produced DVB-T TV tuner dongles that were based on the RTL2832U chipset. With the combined efforts of Antti Palosaari, Eric Fry and Osmocom (in particular Steve Markgraf) it was found that the raw I/Q data on the RTL2832U chipset could be accessed directly, which allowed the DVB-T TV tuner to be converted into a wideband software defined radio via a custom software driver developed by Steve Markgraf. If you’ve ever enjoyed the RTL-SDR project please consider donating to Osmocom via Open Collective as they are the ones who developed the drivers and brought RTL-SDR to life.
https://www.rtl-sdr.com/about-rtl-sdr/
And since the hardware is so affordable there’s lots of software and therefore things that can be done with it.
Magnificent app which corrects your previous console command
We all know this. You typed a loooong line of commands in your shell and you made one typo.
That’s the worst.
Now. There’s a command that aims to help:
It is rather simple. But extremely effective.
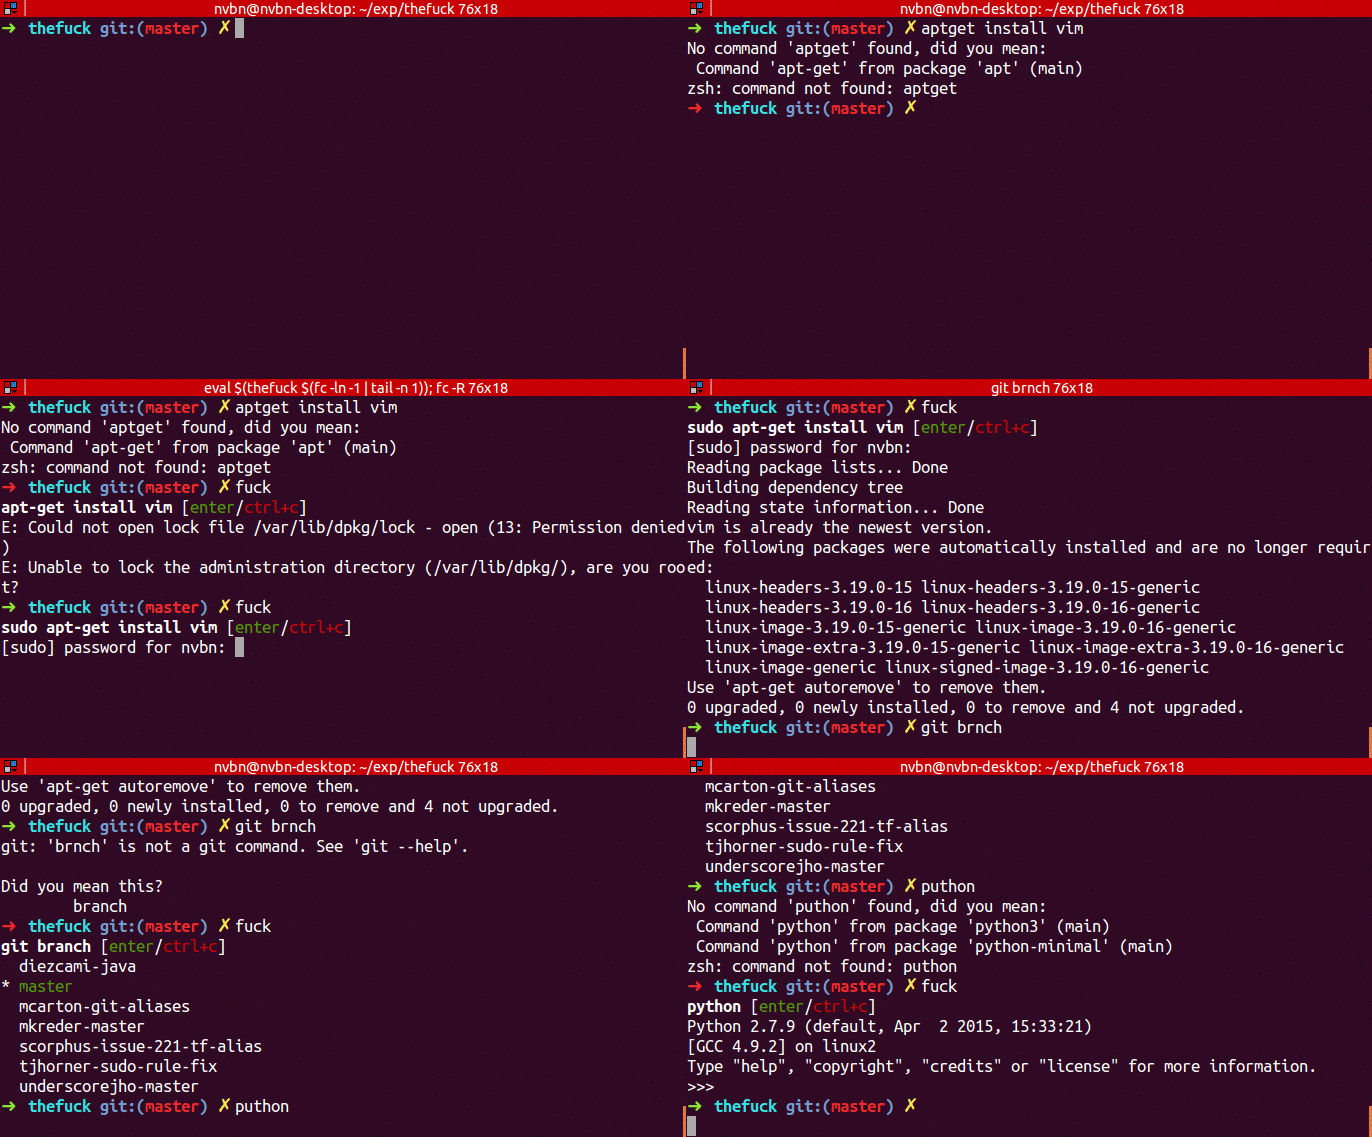
The Fuck attempts to match the previous command with a rule. If a match is found, a new command is created using the matched rule and executed.
Grab it on github. Install it right away. It went into my toolbelt in an instant.
good wireguard tutorial
If you, like me, are looking into new emerging tools and technologies you might also look at Wireguard.
WireGuard® is an extremely simple yet fast and modern VPN that utilizes state-of-the-art cryptography. It aims to be faster, simpler, leaner, and more useful than IPsec, while avoiding the massive headache. It intends to be considerably more performant than OpenVPN. WireGuard is designed as a general purpose VPN for running on embedded interfaces and super computers alike, fit for many different circumstances. Initially released for the Linux kernel, it is now cross-platform (Windows, macOS, BSD, iOS, Android) and widely deployable. It is currently under heavy development, but already it might be regarded as the most secure, easiest to use, and simplest VPN solution in the industry.
bold wireguard website statement
To apply and get started with WireGuard on Linux and iOS I’ve used the very nice tutorial of Graham Stevens: WireGuard Setup Guide for iOS.
This guide will walk you through how to setup WireGuard in a way that all your client outgoing traffic will be routed via another machine (server). This is ideal for situations where you don’t trust the local network (public or coffee shop wifi) and wish to encrypt all your traffic to a server you trust, before routing it to the Internet.
WireGuard Setup Guide for iOS.
Booting Faster (with Linux).
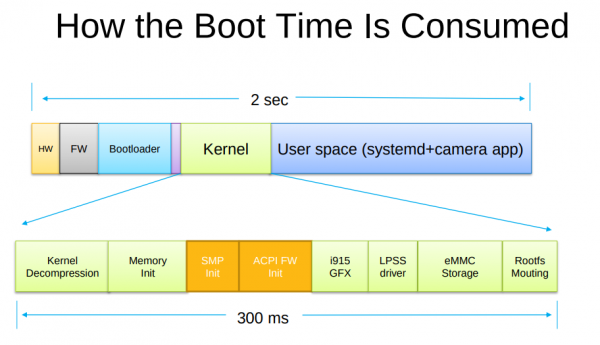
Booting a computer does not happen extremely often in most use-cases, yet it’s a field that has not seen as much optimization and development as others had.
Find a very interesting presentation on the topic: How to make Linux boot faster here. The presentation was held at the Linux Plumbers Conference 2019.
Convert HEIC to JPEG or PNG
If you own a modern age phone it’s very likely that it will store the photos you take in a wonderful format called HEIC – or “High Efficiency Image File Format (HEIF)”.
Now the issue with this format is that your average toolchain is based upon things like Portable Network Graphics (PNG), JPEG and maybe GIF or Scalable Vevtor Graphics (SVG).
So HEIC does not quite fit yet. But you can make it fit with this on Linux.
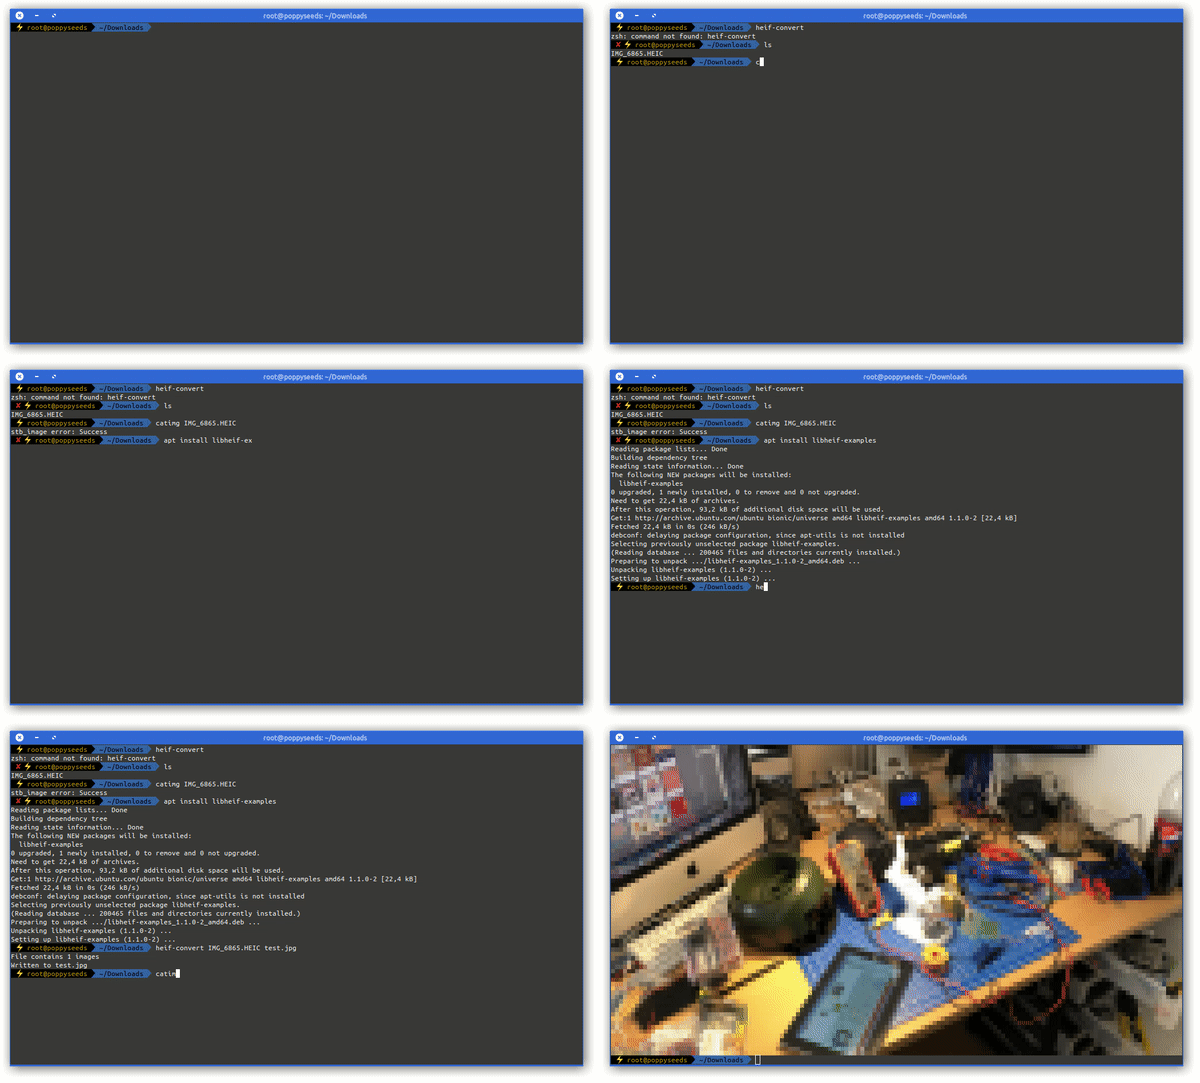
Imagemagick and current GIMP installations apparently still don’t come pre-compiled with HEIF support. But you can install a tool to easily convert an HEIC image into a JPG file on the command line.
apt install libheif-examplesand then the tool heif-convert is your friend.
convert text formats
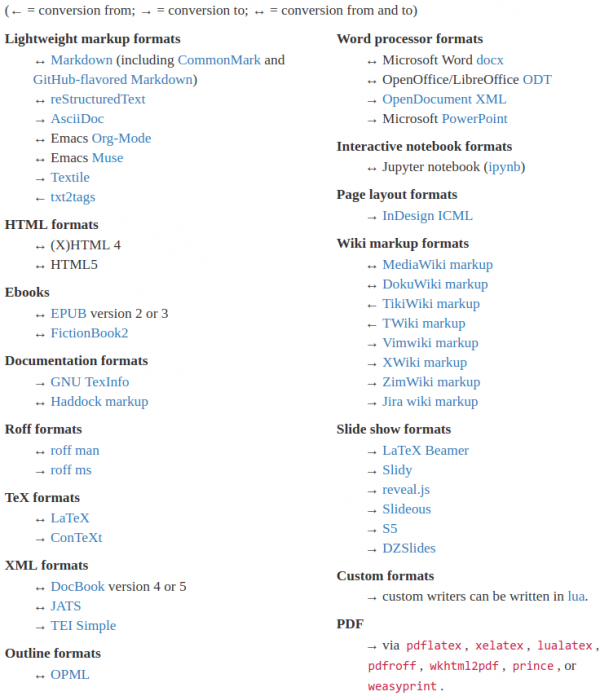
If you need to convert files from one markup format into another, pandoc is your swiss-army knife
https://pandoc.org/
Of course it’s open source – and of course there’s a docker image for it.
cross-platform NES emulator written in C#
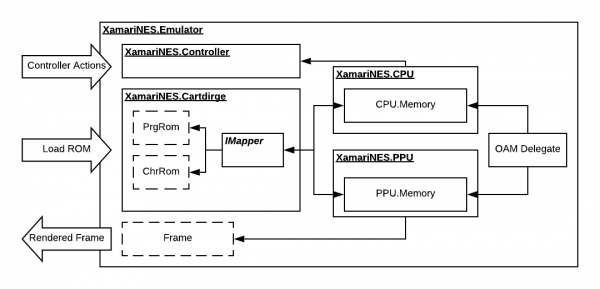
XamariNES is a cross-platform Nintendo Emulator using .Net Standard written in C#. This project started initially as a nighits/weekend project of mine to better understand the MOS 6502 processor in the original Nintendo Entertainment System. The CPU itself didn’t take long working on it a couple hours here and there. I decided once the CPU was completed, how hard could it be just to take it to next step and do the PPU? Here we are a year later and I finally think I have the PPU in a semi-working state.
XamaiNES
If you ever wanted to start looking at and understand emulation this might be a starting point for you. With the high-level C# being used to describe and implement actual existing hardware – like the NES CPU:
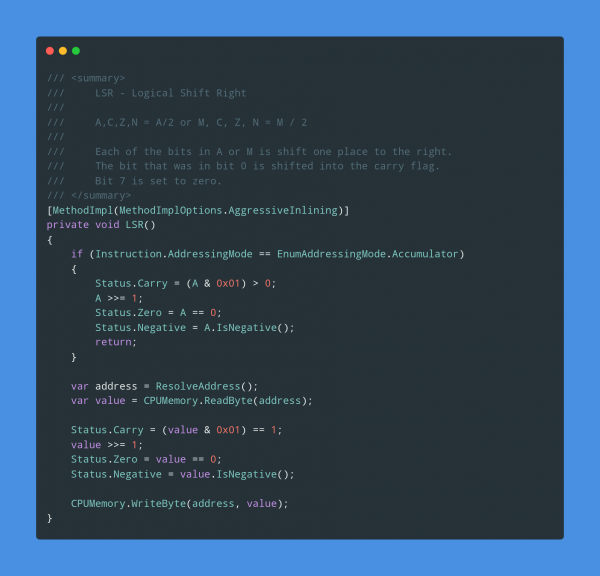
The author does the full circle and everything you’d expect from a simple working emulator is there:
a throw-away remote VNC linux desktop in a docker container
I am running most of my in-house infrastructure based on Docker these days…
Docker is a set of platform-as-a-service (PaaS) products that use operating-system-level virtualization to deliver software in packages called containers. Containers are isolated from one another and bundle their own software, libraries and configuration files; they can communicate with each other through well-defined channels.
All containers are run by a single operating-system kernel and are thus more lightweight than virtual machines.
Wikipedia: Docker
And given the above definition it’s fairly easy to create and run containers of things like command-line tools and background servers/services. But due to the nature of Docker being “terminal only” by default it’s quite hard to do anything UI related.
But there is a way. By using the VNC protocol to get access to the graphical user interface we can set-up a container running a fully-fledge Linux Desktop and we can connect directly to this container.
I am using something I call “throw-away linux desktop containers” all day every day for various needs and uses. Everytime I start such a container this container is brand-new and ready to be used.
Actually when I start it the process looks like this:
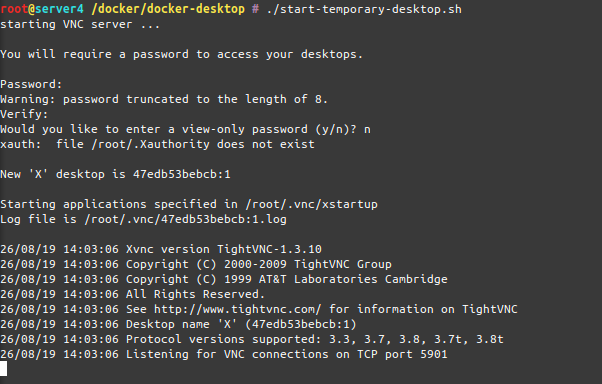
As you can see when the container starts-up it asks for a password to be set. This is the password needed to be entered when the VNC client connects to the container.
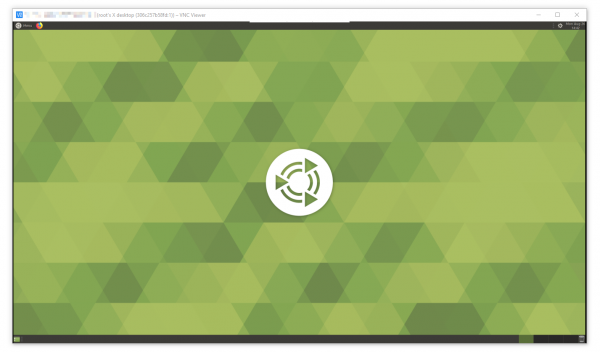
And when you are connected, this is what you get:
I am sharing my scripts and Dockerfile with you so you can use it yourself. If you put a bit more time into it you can even customize it to your specific needs. At this point it’s based on Ubuntu 18.04 and starts-up a ubuntu-mate desktop environment in it’s default configuration.
When you log into the container it will log you in as root – but effectively you won’t be able to really screw around with the host machine as the container is still isolating you from the host. Nevertheless be aware that the container has some quirks and is run in extended privileges mode.
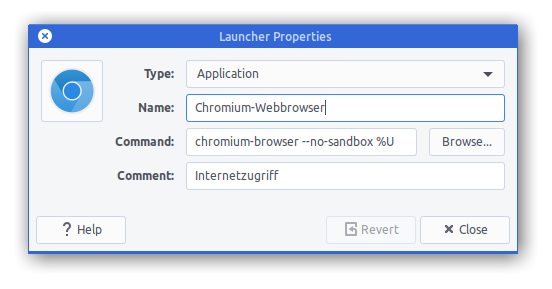
Chromium will be pre-installed as a browser but you will find that it won’t start up. That’s because Chromium won’t start up if you attempt a start as root user.
The workaround:
Now get the scripts and container here and build it yourself!
housekeeping with NodeJS
When you are using or developing NodeJS applications and the Node Package manager (npm) over time a lot of old crusty libraries will accrue.
A lot means, a lot:
To have a chance to get on top of things and save space, try this:
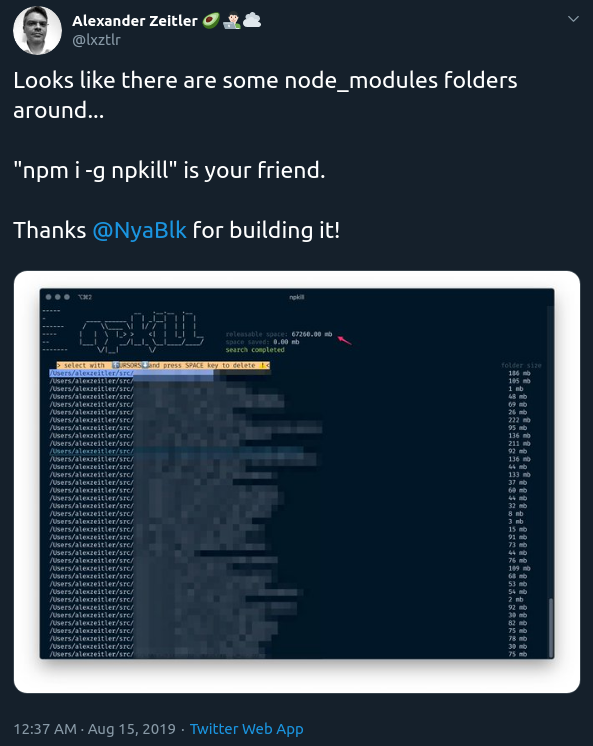
npm i -g npkill
By then using npkill you will get an overview (after a looong scan) of how much disk space there is to be saved.
Great tip!
Password Managers…
I am using 1Password for years now. It’s a great tool. So far.
As I am using it locally synced across my own infrastructure I feel like I am getting slowly but surely pushed out of their target-customer group. What does that mean?
The current pricing scheme, if you buy new, for 1Password looks like this:

So it’s always going to be a subscription if you want to start with it and if you want it in a straight line.
It used to be a one-time purchase per platform and you could set-up syncing across other cloud services as you saw fit. If you really start from scratch the 1Password apps still give you the option to create and sync locally but the direction is set and clear: they want you to sign up to a subscription.
I am not going to purchase a subscription. With some searching I found a software which is extremely similar to 1Password and fully featured. And is available as 1-time purchase per platform for all platforms I am using.
Also. This one is the first that could import my 1Password export files straight away without any issues. Even One-Time-Passwords (OTP) worked immediately.
The name is Enpass and it’s available for Mac, Windows, Linux, iOS, Android and basically acts as a step in replacement for 1Password. It directly imports what 1Password is exporting. And its pricing is:

Subscriptions for services as this are a no-go for me. It’s a commodity service which I am willing to pay for trailing updates and maintenance every year or so in a major update.
I am not willing to pay a substantial amount of money per user per month to just keep having access to my Passwords. And having them synced onto some companies infrastructure does not make this deal sweeter.
Enpass on the other hand comes with peace-of-mind that no data leaves your infrastructure and that you can get the data in and out any time.
It can import from these:
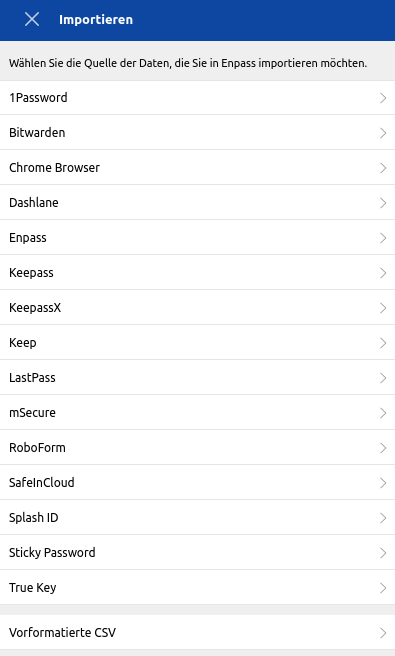
As mentioned I’ve migrated from 1Password in the mere of minutes and was able to plug-in-replace it immediately.
retrofit an old printer to be available on the network
In 2007 I had become proud owner of a Samsung ML-2010 mono laser printer. It’s done a great job ever since and I can recall changing the toner just once so far.
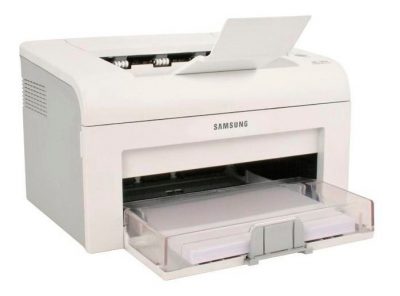
So you can tell: I am not a heavy printer user. Every so often I gotta print out a sheet of paper to put on a package or to fill out a form. A laser printer is the perfect fit for this pattern as it’s toner is not going-bad or evaporating like ink does in ink-printers.
So I still like the printer and it’s in perfect working condition. I’ve just recently filled up the toner for almost no money. But – but this printer needs to be physically connected to the computer that wants to print.
As the usage patterns have significantly changed in the last 12 years this printer needs to be brought into todays networked world.
Replacing it with a new printer is not an option. All printers I could potentially purchase are both more expensive to purchase and the toner is much more expensive to refill. No-can-do.
If only there was an easy way to get the printer network ready. Well, turns out, there is!
First let’s start introducing an opensource project: CUPS
CUPS (formerly an acronym for Common UNIX Printing System) is a modular printing system for Unix-like computer operating systems which allows a computer to act as a print server. A computer running CUPS is a host that can accept print jobs from client computers, process them, and send them to the appropriate printer.
Wikipedia
A good, cheap and energy-efficient way to run a CUPS host is a Raspberry Pi. I do own several first-generation models that have been replaced by much more powerful ones in the previous years.
So I’ve taken one Raspberry Pi and did the set-up steps: Installing the Raspberry Pi Print Server Software.
And now – what did I get?
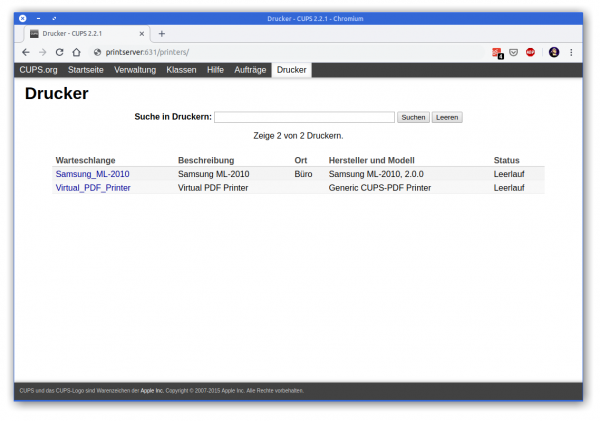
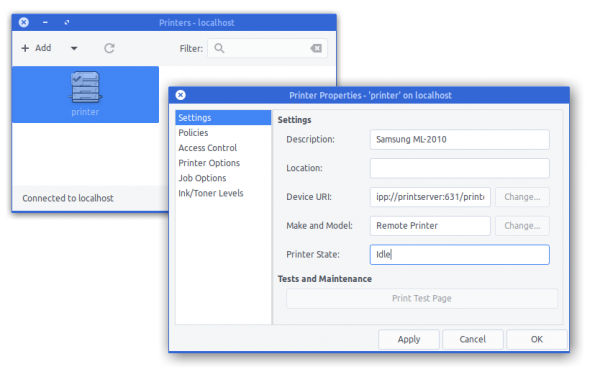
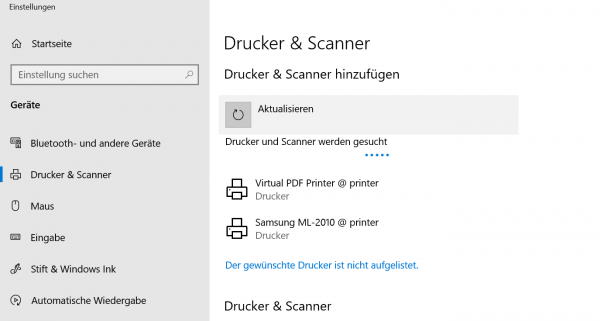
I got a networked Samsung Laser Printer. No thrills, no problems at all.
Tool: Partition Recovery and Undelete – Testdisk
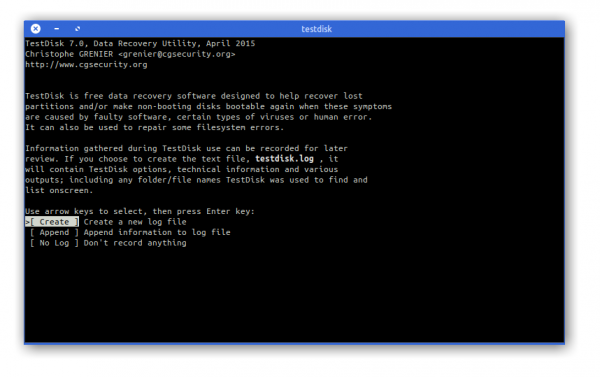
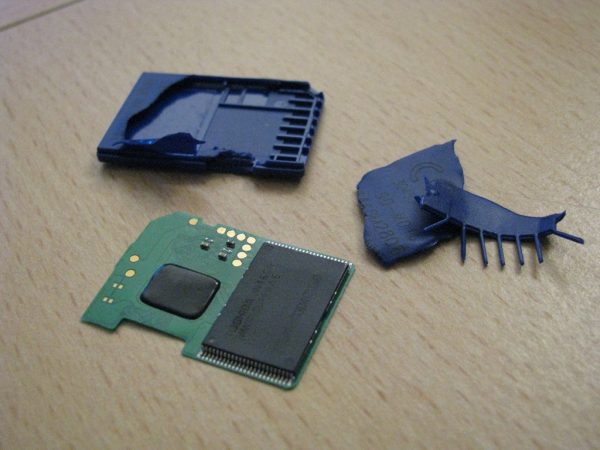
Mass storage hardware breaks all the time. Sometimes it’s hardware that breaks, but sometimes it’s the software that breaks. If it’s the software (or own talent) that made the data go boom, TestDisk is a tool you should know about.
DISCLAIMER: If the data you are trying so recover is actually worth anything you might want to reserve to a professional data recovery service rather than trying to train-on-the-job.
Apart from the availability of pre-compiled packages for most operating systems you can also grab a bootable LiveCD when everything seems gone and lost.
The process itself is rather exciting (if you want the data back) and may require a fresh pair of pants upfront, throughout and after.
Thankfully there’s a great wiki and documentation of how to go about the business of data recovery.
TestDisk is powerful free data recovery software! It was primarily designed to help recover lost partitions and/or make non-booting disks bootable again when these symptoms are caused by faulty software: certain types of viruses or human error (such as accidentally deleting a Partition Table). Partition table recovery using TestDisk is really easy.
- TestDisk can
- Fix partition table, recover deleted partition
- Recover FAT32 boot sector from its backup
- Rebuild FAT12/FAT16/FAT32 boot sector
- Fix FAT tables
- Rebuild NTFS boot sector
- Recover NTFS boot sector from its backup
- Fix MFT using MFT mirror
- Locate ext2/ext3/ext4 Backup SuperBlock
- Undelete files from FAT, exFAT, NTFS and ext2 filesystem
- Copy files from deleted FAT, exFAT, NTFS and ext2/ext3/ext4 partitions.
TestDisk has features for both novices and experts. For those who know little or nothing about data recovery techniques, TestDisk can be used to collect detailed information about a non-booting drive which can then be sent to a tech for further analysis. Those more familiar with such procedures should find TestDisk a handy tool in performing onsite recovery.
And if you give up, think about writing an article of you actually digging deeper:
full website screenshots from your commandline
Think of this: You want to capture a whole, multi-scroll-pages, web-page into one image.
This can be difficult without the right tools. It surely will be a lot of work to accomplish a 10th of thousand pixel height screenshot put together from multiple single screenshots…
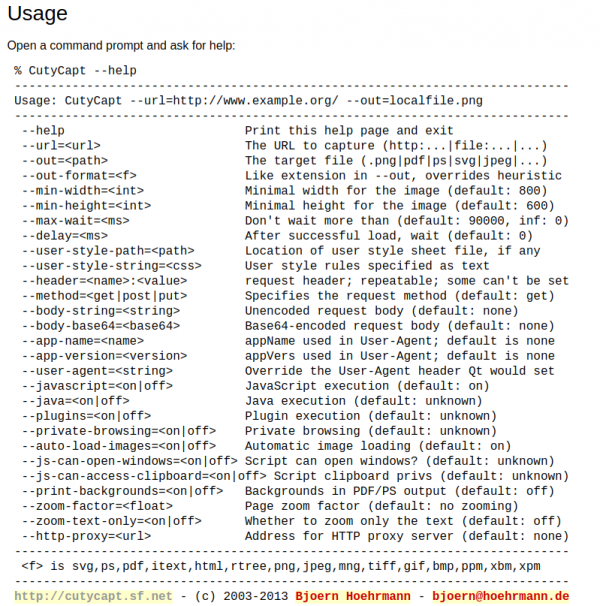
CutyCapt is there to help! It’s a command line tool encapsulating the very powerful WebKit browser engine to render a full page and then create a single file screenshot of the whole page for you.
By example, this is what it did when told to screenshot this website:
bridge the openvpn-status.log to MQTT
For big parts of my VPN needs I use OpenVPN. Especially on iOS devices the deep integration just works. Even to a degree that you enable the VPN once and the device will transparently keep it up / reestablish connections when required.
OpenVPN protocol has emerged to establish itself as a de- facto standard in the open source networking space with over 50 million downloads. OpenVPN is entirely a community-supported OSS project which uses the GPL license.
VISIT THE OPENVPN COMMUNITY
I am using the dockerized version of OpenVPN. From there I’ve got several ways to get telemetry data (like connections, traffic, …) out of it. One way is the management interface provided by OpenVPN. Another way is by using the default openvpn-status.log file.
Since the easiest way out-of-the-box was to use the logfile I sat down and wrote a little 2mqtt bridge for the contents of the logfile.
It’s also dockerized so you can easily set it up by pointing the openvpn-status.log to the right volume/mount-point.
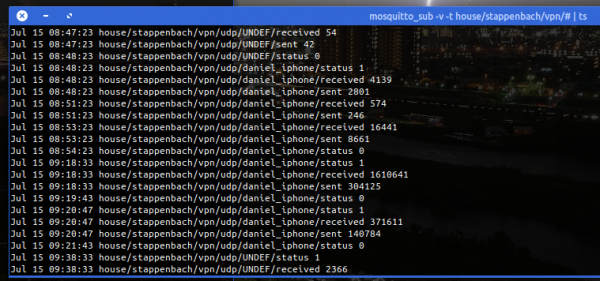
When done it’ll produce MQTT messages like this:
The set-up and start-up is rather simple:
docker run -d --restart=always --volume /openvpnstatus2mqttconfiglocation/:/configuration --volume /openvpnstatusloglocation/:/openvpn openvpn-status2mqttMQTT Broker, Topic-Prefix and so on are configured with the .json configuration file found along the project.
Of course everything I wrote is available on GitHub as open-source.
The immediate outcome of this is that with the always-on VPN I am now getting statistics about, for example, the data consumption of my iPhone.
The big traffic spike at 1 AM is the backup that my iPhone does every night. Very interesting also how often the connection is closed and opened again even without me using the phone…
IP-over-DNS
Picture yourself in this situation. You connect to a network and nothing works. Except for this:
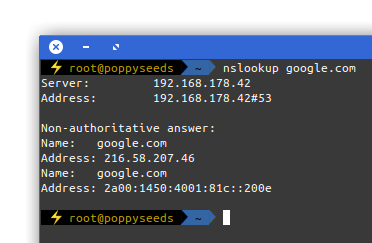
It is quite common to have DNS working in networks while everything else is not. Sometimes the network requires a log-in to give you access to a small portion of the internet.
Now, with the help of a tool called iodine, you can get access to the full internet with only DNS working in your current network:
iodine lets you tunnel IPv4 data through a DNS server. This can be usable in different situations where internet access is firewalled, but DNS queries are allowed.
It runs on Linux, Mac OS X, FreeBSD, NetBSD, OpenBSD and Windows and needs a TUN/TAP device. The bandwidth is asymmetrical with limited upstream and up to 1 Mbit/s downstream.
iodine
Setting it up is a bit of work but given that you are anyway having access to a well connected server on the free portion of the internet it can be easily done.
Of course the source is on github.
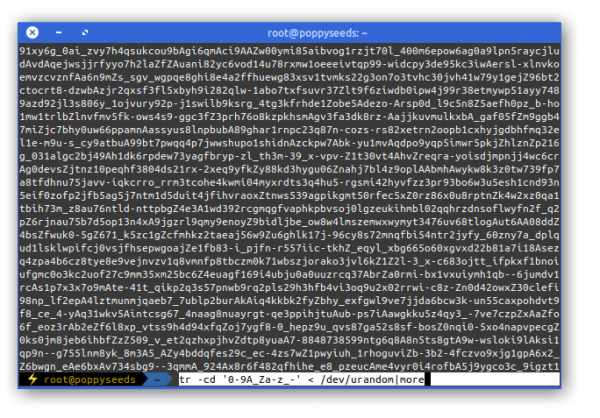
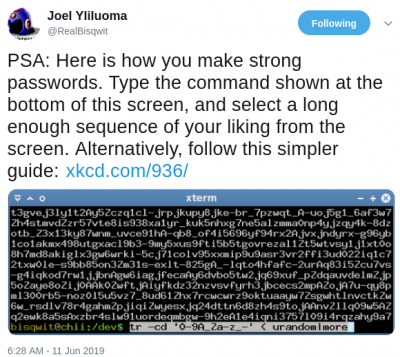
here is how you can make strong passwords.
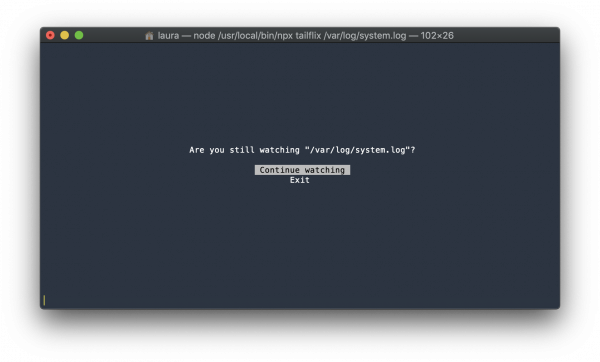
“are you still watching?” – tailfix
drop in replacement for tail -F that asks you if you are still watching
Just like Laura I am also was having a moment when I stumbled across tailflix.
For those not understanding the reference: At the end of an episode you’ve watched on Netflix you will be shown another one, and so on, and so on. Until if you have not touched the remote at all for several episodes Netflix will ask you “Are you still watching?”.
record terminal sessions as svg
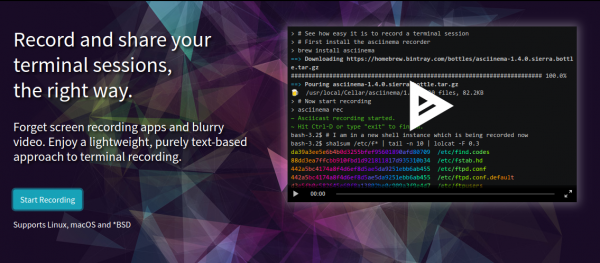
In addition to the terminal recording tool “asciinema” there’s another one to take a look at:
termtosvg is a Unix terminal recorder written in Python that renders your command line sessions as standalone SVG animations.
https://github.com/nbedos/termtosvg
asciinema – record your terminal
technical visualization tools
There’s so much happening in this field as visualizations become more powerful and easier to create.
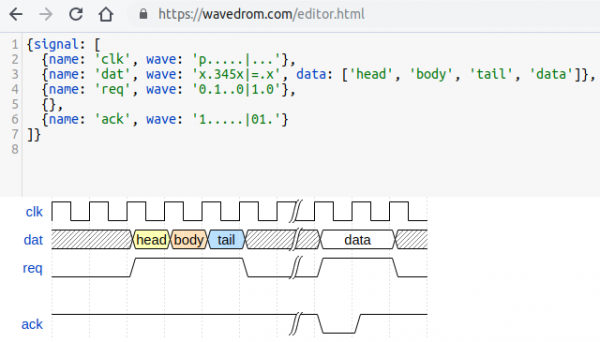
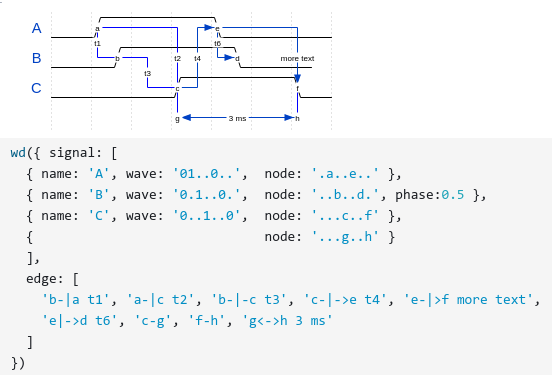
WaveDrom
WaveDrom draws your Timing Diagram or Waveform from simple textual description. It comes with description language, rendering engine and the editor.
WaveDrom editor works in the browser or can be installed on your system. Rendering engine can be embeded into any webpage.
https://wavedrom.com/
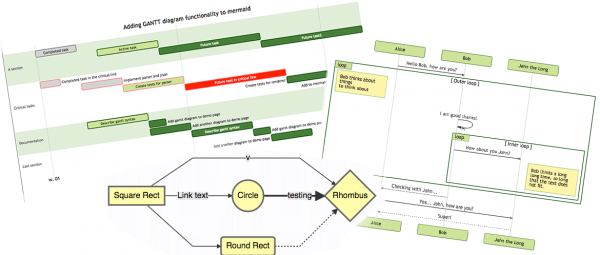
MermaidJS
Generation of diagrams and flowcharts from text in a similar manner as markdown.
Ever wanted to simplify documentation and avoid heavy tools like Visio when explaining your code?
This is why mermaid was born, a simple markdown-like script language for generating charts from text via javascript. Try it using our editor.
P-four-nines
By many known as “High Availability” this elusive thing as a lot of different perspectives to consider…
always go for double redundancy
As the replacement drive for yesterdays hard drive crash was put into place the storage array started to re-silver the newly added empty drive. This process takes a while – about 8 hours for this particular type of array.
Interestingly just 2 minutes into the process another drive dropped a bombshell:
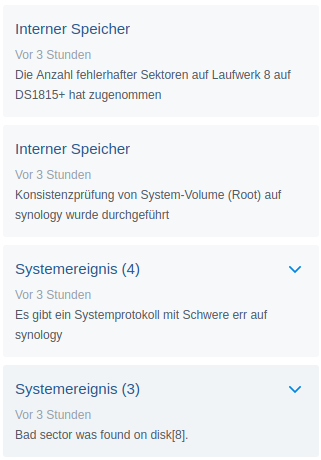
Apparently disk 8 holds together it’s business so far but dropped a couple of parity errors into the equation.
This is bad news. But so far science still is on my side of things and no data has been lost.

But now redundancy is down completely. There’s no redundancy for now – until the replaced hard disk is fully integrated. My policy for these sized drives demands a minimum of 2-disk redundancy and for today this policy saved the day (data).
Actually let’s dive a bit into what it’s doing there to achieve 2-disk redundancy:
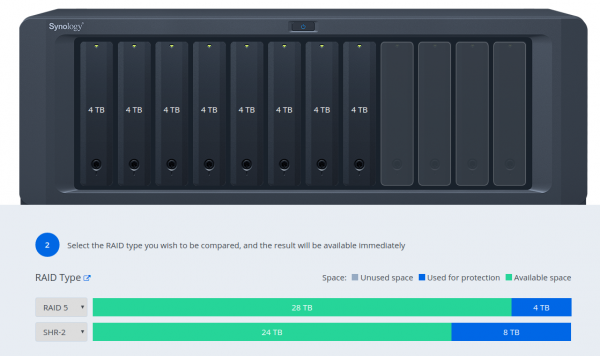
Synology Hybrid RAID (SHR) is an automated RAID management system from Synology, designed to make storage volume deployment quick and easy. If you don’t know much about RAID, SHR is recommended to set up the storage volume on your Synology NAS.
You will learn different types of SHR and their advantages/disadvantages over classic single disk/RAID setups. In the end, you will be able to choose a type of RAID or SHR for the best interest of your storage volume. This article assumes that as the admin of your Synology NAS, you are also an experienced network administrator with a firm grasp of RAID management.
Synology Hybrid Raid
So you trade data redundancy and safety for useable disk space. Here this is compared to traditional RAID 5:
done.
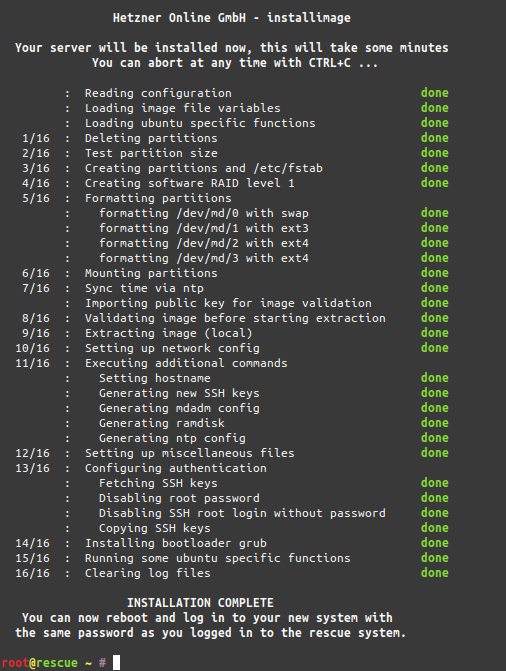
Server move has been finished!
If you can read this article you are already getting this website served from the new machine and your DNS got the memo to update.
make linux fast (unsecure) again
The CPU/hardware related bugs surfacing the last couple of years have mostly been fixed by adjusting the software that is run. Sometimes only by disabling certain features of a CPU or patching the microcode in the CPU itself.
The issue with this is that by fixing these issues features got disabled and workarounds had been introduced that lowered performance. Dramatically so for some use-cases.
By how much? Well it really depends on your CPU and use-cases. But maybe you want to try yourself. If you want to know the most current parameters to pass to your kernel on boot-up to disable all the performance impacting fixes, go here:
It is not recommended to have this in productive use – as you can imagine. Those bugs where fixed for a reason.
bumps ahead
This website is delivered to you by a single dedicated server in a datacenter in Germany. This server is old.
11:13:58 up 1320 days, 25 min, 2 users, load average: 1.87, 1.43, 1.25
uptime
And I am replacing it. While doing so I am going to take some shortcuts to lower the effort I have to put in for the move.
It will save me 2 days of work. It will mean for you: there might be some interruptions of the services provided by this website (there are more than this page…).
Swappiness is a thing, as is cache pressure
We know that using swap space instead of RAM (memory) can severely slow down the performance of Linux. So then, one might ask, since I have more than enough memory available, wouldn’t it better to remove swap space completely? The short answer is, No. There are performance benefits when swap is enabled, even when you have more than enough ram.
Why you should almost always add swap space
vfs_cache_pressure – Controls the tendency of the kernel to reclaim the memory which is used for caching of directory and inode objects. (default = 100, recommend value 50 to 200)
swappiness – This control is used to define how aggressive the kernel will swap memory pages. Higher values will increase aggressiveness, lower values decrease the amount of swap. (default = 60, recommended values between 1 and 60) Remove your swap for 0 value, but usually not recommended in most cases.
https://access.redhat.com/solutions/103833
As I’ve now brought up the topic, go ahead and read the complete story at the source.
file from the far future
I ran a VVV job to catalog a storage array I have. To my surprise at least one file had a very very strange timestamp:
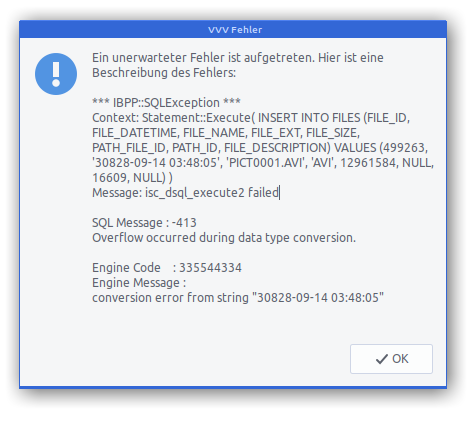
Apparently the file in question was generated on an action cam which had lost its correct date and time setting at the time of recording…
The tool I am using to catalogue the storages is also worth a mention:
VVV is an application that catalogs the content of removable volumes like CD and DVD disks for off-line searching. Folders and files can also be arranged in a single, virtual file system. Each folder of this virtual file system can contain files from many disks so you can arrange your data in a simple and logical way.
about VVV
VVV also stores metadata information from audio files: author, title, album and so on. Most audio formats are supported.
a terminal for Windows
As Windows lately tends to make an effort to stay out of the way as an operating system and user-experience it seems that it regains more attention by developers.
For me this all is quite strange as I’ve personally would prefer switching from macOS to Linux rather than Windows.
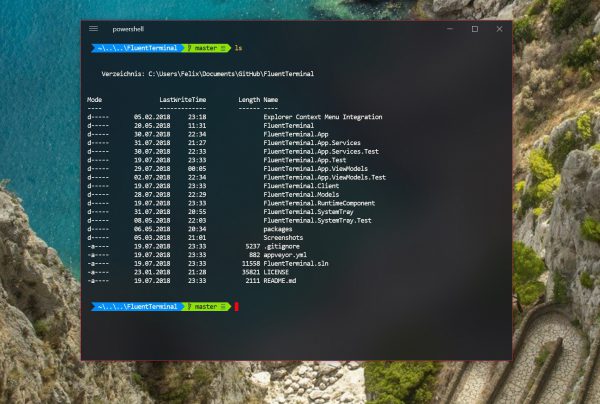
But for those occasions you need to go with Windows. There’s a Terminal application now that gives you, well, a good terminal. Try FluentTerminal.
