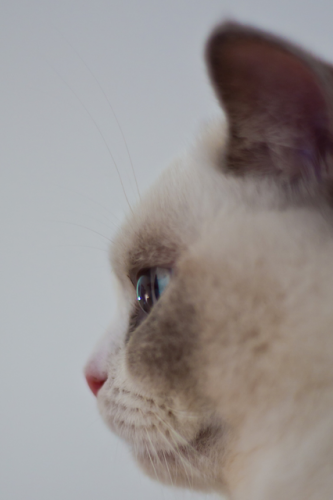
This is Leela. She is a 7 year old lilac white British short hair cat that lives with us. Leela had a sister who used to live with us as well but she developed a heart condition and passed away last year. Witnessing how quickly such conditions develop and evaluate we thought that we can do something to monitor Leelas health a bit to just have some sort of pre-alert if something is changing.
Kid in a Candystore
As this Internet of Things is becoming a real thing these days I found myself in a candy store when I’ve encountered that there are a couple of really really cheap options to get a small PCB with input/output connectors into my house WiFi network.
One of the main actors of this story is the so called ESP8266. A very small and affordable system-on-a-chip that allows you to run small code portions and connect itself to a wireless network. Even better it comes with several inputs that can be used to do all sorts of wonderful things.
And so it happened that we needed to know the weight of our cat. She seemed to get a bit chubby over time and having a point of reference weight would help to get her back in shape. If you every tried to weigh a cat you know that it’s much easier said than done.
The alternative was quickly brought up: Build a WiFi-connected scale to weigh her litter box every time she is using it. And since I’ve recently bought an evaluation ESP8266 I just had to figure out how to build a scale. Looking around the house I’ve found a broken human scale (electronics fried). Maybe it could be salvaged as a part donor?
A day later I’ve done all the reading on that there is a thing called “load-cell”. Those load cells can be bought in different shapes and sizes and – when connected to a small ADC they deliver – well – a weight value.
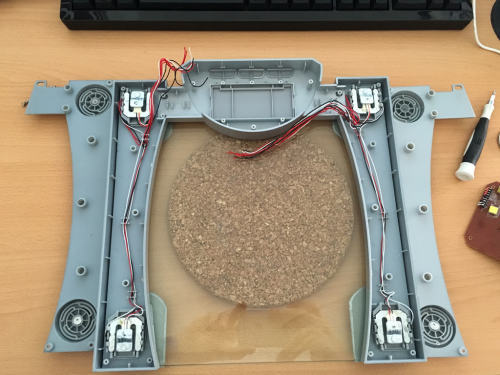
I cracked the human scale open and tried to see what was broken. It luckily turned out to have completely fried electronics but the load-cells where good to go.
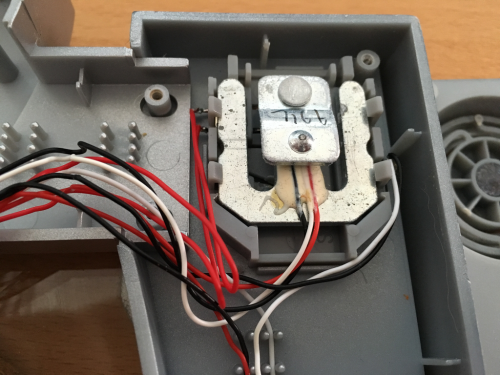
Look at this load cell:
Hardware
That brought down the part list of this project to:
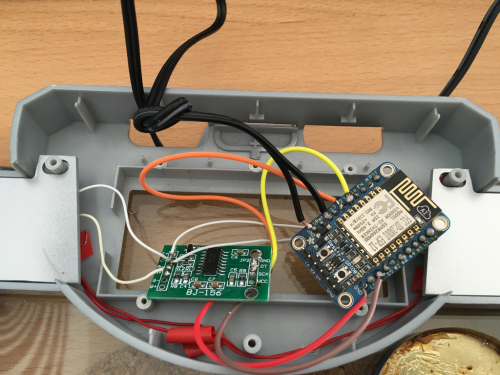
- an ESP8266 – an Adafruit Huzzah in my case
- a HX711 ADC board to amplify and prepare the signal from the load-cells
- a human scale with just enough space in the original case to fit the new electronics into and connect everything.
The HX711 board was the only thing I had to order hardware wise – delivered the next day and it was a matter of soldering things together and throwing in a small Arduino IDE sketch.
My soldering and wiring skills are really sub-par. But it worked from the get-go. I was able to set-up a small Arduino sketch and get measurements from the load-cells that seemed reasonable.
Now the hardware was all done – almost too easy. The software would be the important part now. In order to create something flexible I needed to make an important decision: How would the scale tell the world about it’s findings?
Software
Two basic options: PULL or PUSH?
Pull would mean that the ESP8266 would offer a webservice or at least web-server that exposes the measurements in one way or the other. It would mean that a client needs to poll for a new number in regular intervals.
Push would mean that the ESP8266 would connect to a server somewhere and whenever there’s a meaningful measurement done it would send that out to the server. With this option there would be another decision of which technology to use to push the data out.
Now a bit of history: At that time I was just about to re-implement the whole house home automation system I was using for the last 6 years with some more modern/interoperable technologies. For that project I’ve made the decision to have all events (actors and sensors) as well as some additional information being channeled into MQTT topics.
Let’s refer to Wikipedia on this:
“MQTT1 (formerly MQ Telemetry Transport) is an ISO standard (ISO/IEC PRF 20922) publish-subscribe-based “lightweight” messaging protocol for use on top of the TCP/IP protocol. It is designed for connections with remote locations where a “small code footprint” is required or the network bandwidth is limited. The publish-subscribe messaging pattern requires a message broker. Thebroker is responsible for distributing messages to interested clients based on the topic of a message. Andy Stanford-Clark and Arlen Nipper of Cirrus Link Solutions authored the first version of the protocol in 1999.”
Something build for oil-pipelines can’t be wrong for your house – can it?
So MQTT uses the notation of a “topic” to sub-address different entities within it’s network. Think of a topic as just a simple address like “house/litterbox/weight”. And with that topic MQTT allows you to set a value as well.
The alternative to MQTT would have been things like WebSockets to push events out to clients. The decision for the home-automation was done towards MQTT and so far it seems to have been the right call. More and more products and projects available are also focussing on using MQTT as their main message transport.
For the home automation I had already set-up a demo MQTT broker in the house – and so naturally the first call for the litterbox project was to utilize that.
The folks of Adafruit provide the MQTT library with their hardware and within minutes the scale started to send it’s measurements into the “house/litterbox/weight” topic of the house MQTT broker.
Some tweaking and hacking later the litterbox was put together and the actual litterbox set on-top.
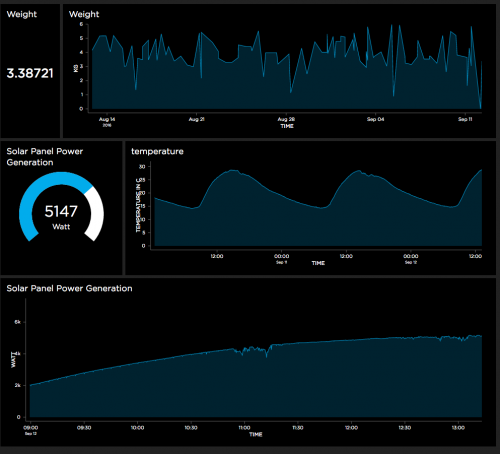
Since Adafruit offers platform to also send MQTT messages towards and create neat little dashboards I have set-up a little demo dashboard that shows a selection of data being pushed from the house MQTT broker to the Adafruit.io MQTT broker.
These are the raw values which are sent into the weight topic:
You can access it here: https://io.adafruit.com/bietiekay/stappenbach
So the implementation done and used now is very simple. On start-up the ESP8622 initialises and resets the weight to 0. It’ll then do frequent weight measurements at the rate it’s configured in the source code. Those weight measurements are being monitored for certain criteria: If there’s a sudden increase it is assumed that “the cat entered the litterbox”. The weight is then monitored and averaged over time. When there’s a sudden drop of weight below a threshold that last “high” measurement is taken as the actual cat weight and sent out to a /weight topic on MQTT. The regular measurements are sent separately to also a configurable MQTT topic.
You can grab the very ugly source code of the Arduino sketch here: litterbox_sourcecode
And off course with a bit of logic this would be the calculated weight topic:
Of course it is not enough to just send data into MQTT topics and be done with it. Of course you want things like logging and data storage. Eventually we also wanted to get some sort of notification when states change or a measurement was taken.
MQTT, the cloud and self-hosted
Since MQTT is enabling a lot of scenarios to implement such actions I am going to touch just the two we are using for our house.
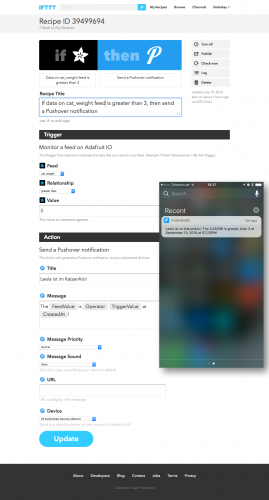
- We wanted to get a push notification to our phones whenever a weight measurement was taken – essentially whenever the cat has done something in the litterbox. The easiest solution: Set-Up a recipe on If This Than That (IFTTT) and use PushOver to send out push notifications to whatever device we want.
- To log and monitor in some sort of a dashboard the easiest solution seemed to be Adafruits offer. Of course hosted inside our house a combination of InfluxDB to store, Telegraf to gather and insert into InfluxDB and Chronograf to render nice graphs was the best choice.
Since most of the above can be done in the cloud (as of: outside the house with MQTT being the channel out) or inside the house with everything self-hosted. Some additional articles will cover these topics on this blog later.
There’s lots of opportunity to add more logic but as far as our experiments and requirements go we are happy with the results so far – we now regularly get a weight and the added information of how often the cat is using her litterbox. Especially for some medical conditions this is quite interesting and important information to have.
