Boblight Alternative: Hyperion

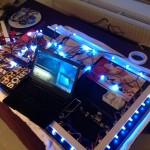
After setting up Boblight on two TVs in the house – one with 50 and one with 100 LEDs – I’ve used it for the last 5 months on a daily basis almost.

First of all now every screen that does not come with “added color-context” on the wall seems off. It feels like something is missing. Second of all it has made watching movies in a dark room much more enjoyable.

The only concerning factor of the past months was that the RaspberryPi does not come with a lot of computational horse-power and thus it has been operating at it’s limits all the time. With 95-99% CPU usage there’s not a lot of headroom for unexpected bitrate spikes and what-have-you.

So from time to time the Pis where struggling. With 10% CPU usage for the 50 LEDs and 19% CPU usage for the 100 LEDs set-up there was just not enough CPU power for some movies or TV streams in Full-HD.

Hyperion

So since even overclocking only slightly improved the problem of Boblight using up the precious CPU cycles for a fancy light-show I started looking around for alternatives.

“Hyperion is an opensource ‘AmbiLight’ implementation controlled using the RaspBerry Pi running Raspbmc. The main features of Hyperion are:

  • Low CPU load. For a led string of 50 leds the CPU usage will typically be below 1.5% on a non-overclocked Pi.
  • Json interface which allows easy integration into scripts.
  • A command line utility allows easy testing and configuration of the color transforms (Transformation settings are not preserved over a restart at the moment…).
  • Priority channels are not coupled to a specific led data provider which means that a provider can post led data and leave without the need to maintain a connection to Hyperion. This is ideal for a remote application (like our Android app).
  • HyperCon. A tool which helps generate a Hyperion configuration file.
  • XBMC-checker which checks the playing status of XBMC and decides whether or not to capture the screen.
  • Black border detector.
  • A scriptable effect engine.
  • Generic software architecture to support new devices and new algorithms easily.

More information can be found on the wiki or the Hyperion topic on the Raspbmc forum.”

Especially the Low CPU load did raise interest in my side.

Setting Hyperion up is easy if you just follow the very straight-forward Installation Guide. On Raspbmc the set-up took me 2 minutes at most.

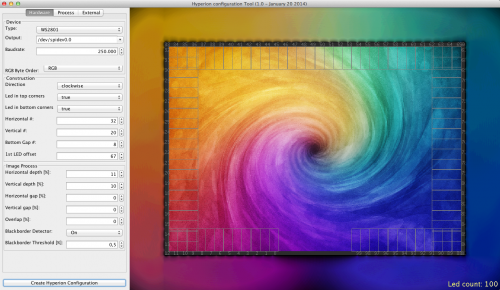
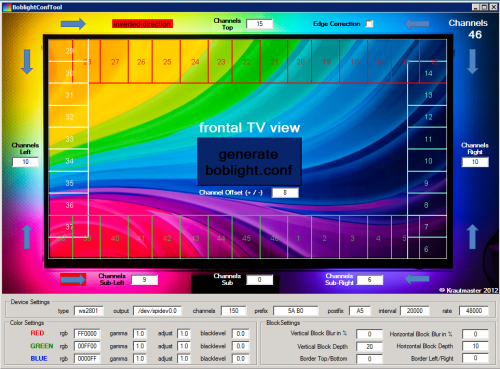
If you got everything set-up on the Pi you need to generate a configuration file. It’s a nice JSON formatted config file that you do not need to create on your own – Hyperion has a nice configuration tool. Hypercon:

Screen Shot 2014-06-28 at 08.52.51

So after 2 more minutes the whole thing was set-up and running. Another 15 minutes of tweaking here and there and Hyperion replaced Boblight entirely.

What have I found so far?

  1. Hyperions network interfaces are much more controllable than those from Boblight. You can use remote clients like on iPhone / Android to set colors and/or patterns.
  2. It’s got effects for screen-saving / mood-lighting!
  3. It really just uses a lot less CPU resources. Instead of 19% CPU usage for 100 LEDs it’s down to 3-4%. That’s what I call a major improvement
  4. The processing filters that you can add really add value. Smoothing everything so that you do not get bright flashed when content flashes on-screen is easy to do and really helps with the experience.

All in all Hyperion is a recommended replacement for boblight. I would not want to switch back.

Source 1: Setting up Boblight
Source 2: https://github.com/tvdzwan/hyperion/wiki/Installation

APN Changer for iOS – when you’re abroad and in need of different mobile provider settings

When traveling you might find yourself in the situation that you get a new SIM card into your iPhone and it’ll start and do it’s automatic magic for you. And eventually you well end up with the right provider settings by default.

But there are some cases when it picks the wrong provider settings. Like in my case. It picked NTT docomo in Japan with the default NTT docomo settings. In my case I was using a reseller for NTT (as described here) and that demanded different provider settings to work.

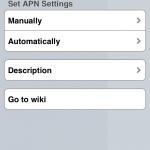
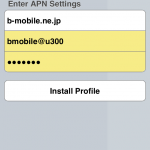
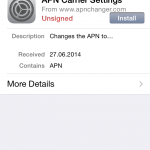
Unfortunately in all it’s wisdom the iPhone did not allow me to set the carrier settings. It just displayed the “Automatic” choice. So I went to the APN Changer website, entered the settings and installed a custom provider setting to my device. This works without any Jailbreak with iPhones without SIM Lock.

Source: m.apnchanger.org

using the RaspberryPi to make all SONOS speakers support Apple Airplay

Airplay allows you to conveniently play music and videos over the air from your iOS or Mac OS X devices on remote speakers.

Since we just recently “migrated” almost all audio equipment in the house to SONOS multi-room audio we were missing a bit the convenience of just pushing a button on the iPad or iPhones to stream audio from those devices inside the household.

To retrofit the Airplay functionality there are two options I know of:

1: Get Airplay compatible hardware and connect it to a SONOS Input.

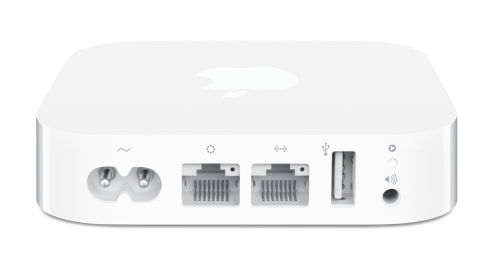
airportexpress_2012_back-285111You have to get Airplay hardware (like the Airport Express/Extreme,…) and attach it physically to one of the inputs of your SONOS Set-Up.  Typically you will need a SONOS Play:5 which has an analog input jack.
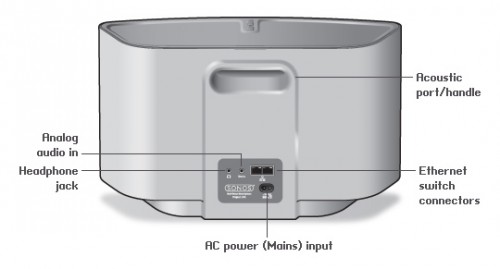
PLAY5_back

2: Set-Up a RaspberryPi with NodeJS + AirSonos as a software-only solution

You will need a stock RaspberryPi online in your home network. Of course this can run on virtually any other device or hardware that can run NodeJS. For the Pi setting it up is a fairly straight-forward process:

You start with a vanilla Raspbian Image. Update everything with:

sudo apt-get update

sudo apt-get upgrade

Then install NodeJS according to this short tutorial. To set-up the AirSonos software you will need to install additional avahi software. Especially this was needed for my install:

sudo apt-get install git-all libavahi-compat-libdnssd-dev

You then need to get the AirSonos software:

sudo npm install airsonos -g

After some minutes of wait time and hard work by the Pi you will be able to start AirSonos.

sudo airsonos

And it’ll come up with an enumeration of all active rooms.

Screen Shot 2014-06-25 at 11.38.47

And on all your devices it’ll show up like this:

IMG_1046

and

Screen Shot 2014-06-25 at 12.38.27


Source: https://github.com/stephen/airsonos

How to use the Tokyo public transportation system as a visitor

Being in Tokyo as a visitor brings a lot of challenges. Since you gotta use the public transport offers to get from A to B. Now we had the same challenge this May and this is how we tried to solve it.

Bildschirmfoto 2014-05-18 um 18.51.12

Problem: How do you know which train lines you take and where they are?

Solution: Use Google Maps (you need mobile internet access!) to find your route

The public transportation feature of Google Maps works like a charm. It’s accurate as it can be and offers even walking instructions to get to the right platform or train station.

Notice the colored lines next to the different stations. That’s the color you’re looking for on the train. They are color coded! To find your right platform just take the information that Google gives you and look out for it. It will be written on signs “Rinkai towards Tokyo Teleport”.


Problem: Okay I know which train I have to use. But before I enter the platform I have to pass the ticket gate. How do I buy a ticket? How do I know which one?

Solution: Get a Suica card and charge it! If you’re a group travelling: Look out for cheap group ticket offerings.

A Suica card (aka “Super Urban Intelligent Card”) can be used instead of buying a ticket. You can buy it where you can buy the tickets – most of the time it’s 500 Yen + charge. Charging it with some Yen is crucical since the gates will not let you in when your card is not at least charged with 210 Yen.

You may ask: If I buy a ticket from A to B I have to pay the price upfront. When I use the Suica how does it work then? Easy answer: When you enter the train station through the ticket gate you pass it with your Suica card. It will start a journey for you. When you exit it will end the journey. The card and system is intelligent enough to calculate all steps in between, add them up and substract the fare price from your Suica balance. It always takes the cheapest price for single travellers.

If you’re on your way as a group you might want to use the ticket machines before going through the ticket gates. The Suica is a personal card and only suited for one person to be used. So you cannot pass it through the ticket gate back and enter the ticket gate again without causing panic with the service personell.

To buy tickets for groups I suggest to switch the terminals to english – most of them will offer that option. You then have to specifically know where you want to go. Sometimes it’s the easiest way to just go to the counter and buy them there.

Sometimes when you bought tickets you find out that you made a mistake. Fear not! You can give them back and by doing so get your money back. Service personell is awesome and will help you at any time! DO NOT PANIC!

Another awesome feature you get ‘for free’ by having a Suica card is that you can use it with all the vending machines available everywhere in the train stations. Just pick the beverage you want and swipe the card. Done!

Beware: fill the card up before going out of the ticket gate when you used it all up!

If you happen to have a NFC enabled device (like most Android phones) you can install the Suica Reader app from the Google Store and get information about what happened to your card so far.

Need to do Load Tests? Try Tsung!

Tsung is an open-source multi-protocol distributed load testing tool

It can be used to stress HTTP, WebDAV, SOAP, PostgreSQL, MySQL, LDAP and Jabber/XMPP servers. Tsung is a free software released under the GPLv2 license.

The purpose of Tsung is to simulate users in order to test the scalability and performance of IP based client/server applications. You can use it to do load and stress testing of your servers. Many protocols have been implemented and tested, and it can be easily extended.

It can be distributed on several client machines and is able to simulate hundreds of thousands of virtual users concurrently (or even millions if you have enough hardware …).

Source 1: http://tsung.erlang-projects.org/

MOSH (Mobile Shell) – fixing SSH for everyone

How many times did you experience a connection loss on your terminal window in the last week? Yeah I know – like everytime you close the lid of your notebook and move to a different place. So like a dozen times every day.

And everytime you reconnect to your servers and you use things like screen to keep your terminals open and your programs running while you’re disconnected.

On the other hand – did you ever curse the internet gods while you tried to do a very important check or bugfix to a machine whilst on a train or mobile roaming network? It’s not what I would call fun-times. When there are no constant disconnects the lag is just infuriating. MOSH also solves this since it’s predicting and responding way faster then vanilla SSH. Your terminal becomes useable again!

So there’s now MOSH to the rescue:

Remote terminal application that allows roaming, supports intermittent connectivity, and provides intelligent local echo and line editing of user keystrokes.
Mosh is a replacement for SSH. It’s more robust and responsive, especially over Wi-Fi, cellular, and long-distance links.
Mosh is free software, available for GNU/Linux, FreeBSD, Solaris, Mac OS X, and Android.

[youtube]http://www.youtube.com/watch?v=XsIxNYl0oyU[/youtube]

Install it on your servers and your clients and never lose a connection again.

Source 1: http://www.gnu.org/software/screen/
Source 2: http://mosh.mit.edu

IPv6 native root server has problems with OpenFire Jabber / XMPP Server to Server

I was setting up a new root-server machine and went for the Debian 7 minimal set-up. Thankfully the root-server provider I am using (hetzner) is connected with IPv4 and IPv6 natively. Awesome stuff!

If you’re using an IPv6 native set-up these days you STILL have to be cautious about possible side-effects with software having bugs and not knowing how to deal with these ginormous ip adresses.

So there’s a well known Jabber / XMPP server that I am using for some years now without any issues. I was even using it on native IPv6 connected machines earlier.

But with the fresh and clean set-up of Debian 7 and IPv6 by the hoster several problems started bubbling up.

1: the ‘there can only be one ipv*’ problem

Turns out that the debian team decided to set a system setting by default that lets IPv6 aware applications bind to IPv6 only. Good thing, you can disable it by adding this to your sysctl.conf:

net.ipv6.bindv6only=0

2: the ‘who resolves first is right’ problem

When you get a IPv6 native machine it might have a resolv.conf consisting of IPv4 and IPv6 name servers. And don’t worry: Everything is going to be all-right as long as the software you’re planning to use is perfectly capably dealing with the answers of both types of servers. The IPv4 ones will default to the A records, the IPv6 ones to the AAAA record.

Now there’s OpenFire. A stable and easy to use XMPP / Jabber server implementation. It’s based upon Java and I am running it with Java 7 on my Debian machine.

Unfortunately in the current 3.9.1 version of OpenFire there’s a bug that leads to Server-to-Server XMPP connections not working when they resolv to IPv6. So for example your Google-Talk contacts won’t work at all.

The bug itself is rather stupid: Seems that OpenFire expects an IPv4 adress from the DNS lookup and crashes on an IPv6 adress.

The solution is as easy as the bug is stupid: Remove the IPv6 defaulting nameservers from your resolv.conf.

# nameserver config
nameserver 2xx.xxx.yyy.99
nameserver 2xx.xxx.yyy.100
nameserver 2xx.xxx.yyy.98
nameserver 8.8.8.8
nameserver 8.8.4.4
#nameserver 2axx:yyy:0:zzzz::add:9898
#nameserver 2axx:yyy:0:zzzz::add:9999
#nameserver 2axx:yyy:0:zzzz::add:1010

Source 1: defaulting to net.ipv6.bindv6only=1
Source 2: http://community.igniterealtime.org/thread/51902

Brackets: a multi-platform editor written in javascript – including NodeJS

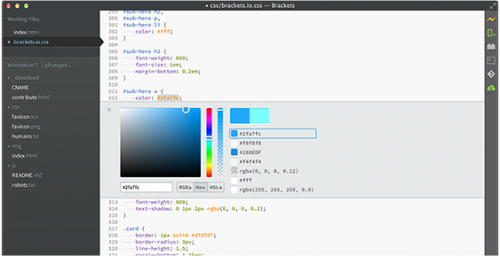
“Brackets is an open source code editor for web designers and front-end developers.”

hero

On the first tries it’s an awesome thing to have all that JavaScript debugging, Live HTML editing and what-not in one place. Give it a spin.

[youtube]https://www.youtube.com/watch?v=T6d5C3rLeFY[/youtube]

Source 1: http://brackets.io/

weave your net of things that have internet…ehm – internet of things

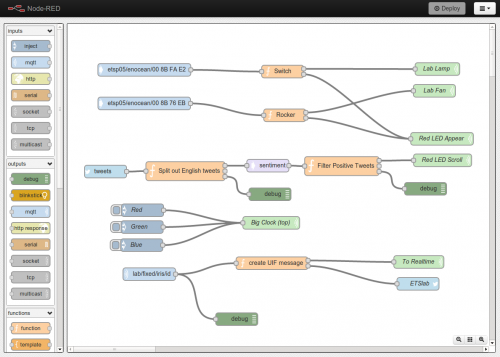
node-red-screenshot

The internet of things” is a buzzword used more and more. It means that things around you are connected to the (inter)network and therefore can talk to each other and, when combined, offer fantastic new opportunities.

Yeah right.

So NodeRed is a NodeJS based toolset that allows you to create so called “flows” (see picture above). Those flows determine what reacts and happens when things happen. Fantastic, told you!

Source 1: http://nodered.org/
Source 2: http://en.wikipedia.org/wiki/Internet_of_ThingsSource 3: http://nodejs.org/

ZFS Tutorial

“ZFS is really the final word in filesystems. With a feature set longer than this tutorial, it can take a while to master. You can set many more options per dataset, enable disk usage quotes and much more. Once you’ve used it and seen the benefits, you’ll probably never want to use anything else. Hopefully this has been helpful to get you on your way to becoming a FreeBSD ZFS master.”

Source: http://www.bsdnow.tv/tutorials/zfs

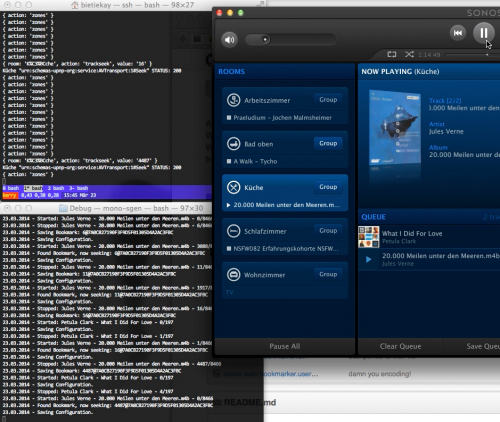
I give you: the SONOS Audiobook / Podcast Auto Bookmarker – never lose your Listening Progress again…

Since the SONOS system I’ve bought turned out to be highly hackable I’ve spent some quality-time this weekend fixing the worst downside I’ve found so far that the SONOS system had for me

I am listening to a lot of Podcasts and Audiobooks. And it turns out that those two Genre are not particularly good supported by SONOS. When you’re listening to a 4 hour podcast and you stop it to play a song in between (since you stretch the listening of that podcast to several days) the next time you start that 4 hour podcast the SONOS system did not remember the position that you stopped at the last time and restarts the podcast from the beginning.

If you did not remember where you left of the last time, you’re lost. The same goes for Audiobooks.

Now this is the first feature I am teaching my SONOS system. And I am opensourcing it so you can do it as well.

SONOS Auto Bookmark Tool

Everything you need can be run on a RaspberryPi:

  1. You need NodeJS and node-sonos-http-api installed and running.
  2. You need MONO and sonos-auto-bookmarker (change the configuration.json file in bin/Debug after you xbuilded the .sln file)

Now the Auto Bookmarker Tool will, with the help of the sonos-http-api, monitor your household and whenever something longer than 10 minutes is played and stopped it bookmarks the last played position. Whenever you restart that track it will then seek to the last known position automatically.

[youtube]https://www.youtube.com/watch?v=Eqk3SyNv8sE[/youtube]

Source 1: https://github.com/bietiekay/sonos-auto-bookmarker

document your REST interfaces with style: Swagger

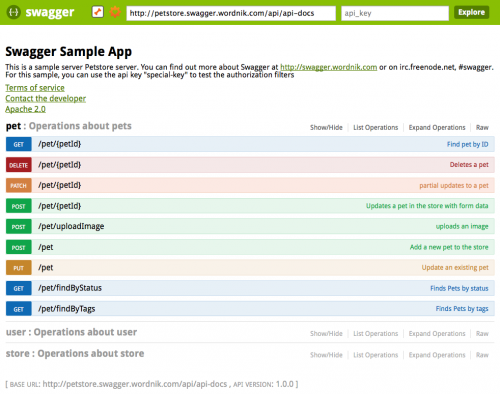
Swagger is a specification and complete framework implementation for describing, producing, consuming, and visualizing RESTful web services. The overarching goal of Swagger is to enable client and documentation systems to update at the same pace as the server. The documentation of methods, parameters, and models are tightly integrated into the server code, allowing APIs to always stay in sync. With Swagger, deploying managing, and using powerful APIs has never been easier.”

Bildschirmfoto 2014-03-15 um 22.35.09

Source 1: https://helloreverb.com/developers/swagger
Source 2: https://github.com/wordnik/swagger-core
Source 3: http://petstore.swagger.wordnik.com/#!/pet

miataru can embed your location into any website now!

An exciting new feature has been added to the Miataru service! It’s now possible to embed the location of a device into any website. Here’s an example:

It’s a pretty easy process. When your device is available on the standard public miataru service you only have to embed an iFrame into the website. Just like this:

<iframe width=”320″ scrolling=”no” height=”240″ frameborder=”0″ src=”http://miataru.com/client/embed.html#BF0160F5-4138-402C-A5F0-DEB1AA1F4216;Demo Device”></iframe>

Source 1: http://miataru.com/client/#BF0160F5-4138-402C-A5F0-DEB1AA1F4216
Source 2: https://github.com/miataru/miataru-webclient

GraphHopper: blazingly fast routes with OpenStreetMap

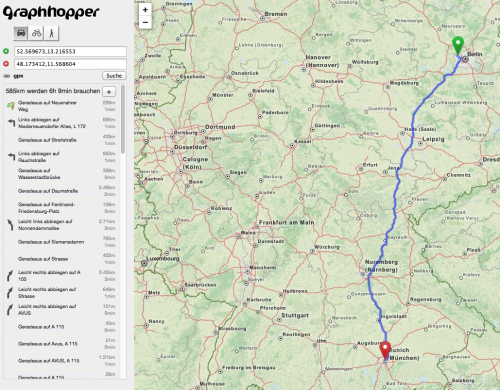
Playing with OpenStreetMap resources lately I came to the point where I wanted to calculate routes between points based on the OSM data. Now there is GraphHopper to the rescue! It’s opensource and awesome!

“GraphHopper offers memory efficient algorithms in Java for routing on graphs. E.g. Dijkstra and A* but also optimized road routing algorithms like Contraction Hierarchies. It stands under the Apache License and is build on a large test suite.”

GraphHopper
Source 1: http://graphhopper.com

setting up boblight with a Raspberry Pi and RaspBMC

Some might know AmbiLight – a great invention by Philips that projects colored light around a TV screen based upon the contents shown. It’s a great addition to a TV but naturally only available with Philips TV sets.

Not anymore. There are several open-source projects that allow you to build your very own AmbiLight clone. I’ve built one using a 50-LEDs WS2801 stripe, a 5V/10A power supply, a RaspberryPi, and the BobLight integration in RaspBMC (this is a nice XBMC distribution for the Pi).

Boblight is a collection of tools for driving lights connected to an external controller.

Its main purpose is to create light effects from an external input, such as a video stream (desktop capture, video player, tv card), an audio stream (jack, alsa), or user input (lirc, http). Boblight uses a client/server model, where clients are responsible for translating an external input to light data, and boblightd is responsible for translating the light data into commands for external light controllers.”

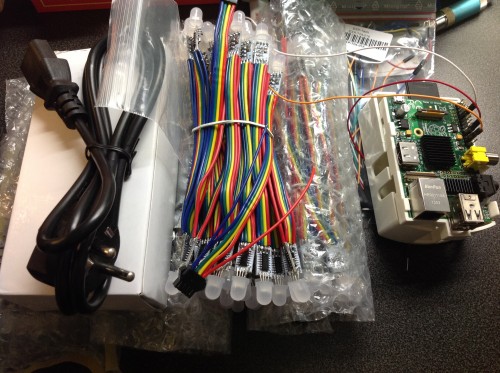
The hardware to start with looks like this:

pre_requisites

I’ve fitted some heat-sinks to the Pi since the additional load of controlling 50 LEDs will add a little bit of additional CPU usage which is desperately needed when playing Full HD High-Bitrate content.

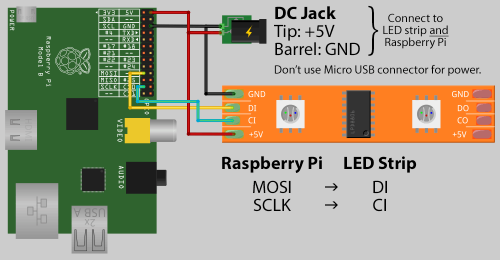
The puzzle pieces need to be put together as described by the very good AdaFruit diagram:

diagramAs you can see the Pi is powered directly through the GPIO pins. You’re not going to use the MicroUSB or the USB ports to power the Pi. It’s important that you keep the cables between the Pi and the LEDs as short as possible. When I added longer / unshielded cables everything went flickering. You do not want that – so short cables it is :-)

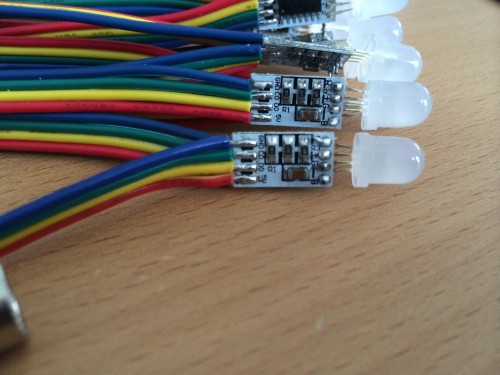
leds

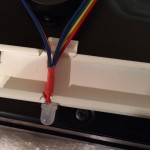
When you look at aboves picture closely you will find a CO and DO on the PCB of the LED. on the other side of the PCB there’s a CI and DI. Guess what: That means Clock IN and Clock OUT and Data IN and Data OUT. Don’t be mistaken by the adapter cables the LED stripes comes with. My Output socket looked damn close to something I thought was an Input socket. If nothing seems to work on the first trials – you’re holding it wrong! Don’t let the adapters fitted by the manufacturer mislead you.

Depending on the manufacturer of your particular LED stripe there are layouts different from the above image possible. Since RaspBMC is bundled with Boblight already you want to use something that is compatible with Boblight. Something that allows Boblight to control each LED in color and brightness separately.

I opted for WS2801 equipped LEDs. This pretty much means that each LED sits on it’s own WS2801 chip and that chip takes commands for color and brightness. There are other options as well – I hear that LDP8806 chips also work with Boblight.

My power supply got a little big to beefy – 10 Amps is plenty. I originally planned to have 100 LEDs on that single TV. Each LED at full white brightness would consume 60mA  – which brings us to 6Amps for a 100 – add to that the 2 Amps for the PI and you’re at 8A. So 10A was the choice.

To connect to the Pi GPIO Pins I used simple jumper wires. After a little bit of boblightd compilation on a vanilla Raspbian SD card (how-to here). Please note that with current RaspBMC versions you do not need to compile Boblight yourself – I’ve just taken for debugging purposes as clean Raspbian Image and compiled it myself to do some boblight-constant tests. Boblight-constant is a tool that comes with Boblight which allows you to set all LEDs to one color.

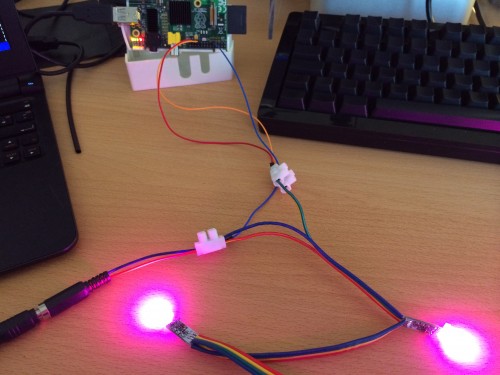
If everything is right, it should look like this:

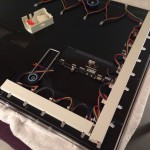
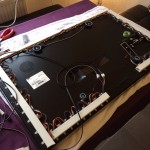
working_first_timeNow everything depends on how your LED stripes look like and how your TVs backside looks like. I wanted to fit my setup to a 42″ Samsung TV. This one already is fitted with a Ultra-Slim Wall mount which makes it pretty much sitting flat on the wall like a picture. I wanted the LEDs to sit right on the TVs back and I figured that cable channels when cut would do the job pretty nicely.

To get RaspBMC working with your setup the only things you need to do are:

  1. Enable Boblight support in the Applications / RaspBMC tool
  2. Login to your RaspBMC Pi through SSH with the user pi password raspberry and copy your boblight.conf file to /etc/boblight.conf.

The configuration file can be obtained from the various tutorials that deal with the boblight configuration. You can choose the hard way to create a configuration or a rather easy one by using the boblight configuration tool.

I’ve used the tool :-)

Boblight Config ToolNow if everything went right you don’t have flickering, the TV is on the wall and you can watch movies and what-not with beautiful light effects around your TV screen. If you need to test your set-up to tweak it a bit more, go with this or this.

result_1

Source 1: http://en.wikipedia.org/wiki/Ambilight
Source 2: http://www.raspberrypi.org/
Source 3: https://code.google.com/p/boblight/
Source 4: http://www.raspbmc.com/
Source 5: http://learn.adafruit.com/light-painting-with-raspberry-pi/hardware
Source 6: How-To-Compile-Boblight
Source 7: Boblight Config Generator
Source 8: Boblight Windows Config Creation Tool
Source 9: Test-Video 1
Source 10: Test-Video 2

“Compressing” JSON to JSON

JSON_logo
JSON Logo

The internet and all those browsers and javascript applications brought data structures that are pretty straight-forward. One of them is JSON.

The wikipedia tells about JSON:

“JSON (/ˈdʒeɪsɒn/ JAY-soun, /ˈdʒeɪsən/ JAY-son), or JavaScript Object Notation, is an open standard format that uses human-readable text to transmit data objects consisting of attribute–value pairs. It is used primarily to transmit data between a server and web application, as an alternative to XML.”

Unfortunately complex JSON can get a bit heavy on the structure itself with over and over repetitions of data-schemes and ids.

There’s RJSON to the rescue on this. It’s backwards compatible and makes your JSON more compressible:

“RJSON converts any JSON data collection into more compact recursive form. Compressed data is still JSON and can be parsed with JSON.parse. RJSON can compress not only homogeneous collections, but also any data sets with free structure.

RJSON is single-pass stream compressor, it extracts data schemes from document, assign each schema unique number and use this number instead of repeating same property names again and again.”

Of course this is all open-source and you can get your hands dirty here.

Source 1: http://en.wikipedia.org/wiki/JSON
Source 2: http://www.cliws.com/e/06pogA9VwXylo_GknPEeFA/
Source 3: https://github.com/dogada/RJSON

the Miataru Browser Client Application is here!

After getting the server and the iOS client application to the people I’ve sat down and started doing something I have not done yet – writing a web application with no server side except a standard HTTP server.

Here’s a little demonstration which I will explain in more detail below:

[youtube]http://www.youtube.com/watch?v=YHujwbuFwco[/youtube]

The default Miataru service can be accessed through the client application with this URL: http://miataru.com/client – This will open a new browser window with a completely fresh session of the application. Since Miataru is all about control of your own data this webapplication does not store anything on any servers – every access to the internet is read-only and only to the Miataru service (just “GetLocation”). Oh – and by default it uses SSL to encrypt all traffic from and to the Miataru service.

You can start by entering DeviceIDs you know or you can – for test purposes – use a DeviceID I am providing for test purposes: BF0160F5-4138-402C-A5F0-DEB1AA1F4216

Of course, the easiest way is to just embedd the DeviceID into the URL, just like this: http://miataru.com/client/#BF0160F5-4138-402C-A5F0-DEB1AA1F4216

Oh and if you want to see the device moving on your iPhone just use the miataru iOS client and scan this QR code here:

qrcode

So that was easy – but if the application does not store anything on any server, how does it maintain the Known Devices list between browser sessions (open/closes of the browser) you ask? – It’s using HTML5 WebStorage to store these information locally in your browser. This has the advantage of being completely local, but also the disadvantage that it is not shared between browsers or machines.

Like usual this whole application is also available completely free of charge and open-sourced to be used, edited and installed on-premise if you like.

Let me know how you like it!

Source 1: http://miataru.com/client
Source 2: http://miataru.com/client/#BF0160F5-4138-402C-A5F0-DEB1AA1F4216
Source 3: https://github.com/miataru/miataru-webclient
Source 4: http://www.w3schools.com/html/html5_webstorage.asp

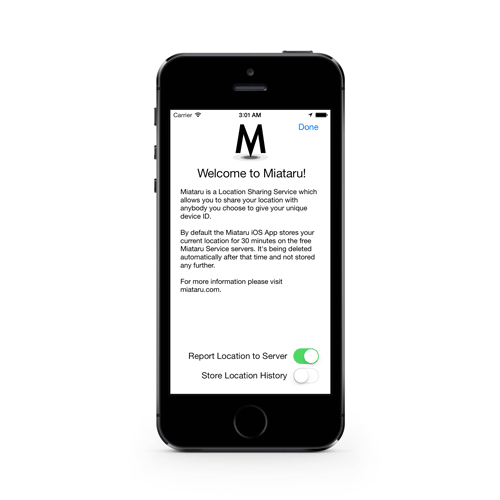
Miataru for iOS is available in the iOS AppStore

After roughly 1,5 months of learning Javascript and Objective-C the iOS application and the publicly available Miataru service launched this week.

If you want to interface with the publicly available instance of the miataru server you can use the URL: http://service.miataru.com. This URL also is pre-configured with the iOS client that got recently available in the AppStore.

featurerette-1

appstorebadge_small

Source 1: Miataru for iOS
Source 2: iOS AppStore

SMS Alarming for h.a.c.s.

I’ve added Alarming to hacs a while ago and I’ve now extended the built-in SMS gateway providers with the german telekom services called “Global SMS API”.

This API is offered through the Telekom own portal called developer garden and is as easy to use as it can possibly be. You only need to set-up the account with developergarden and after less than 5 minutes you can send and receive SMS and do a lot more. They got APIs for nearly everything you possible want to do … fancy some “talk to your house”-action? Would be easy to integrate into h.a.c.s. using their Speech2Text APIs.

They have a short video showing how to set it all up:

[youtube]http://www.youtube.com/watch?v=caRSafzMDK0[/youtube]

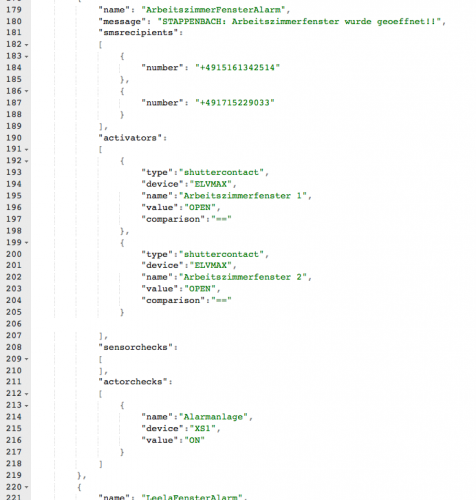
So I’ve added the SMS-send capabilities to the hacs internal alarming system with it’s own JSON configuration file looking like this:

Bildschirmfoto 2013-07-11 um 23.08.46

And this simple piece of configuration leads to SMS getting sent out as soon as – in this example – a window opens:

sms-alarming-ahcs

Before the Telekom Global SMS API I’ve used a different provider (SMS77) but since the delivery times of this provider varied like crazy (everything from 30 seconds to 5 minutes) and the provider had a lot of downtimes my thought was to give the market leader a try.

So now here it is – integrated. Get the source here.

Source 1: https://github.com/bietiekay/hacs
Source 2: https://www.developergarden.com/de/apis/apis-sdks/global-sms-api/

How many space missions are exploring our solar system right now?

The number is 27!

20130425_solar-system-missions2013-05_big
CC-BY-SA Olaf Frohn

Right now there are 27 different missions ongoing to explore our solar system. A high number for something that is not part of our daily news cycle. Those missions currently concentrate on the sun, mars, mercury, venus, the earth moon and some asteriods.

Source: http://www.raumfahrer.net/news/raumfahrt/01052013213936.shtml

extending the house storage

In times when mobile phone cameras produce pictures of 2 MBytes each and decent DSLR cameras produce pictures in the range of more than 20 Mbytes each – not speaking of the various sensors around the house the question of how all of this is going to be stored is an interesting one.

Prices for mass storage is dropping for years and sized of hard disks are getting bigger and bigger. 3 Tbyte drives are fairly cheap now. Cheap enough to consider serious redundancy even for home use.

Having that home automation hobby and having very specific needs when it comes to home entertainment or even watching TV (we don’t watch live-tv…) we have a relatively huge demand for storage space. That way we are already storing over 10 Tbyte of data, fully encrypted, redundant and backed-up.

Our file server infrastructure grew with the needs over the years.

It started way back in 2003 when I set-up the first fileserver for my apartment back then. It was a fairly huge 19 inch case with 5 hard disks (100 Gbyte each). This machine was filled in 2005 and needed replacement.

We’re in IDE land back then. Because the system hardware died on me due to a power surge all the disks and a new mainboard were seated in a new case with room for a lot of disks.

One interesting detail might be that I consistently used Windows Server for that purpose.

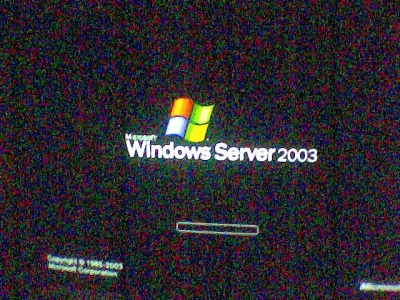
The machine always wasn’t just a fileserver. It was smtp, imap, nntp and media server all the time. That lead to a growing demand of CPU and memory resources. It started with an 800 Mhz AMD Athlon (which died quickly) and for the next years to come I used a 2.8 Ghz Intel Pentium 4. Everything started with Windows Server 2003 – bought in the Microsoft Store when I was a Microsoft employee.

Diskspace demand kept growing and in 2009 a new case, new mainboard + memory and new disks where due.

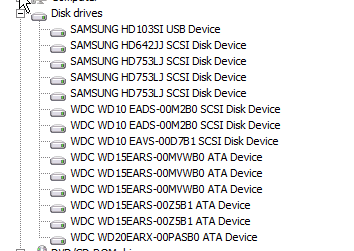
Since 2009 a Core4Quad Q9550 with 2.8 Ghz and 16 Gbyte of Memory is the heart of our fileserver. Since we’re frequently live-transcoding video streams to feed iPads and iPhones around the house that machine has plenty of grunt to feed the demand. We can have 2 iPhones and 2 iPads playing 720p content without getting stutters. Back in 2009 we also switched to a mixed IDE and SATA setup as you can see in the picture:

Plenty of room when the new case arrived – it was getting crowded just 2 years later in 2011. Every seat was taken – which means 13 disks are in that case and 1 attached through USB.

That adds up to more than 16 Tbyte of raw storage. In 2011 we also upgraded to Windows Server 2008. We never lost a bit with that operating system, not under the heaviest load and even through serious hardware malfunctions. A lot of disks of those 13 died throughout the years: Almost 1 every 2 months was replaced – most of them through extended waranties – of course we have a spare always ready to take the place. Only one time I had to rush to a store to get a replacement drive when two disks failed short after each other. That’s why there’s that 2 Tbyte drive in the 1.5 Tbyte compound…

So it’s getting full again. Since that case isn’t really holding more disks and replacing them is getting harder because of the tight fit the idea was born to now add a bigger case but to just add a NAS/SAN which holds between 6 to 8 disks at once, comes with it’s own redundancy management and exports one big iSCSI volume.

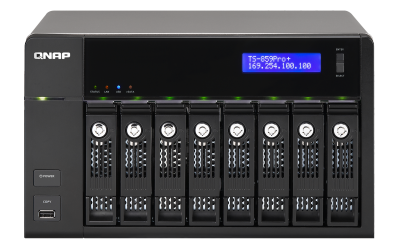
That said a network card was added to the fileserver and a QNAP TS-859 Pro+ 8-bay appliance was bought. This one is a shiny black device which uses less power then an aditional case with extra cpu and memory would have use and after calculating through a number of combinations it’s even the cheapest solution for an 8 drive set-up.

After some intensive testing it seems that the iSCSI approach is the most robust one. Since I am just done with testing the appliance the next step is to buy drives. So stay tuned!

Source 1: http://www.qnap.com/de/index.php?lang=de&sn=375&c=292&sc=528&t=532&n=3486

home automation example: domotica

For several years now I am interested in this home automation thing – I even got a little bit of my own home automation going. But with websites like domotica you can get an idea of what is achieveable and how it might look for the people actually using it every day.

Source 1: http://www.hekkers.net/domotica/Default.aspx

ELV Max! Cube – home automation for the heating

For several years now I am building my own home automation tools by putting together existing hardware and self-written software. As the central software core of my home automation system I use h.a.c.s. – “home automation control server” which I put up as open source software on GitHub.

Throughout the years I was able to embedd a lot of daily tasks and measurements in one place which can be accessed by a simple web page. It currently looks like this:

You can find some articles on this blog about h.a.c.s. if you want to know more about it.

As of today I can control and measure the states of switches, windows, doors, temperature and humidity and power consumption. Scenarios like “when this door opens, switch on that light” are easy things to do with h.a.c.s.

Now “Winter’s coming!”. And therefore I want to take control of the heating of each and every room in the house. I want to set a goal for a temperature and I want the heating to fire up or cool down with that goal. And of course I want to monitor manual changes of each and every radiator in the house.

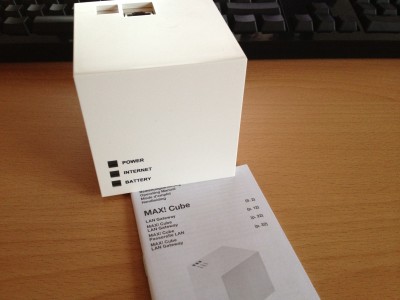
Last week then I stumbled upon a piece of kit called “ELV MAX! Cube”. It’s a white cube (as the name implies) which offers a USB port from which it is powered and an RJ-45 ethernet port which connects the cube to the home network.

The cube itself does not draw much power and it can be powered by the routers USB port easily. It allows you to connect some peripherals using 868 mhz rf. Those peripherals can be: window state sensors (closed/open) and thermostats to control the radiators (and a switch but, well… hopefully not necessary).

It comes with it’s own user interface – a java application that connects to the device and allows you to configure it. Quite nice – it runs on Windows and Mac. You can use a cloud service to control the device over the internet, but I have no intention in trying that out right now.

My plan is to extend h.a.c.s. to get information from the cube and handle them and in the end even control the cube by setting temperatures and controlling the outcome of those changes.

As of now there are some efforts to decode the quite interesting protocol the cube is talking. You communicate with the cube over TCP (my cube listens on port 62910).

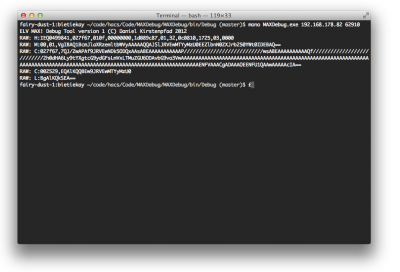
Currently I am building a small debug application which allows me to experiment with the output of the cube faster than plain telnet would. And within this I had the first contact tonight:

As always all my efforts can be seen in the hacs repository.

Source 1: https://github.com/bietiekay/hacs
Source 2: http://www.schrankmonster.de/?s=hacs
Source 3: http://www.elv.de/max-cube-lan-gateway.html
Source 4: http://www.domoticaforum.eu/viewtopic.php?f=66&t=6654

das Keyboard

It appeared to me that I stopped working with a decent keyboard since I moved completely to Macs at home. I was using the keyboards the machine came with and not always does Apple deliver the best possible keyboard for the money.

So I tried to turn back to my trusty IBM PS/2 Model M last week and I had to find out that somehow the actively powered USB to PS2 adapter I had is got lost. A passive one just doesn’t cut it and the keyboard does not work at all.

I remembered that in 2006 I wrote about a back-then-new keyboard that resembled the fantastic Model M. Voilá! They even worked on their keyboards since 2006 and improved them :-)

A little bit more than 6 years after writing first about the product I got me a “das Keyboard Ultimate S EU”.

First verdict: It is awesome!

It’s expensive, that’s true. But if just feels right typing on it. I can see me writing a lot of stuff for longer periods on that keyboard :-)

Source 1: http://www.schrankmonster.de/2005/05/22/real-elite-keyboard
Source 2: http://www.schrankmonster.de/2005/08/17/teh-keyboard-for-teh-coders/


automation to the people: download YouTube videos automatically

You know that: You have just stumbled upon a great and informative YouTube channel. It’s full of videos you would like to watch but to do that you need to have internet access in any case. And of course that internet access needs to be as fast as possible to cope with the video quality you would like to watch.

If only it would be possible to download a video from YouTube, store it locally and watch it whenever you got the time. Maybe you want to take that video with you on that great, internetless self-awareness trip…

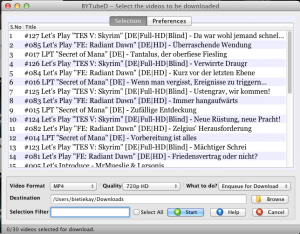
Now there are a lot of tools that allow you to download YouTube clips manually. I used BYTubeD for that purpose. It is a nice and easy to use Firefox Add-On which can be started whenever a YouTube video appears in any page.

After you’ve started into BYTubeD you can select which of the videos on the page you would like to download and what quality you would like to get.

All this works very well if you only want to download something once every while. Problems come up if you want to download regular postings…

I’ve subscribed to several – to me – very interesting YouTube channels. These get updated almost every day. The only option for me to keep track with them is to take the time, surf YouTube and use BYTubeD to download manually if there is anything new. Now this was a waste of time for me so I automated it.

I wrote a small tool I call “YouTubeFeast” – because it allows you to feast on YouTube… yeah I know. Now this tool is designed to run on a linux or windows machine in the background and scan in configurable intervals for new videos. If it finds new videos it downloads them in the quality you pre-configured to a folder you configured. It couldn’t be easier.

It’s open-source (GPLv2) and I’ve made it publicly available on GitHub. You can even find a pre-compiled binary version there which is ready-to-run.

The configuration file “YouTubeFeast.configuration” is a plain and simple text file. Use your favourite text editor and obey some simple rules:

  • any line beginning with # is a comment
  • any line not beginning with a # is a download-job
  • any download job consists of the following, tabulator separated parameters:
    • the URL of the video page / channel homepage / overview
    • the desired quality (360p, 720p, 1080p)
    • the path to store the videos
    • the interval (in hours) to check for new stuff
  • don’t forget: tabulator separates parameters (take a look into the example configuration file…)

After configuring the only thing you need to do is to start YouTubeFeast. It will then go through all the jobs and download video files – as soon as it comes across an already downloaded file it stops that specific job.

That’s all about it. If you got any comment or suggestions for improvement please let me know.

Source 1: https://github.com/bietiekay/YouTubeFeast
Source 2: Download YouTubeFeast-March2013

der letzte Flug des Space Shuttle Endeavour

Am kommenden Freitag soll das Space Shuttle Endeavour zum letzen Mal und ein Space Shuttle zum vorletzten Mal abheben. Da will man dabei sein :-)

Ich habe glücklicherweise gerade die Herren (und Damen?) von SpaceLiveCast entdeckt. Offenbar machen die schon eine ganze Weile Livestreams zu den verschiedenen Raumfahrt-Events.

P.S.: Wenn ich einen Wunsch frei hätte, wäre das, dass die Seite einen Video Podcast Feed anbietet….(wird Hilfe benötigt?)

Source 1: http://spacelivecast.de/
Source 2: http://www.raumfahrer.net
Source 3: http://spacelivecast.de/2011/04/29-04-ab-1900-uhr-sts-134-letzter-endeavour-flug/

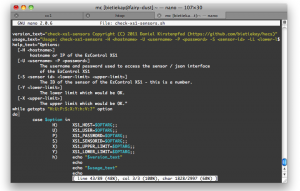
configuring the nano editor to my needs…

Configuring your favourite Editor on OSX (or Linux, or anywhere else) is important – since nano is my editor of choice I wanted to use it’s syntax highlighting capabilities. Easy as pie as it turned out:

I started with a .nanorc file from this guy and modified it to recognize some of my frequent file-types (like .cs files).

You can download my nanorc.tar – just extract it and put it into your user home directory.

Source 1: http://talk.maemo.org/showthread.php?t=68421
Source 2: http://www.nano-editor.org/dist/v2.2/nano.html#Nanorc-Files
Source 3: nanorc.tar

Photosynth now mobile…

It’s been some months years since the once Microsoft Research Project got public and Microsoft started offering it’s great Photosynth service to the public.

I’ve been using the Microsoft panoramic and Photosynth tools for years now and I tend to say that they are the best tools one can get to create fast, easy and high-quality panoramic images.

There is photosynth.net to store all those panoramic pictures like this one from 2008:

The photosynth technology itself contains several other interesting technologies like SeaDragon which allows high quality image zooming on current internet connection speeds.

This awesome technology is as of now available on the iPhone (3GS and upwards) and it’s better than all the other panoramic tools I’ve used on a phone.

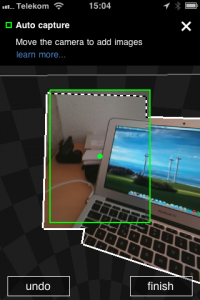
the process of taking the images
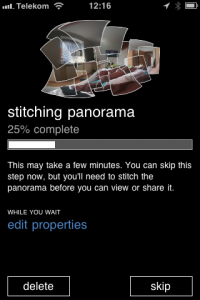
after the pictures are taken additional stitching is needed
after the stitching completed a fairly impressive panoramic images is the result

Source 1: Photosynth articles from the past
Source 2: Photosynth in Wikipedia
Source 3: Photosynth on iPhone App Store

Shairport – someone reversed an AirPort Express

Low Latency Network Audio was a dream for the past years (see an article of 2005 and 2008) and with AirPlay it’s finally there.

I am using the Apple AirPlay technology for several years now… after it got implemented into iOS it’s just fantastic to have the option to have whatever sound source I want to playing loud and clear in any room I want to…

Okay it’s not quite as sophisticated as the sonos solution regarding the control of multiple music sources in multiple rooms but it get’s the job done in an apartment.

So back to the topic: Apple integrated the AirPlay technology into their wireless base station “AirPort Express”. Basically AirPlay is a piece of software which receives an encrypted audio stream over the network and outputs the stream to the SPDIF or audio jack.
Back in 2005 there already was an emulator of this protocol called “Fairport” but Apple decided to encrypt the AirPlay traffic. This led to the problem that the encryption key was unkown because it’s baked into the AirPort Express firmware. And this is where the good news start:
“My girlfriend moved house, and her Airport Express no longer made it with her wireless access point. I figured it’d be easy to find an ApEx emulator – there are several open source apps out there to play to them. However, I was disappointed to find that Apple used a public-key crypto scheme, and there’s a private key hiding inside the ApEx. So I took it apart (I still have scars from opening the glued case!), dumped the ROM, and reverse engineered the keys out of it.”

So to keep things short: Someone got an AirPort Express, dumped the firmware, extracted the AirPlay encryption keys and wrote an emulator of the AirPlay protocol which uses the key. Voilá!

ShairPort is available in source code on the site of the guy and obviously it’s unsure if Apple will react by changing the encryption key in the future. But for the time being it works as advertised:

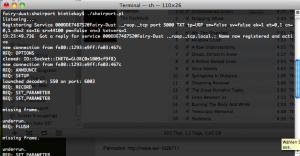
I took one of my computers and followed the instructions to update perl, install Macports and then run ShairPort. So when ShairPort is run it looks not as appealing as expected:

Notably  it uses IPv6 to communicate between iTunes and ShairPort… Oh I almost forgot to show how it looks in iTunes:

On another side note: It works on Linux, Windows and Mac OS X :-)

Source 1: Apple AirPlay
Source 2: Sonos
Source 3: Apple AirPort Express
Source 4: ShairPort