How to weigh your cat! – the IoT version

This is Leela. She is a 7 year old lilac white British short hair cat that lives with us. Leela had a sister who used to live with us as well but she developed a heart condition and passed away last year. Witnessing how quickly such conditions develop and evaluate we thought that we can do something to monitor Leelas health a bit to just have some sort of pre-alert if something is changing.

Kid in a Candystore

As this Internet of Things is becoming a real thing these days I found myself in a candy store when I’ve encountered that there are a couple of really really cheap options to get a small PCB with input/output connectors into my house WiFi network.

One of the main actors of this story is the so called ESP8266. A very small and affordable system-on-a-chip that allows you to run small code portions and connect itself to a wireless network. Even better it comes with several inputs that can be used to do all sorts of wonderful things.

And so it happened that we needed to know the weight of our cat. She seemed to get a bit chubby over time and having a point of reference weight would help to get her back in shape. If you every tried to weigh a cat you know that it’s much easier said than done.

The alternative was quickly brought up: Build a WiFi-connected scale to weigh her litter box every time she is using it. And since I’ve recently bought an evaluation ESP8266 I just had to figure out how to build a scale. Looking around the house I’ve found a broken human scale (electronics fried). Maybe it could be salvaged as a part donor?

A day later I’ve done all the reading on that there is a thing called “load-cell”. Those load cells can be bought in different shapes and sizes and – when connected to a small ADC they deliver – well – a weight value.

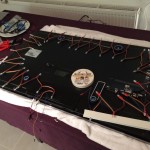
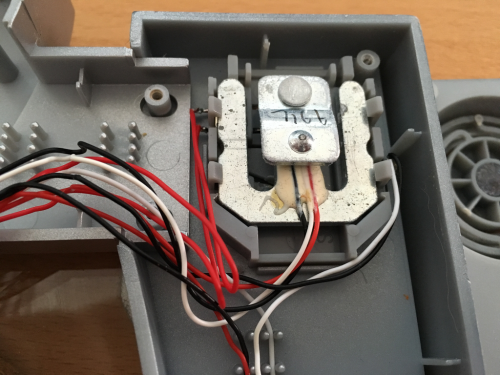
I cracked the human scale open and tried to see what was broken. It luckily turned out to have completely fried electronics but the load-cells where good to go.
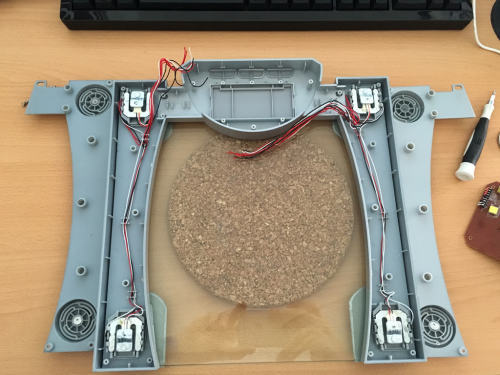
Look at this load cell:
Hardware

That brought down the part list of this project to:

  • an ESP8266 – an Adafruit Huzzah in my case
  • a HX711 ADC board to amplify and prepare the signal from the load-cells
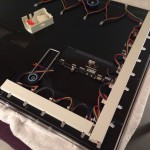
  • a human scale with just enough space in the original case to fit the new electronics into and connect everything.

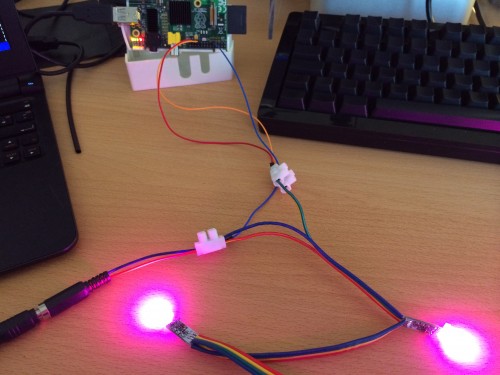
The HX711 board was the only thing I had to order hardware wise – delivered the next day and it was a matter of soldering things together and throwing in a small Arduino IDE sketch.

My soldering and wiring skills are really sub-par. But it worked from the get-go. I was able to set-up a small Arduino sketch and get measurements from the load-cells that seemed reasonable.
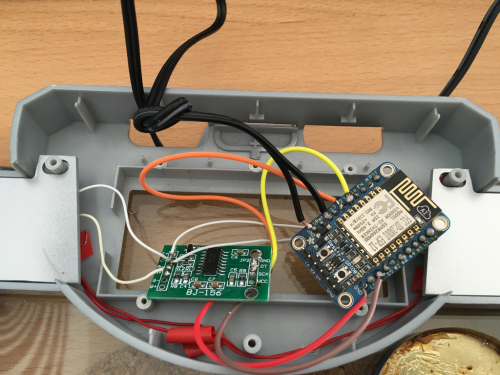
Now the hardware was all done – almost too easy. The software would be the important part now. In order to create something flexible I needed to make an important decision: How would the scale tell the world about it’s findings?

Software

Two basic options: PULL or PUSH?

Pull would mean that the ESP8266 would offer a webservice or at least web-server that exposes the measurements in one way or the other. It would mean that a client needs to poll for a new number in regular intervals.

Push would mean that the ESP8266 would connect to a server somewhere and whenever there’s a meaningful measurement done it would send that out to the server. With this option there would be another decision of which technology to use to push the data out.

Now a bit of history: At that time I was just about to re-implement the whole house home automation system I was using for the last 6 years with some more modern/interoperable technologies. For that project I’ve made the decision to have all events (actors and sensors) as well as some additional information being channeled into MQTT topics.

Let’s refer to Wikipedia on this:

“MQTT1 (formerly MQ Telemetry Transport) is an ISO standard (ISO/IEC PRF 20922) publish-subscribe-based “lightweight” messaging protocol for use on top of the TCP/IP protocol. It is designed for connections with remote locations where a “small code footprint” is required or the network bandwidth is limited. The publish-subscribe messaging pattern requires a message broker. Thebroker is responsible for distributing messages to interested clients based on the topic of a message. Andy Stanford-Clark and Arlen Nipper of Cirrus Link Solutions authored the first version of the protocol in 1999.”

Something build for oil-pipelines can’t be wrong for your house – can it?

So MQTT uses the notation of a “topic” to sub-address different entities within it’s network. Think of a topic as just a simple address like “house/litterbox/weight”. And with that topic MQTT allows you to set a value as well.

The alternative to MQTT would have been things like WebSockets to push events out to clients. The decision for the home-automation was done towards MQTT and so far it seems to have been the right call. More and more products and projects available are also focussing on using MQTT as their main message transport.

For the home automation I had already set-up a demo MQTT broker in the house – and so naturally the first call for the litterbox project was to utilize that.

The folks of Adafruit provide the MQTT library with their hardware and within minutes the scale started to send it’s measurements into the “house/litterbox/weight” topic of the house MQTT broker.

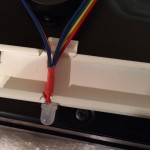
Some tweaking and hacking later the litterbox was put together and the actual litterbox set on-top.

Since Adafruit offers platform to also send MQTT messages towards and create neat little dashboards I have set-up a little demo dashboard that shows a selection of data being pushed from the house MQTT broker to the Adafruit.io MQTT broker.

These are the raw values which are sent into the weight topic:

You can access it here: https://io.adafruit.com/bietiekay/stappenbach

So the implementation done and used now is very simple. On start-up the ESP8622 initialises and resets the weight to 0. It’ll then do frequent weight measurements at the rate it’s configured in the source code. Those weight measurements are being monitored for certain criteria: If there’s a sudden increase it is assumed that “the cat entered the litterbox”. The weight is then monitored and averaged over time. When there’s a sudden drop of weight below a threshold that last “high” measurement is taken as the actual cat weight and sent out to a /weight topic on MQTT. The regular measurements are sent separately to also a configurable MQTT topic.

You can grab the very ugly source code of the Arduino sketch here: litterbox_sourcecode

And off course with a bit of logic this would be the calculated weight topic:
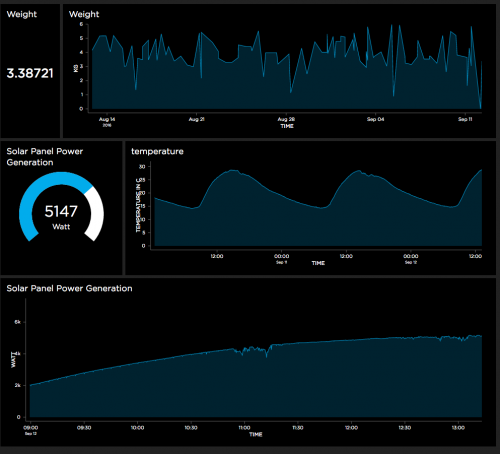
Of course it is not enough to just send data into MQTT topics and be done with it. Of course you want things like logging and data storage. Eventually we also wanted to get some sort of notification when states change or a measurement was taken.

MQTT, the cloud and self-hosted

Since MQTT is enabling a lot of scenarios to implement such actions I am going to touch just the two we are using for our house.

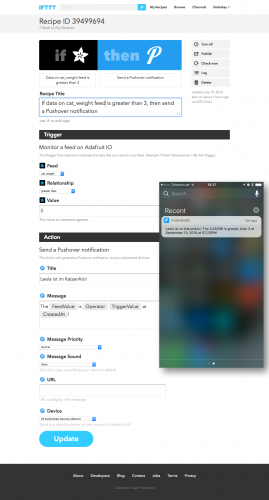
  1. We wanted to get a push notification to our phones whenever a weight measurement was taken – essentially whenever the cat has done something in the litterbox. The easiest solution: Set-Up a recipe on If This Than That (IFTTT) and use PushOver to send out push notifications to whatever device we want.
  2. To log and monitor in some sort of a dashboard the easiest solution seemed to be Adafruits offer. Of course hosted inside our house a combination of InfluxDB to store, Telegraf to gather and insert into InfluxDB and Chronograf to render nice graphs was the best choice.

Since most of the above can be done in the cloud (as of: outside the house with MQTT being the channel out) or inside the house with everything self-hosted. Some additional articles will cover these topics on this blog later.

There’s lots of opportunity to add more logic but as far as our experiments and requirements go we are happy with the results so far – we now regularly get a weight and the added information of how often the cat is using her litterbox. Especially for some medical conditions this is quite interesting and important information to have.
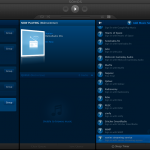
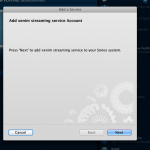
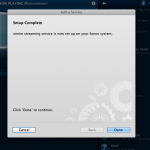
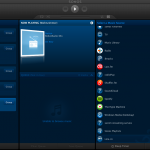
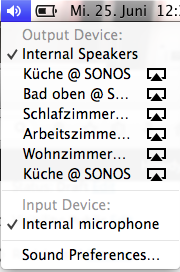
the xenim streaming network SONOS integration now plays recent shows!


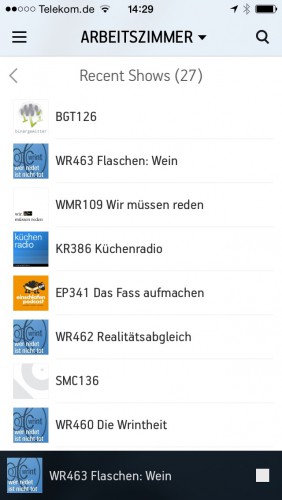
Since I am frequently using the xenim streaming network service but I was missing out on the functionality to replay recent shows. With the wonderful functionality of Re-Live made available through ReliveBot  I have now added this replay feature and I am using it a lot since.

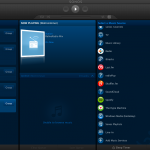
Within the SONOS controller app it looks like this:

Screen Shot 2015-07-31 at 14.22.13

IMG_3551

To set-up this service with your SONOS set-up just follow the instructions shown here: a new Music Service for SONOS

Source 1: xenim streaming network
Source 2: ReliveBot
Source 3: Download the Custom Service
Source 4: a new Music Service for SONOS

I wish there was: cheap network microphones with open source speech recognition

I was on a business trip the other day and the office space of that company was very very nice. So nice that they had all sorts of automation going on to help the people.

For example when you would run into a room where there’s no light the system would light up the room for you when it senses your presence. Very nice!

There was some lag between me entering the room, being detected and the light powering up. So while running into a dark room, knowing I would be detected and soon there would be light, I shouted “Computer! Light!” while running in.

That StarTrek reference brought an old idea back that it would be so nice to be able to control things through omnipresent speech recognition.

I am aware that there’s Siri, Cortana, Google Now. But those things are creepy because they involve external companies. If there are things listening to me all day every day, I want them to be within the premise of the house. I want to know exactly down to the data flow what is going on and sent where. I do not want to have this stuff leave the house at any times. Apart from that those services are working okayish but well…

Let alone the hardware. Usually the existing assistants are carried around in smart phones and such. Very nice if you want to touch things prior to talking to them. I don’t want to. And no, “Hey Siri!” or “OK Google” is not really what I mean. Those things are not sophisticated enough yet. I was using “Hey Siri!” for less than 24 hours. Because in the first night it seemed to have picked up something going on while I was sleeping which made it go full volume “How can I help!” on me. Yes, there’s no “don’t listen when I am sleeping” thing. Oh it does not know when I am sleeping. Well, you see: Why not?

Anyway. What I wish there was:

  • cheap hardware – a microphone(-array) possibly to put into every room. It either needs to have WiFi or LAN. Something that connects it to the network. A device that is carried around is not enough.
  • open source speech recognition – everything that is collected by the microphone is processed through an open source speech recognition tool. Full text dictation is a bonus, more importantly heavy-duty command recognition and simple interactions.
  • open source text to speech – to answer back, if wanted

And all that should be working on a basic level without internet access. Just like that.

So? Any volunteers?

when you’re working late: grant your eyes a rest

“Ever notice how people texting at night have that eerie blue glow?

Or wake up ready to write down the Next Great Idea, and get blinded by your computer screen?

During the day, computer screens look good—they’re designed to look like the sun. But, at 9PM, 10PM, or 3AM, you probably shouldn’t be looking at the sun.

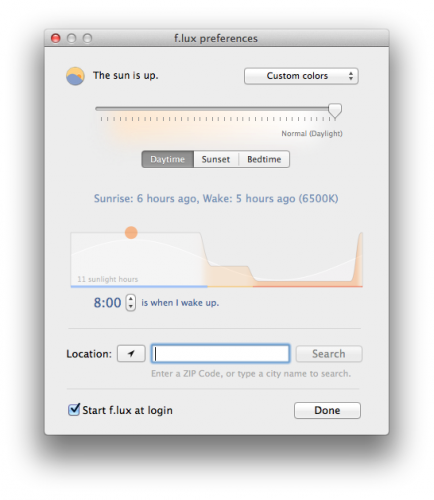
f.lux fixes this: it makes the color of your computer’s display adapt to the time of day, warm at night and like sunlight during the day.

It’s even possible that you’re staying up too late because of your computer. You could use f.lux because it makes you sleep better, or you could just use it just because it makes your computer look better.”

Bildschirmfoto 2014-09-27 um 12.58.33

Source: https://justgetflux.com/

a new Music Service for SONOS: xenim streaming network

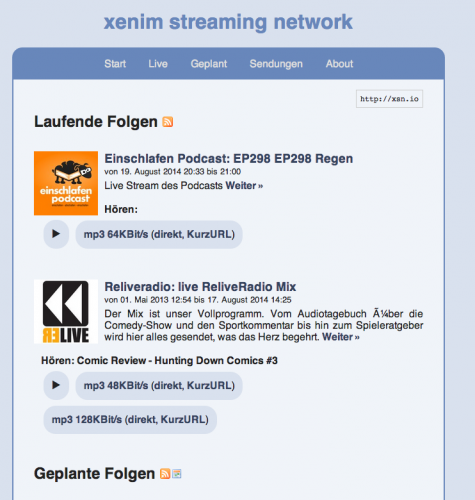
I am a frequent podcast live-stream listener. And being that I am enjoying the awesome service called xenim streaming network.

Bildschirmfoto 2014-08-19 um 21.03.21

Any Podcast producer can join the xsn and with that can live-stream his own Podcast while recording. It’s CDN is based on voluntarily provided resources and pretty rock-solid as far as my experience with it goes.

Since I am a frequent user of this – and I’ve got that gorgeous SONOS hardware scattered around my house – I thought I need to have that service integrated into my SONOS set.

The SONOS system knows the concept of “Music Services”. There are quite a lot of them but xsn is missing. But SONOS is awesome and they got an API!

Unfortunately the API documentation is hidden behind a NDA wall so that would be a no-go. What’s not hidden is what the SONOS controllers have to discuss with all the existing services. Most of the time these do not use HTTPS so we’re free to listen to the chatters. I did just that and was able, for the sake of interoperability, to reverse engineer the SONOS SMAPI as far as it is necessary to make my little xsn Music Service work.

As usual you can get the source-code distributed freely through Github. If you’re not into that sort of compiling and programming things, you are invited to use my free-of-charge provided service. To set it up on your home SONOS just follow these simple steps:

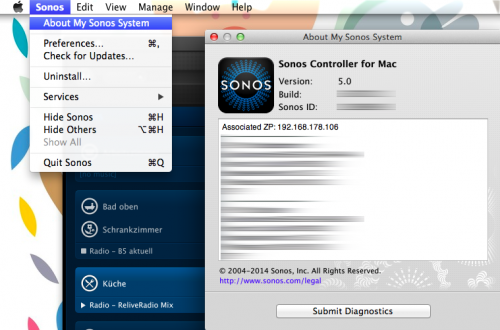
Step 1: Start your SONOS Controller Application and find out the IP address of your SONOS.

Click on “About My Sonos System” and check the IP address written next to the “Associated ZP”.

Screen Shot 2014-08-19 at 19.45.56

Step 2: Add the xsn Music Service.

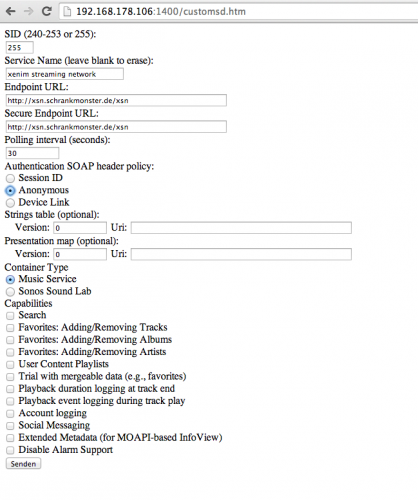
By opening a browser window and browsing to: http://<your-associated-zp-ip>:1400/customsd.htm

When you’re there – fill out the fields as below. The SID is either 255, or if you used that previously, something between 240-253. The service name is “xenim streaming network”. The Endpoint URL and Secure Endpoint URL both are http://xsn.schrankmonster.de/xsn

Set the Polling interval to 30 seconds. Click on the Anonymous Authentication SOAP header policy and you’re good to go. Click on “send” to finish.

Bildschirmfoto 2014-08-19 um 21.16.27

Step 3: Add the new Music Service to your SONOS Controller.

Click on “Add Music Services” and click through until you see “xenim streaming network”. Add the service and you’re set!

p.s.: It’s normal that the service icon is a question mark.

Step 4: Enjoy Live Podcasts!

Source 1: https://github.com/bietiekay/sonos-xsn-service
Source 2: http://streams.xenim.org/

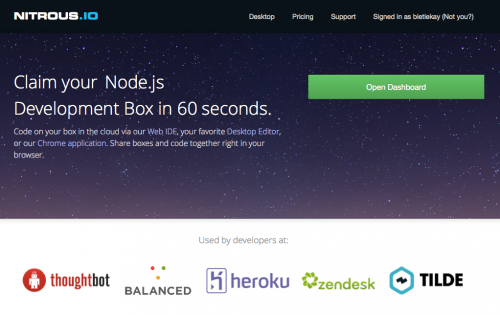
Nitrous – full IDE in your browser – with Collaboration!

“Nitrous is a backend development platform which helps software developers save time by cutting out the repetitive parts of creating development environments and automating them.

Once you create your first development environment, there are many features which will make development easier.”

Bildschirmfoto 2014-07-06 um 11.38.49

So what you’re getting is:

  • a virtual machine operated for you and set-up with a single click
  • A full-featured IDE in your browser
  • Code-Collaboration by inviting others to edit your project
  • a debugging environment in which you can test-run and work with your code

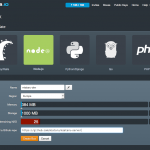
Here are some screenshots to get you a feel for it:

Source: https://www.nitrous.io/

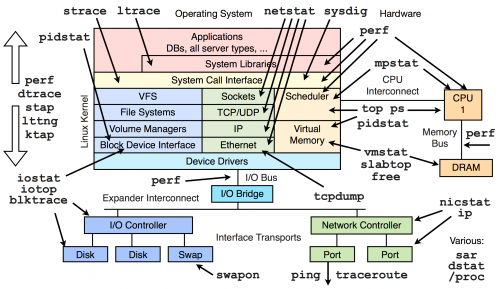
Scaling Linux: Perfomance Tools and Measurements


If you ever experienced a missmatch between the performance you expected from a server or application running on Linux you probably started to debug your way into it why the applications performance is not on the expected levels.

With Linux being very mature you get an enormous amounts of helpers and interfaces to debug the performance aspects of the operating system and the applications.

Want to see proof? Here – a map of almost all the thingies and interfaces you got:linuxperftools

Thankfully Brendan Gregg put together a page with videos and further links to drill into those interfaces and methods above.

Source: http://www.brendangregg.com/linuxperf.html

Boblight Alternative: Hyperion

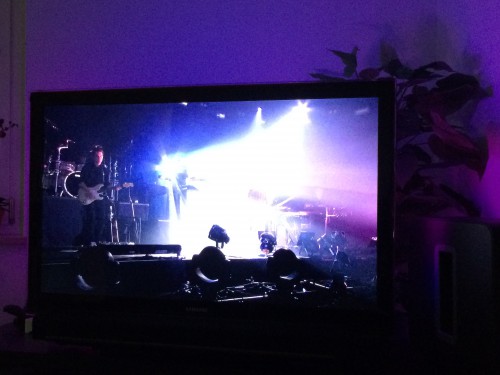
After setting up Boblight on two TVs in the house – one with 50 and one with 100 LEDs – I’ve used it for the last 5 months on a daily basis almost.

First of all now every screen that does not come with “added color-context” on the wall seems off. It feels like something is missing. Second of all it has made watching movies in a dark room much more enjoyable.

The only concerning factor of the past months was that the RaspberryPi does not come with a lot of computational horse-power and thus it has been operating at it’s limits all the time. With 95-99% CPU usage there’s not a lot of headroom for unexpected bitrate spikes and what-have-you.

So from time to time the Pis where struggling. With 10% CPU usage for the 50 LEDs and 19% CPU usage for the 100 LEDs set-up there was just not enough CPU power for some movies or TV streams in Full-HD.

Hyperion

So since even overclocking only slightly improved the problem of Boblight using up the precious CPU cycles for a fancy light-show I started looking around for alternatives.

“Hyperion is an opensource ‘AmbiLight’ implementation controlled using the RaspBerry Pi running Raspbmc. The main features of Hyperion are:

  • Low CPU load. For a led string of 50 leds the CPU usage will typically be below 1.5% on a non-overclocked Pi.
  • Json interface which allows easy integration into scripts.
  • A command line utility allows easy testing and configuration of the color transforms (Transformation settings are not preserved over a restart at the moment…).
  • Priority channels are not coupled to a specific led data provider which means that a provider can post led data and leave without the need to maintain a connection to Hyperion. This is ideal for a remote application (like our Android app).
  • HyperCon. A tool which helps generate a Hyperion configuration file.
  • XBMC-checker which checks the playing status of XBMC and decides whether or not to capture the screen.
  • Black border detector.
  • A scriptable effect engine.
  • Generic software architecture to support new devices and new algorithms easily.

More information can be found on the wiki or the Hyperion topic on the Raspbmc forum.”

Especially the Low CPU load did raise interest in my side.

Setting Hyperion up is easy if you just follow the very straight-forward Installation Guide. On Raspbmc the set-up took me 2 minutes at most.

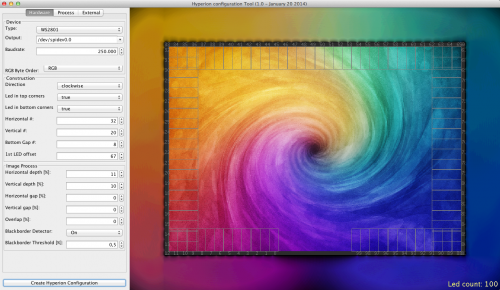
If you got everything set-up on the Pi you need to generate a configuration file. It’s a nice JSON formatted config file that you do not need to create on your own – Hyperion has a nice configuration tool. Hypercon:

Screen Shot 2014-06-28 at 08.52.51

So after 2 more minutes the whole thing was set-up and running. Another 15 minutes of tweaking here and there and Hyperion replaced Boblight entirely.

What have I found so far?

  1. Hyperions network interfaces are much more controllable than those from Boblight. You can use remote clients like on iPhone / Android to set colors and/or patterns.
  2. It’s got effects for screen-saving / mood-lighting!
  3. It really just uses a lot less CPU resources. Instead of 19% CPU usage for 100 LEDs it’s down to 3-4%. That’s what I call a major improvement
  4. The processing filters that you can add really add value. Smoothing everything so that you do not get bright flashed when content flashes on-screen is easy to do and really helps with the experience.

All in all Hyperion is a recommended replacement for boblight. I would not want to switch back.

Source 1: Setting up Boblight
Source 2: https://github.com/tvdzwan/hyperion/wiki/Installation

using the RaspberryPi to make all SONOS speakers support Apple Airplay

Airplay allows you to conveniently play music and videos over the air from your iOS or Mac OS X devices on remote speakers.

Since we just recently “migrated” almost all audio equipment in the house to SONOS multi-room audio we were missing a bit the convenience of just pushing a button on the iPad or iPhones to stream audio from those devices inside the household.

To retrofit the Airplay functionality there are two options I know of:

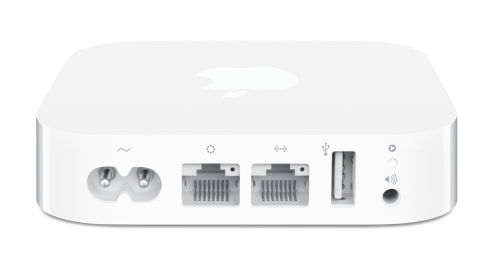
1: Get Airplay compatible hardware and connect it to a SONOS Input.

airportexpress_2012_back-285111You have to get Airplay hardware (like the Airport Express/Extreme,…) and attach it physically to one of the inputs of your SONOS Set-Up.  Typically you will need a SONOS Play:5 which has an analog input jack.
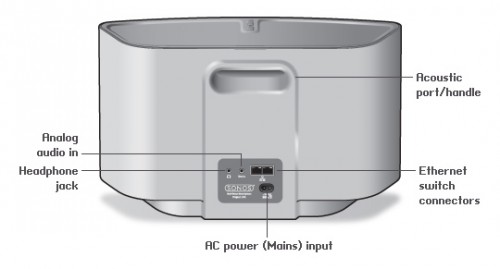
PLAY5_back

2: Set-Up a RaspberryPi with NodeJS + AirSonos as a software-only solution

You will need a stock RaspberryPi online in your home network. Of course this can run on virtually any other device or hardware that can run NodeJS. For the Pi setting it up is a fairly straight-forward process:

You start with a vanilla Raspbian Image. Update everything with:

sudo apt-get update

sudo apt-get upgrade

Then install NodeJS according to this short tutorial. To set-up the AirSonos software you will need to install additional avahi software. Especially this was needed for my install:

sudo apt-get install git-all libavahi-compat-libdnssd-dev

You then need to get the AirSonos software:

sudo npm install airsonos -g

After some minutes of wait time and hard work by the Pi you will be able to start AirSonos.

sudo airsonos

And it’ll come up with an enumeration of all active rooms.

Screen Shot 2014-06-25 at 11.38.47

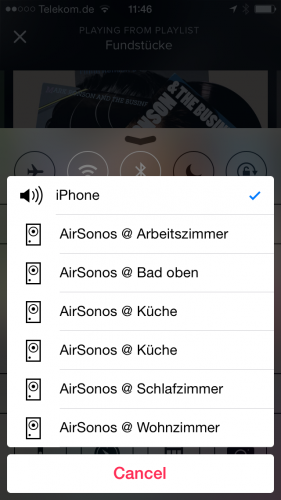
And on all your devices it’ll show up like this:

IMG_1046

and

Screen Shot 2014-06-25 at 12.38.27


Source: https://github.com/stephen/airsonos

MOSH (Mobile Shell) – fixing SSH for everyone

How many times did you experience a connection loss on your terminal window in the last week? Yeah I know – like everytime you close the lid of your notebook and move to a different place. So like a dozen times every day.

And everytime you reconnect to your servers and you use things like screen to keep your terminals open and your programs running while you’re disconnected.

On the other hand – did you ever curse the internet gods while you tried to do a very important check or bugfix to a machine whilst on a train or mobile roaming network? It’s not what I would call fun-times. When there are no constant disconnects the lag is just infuriating. MOSH also solves this since it’s predicting and responding way faster then vanilla SSH. Your terminal becomes useable again!

So there’s now MOSH to the rescue:

Remote terminal application that allows roaming, supports intermittent connectivity, and provides intelligent local echo and line editing of user keystrokes.
Mosh is a replacement for SSH. It’s more robust and responsive, especially over Wi-Fi, cellular, and long-distance links.
Mosh is free software, available for GNU/Linux, FreeBSD, Solaris, Mac OS X, and Android.

[youtube]http://www.youtube.com/watch?v=XsIxNYl0oyU[/youtube]

Install it on your servers and your clients and never lose a connection again.

Source 1: http://www.gnu.org/software/screen/
Source 2: http://mosh.mit.edu

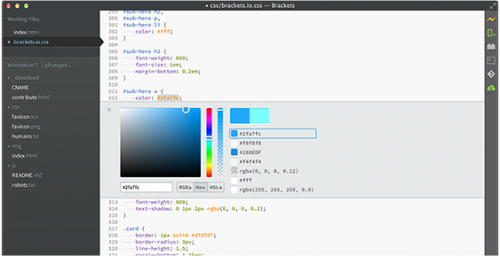
Brackets: a multi-platform editor written in javascript – including NodeJS

“Brackets is an open source code editor for web designers and front-end developers.”

hero

On the first tries it’s an awesome thing to have all that JavaScript debugging, Live HTML editing and what-not in one place. Give it a spin.

[youtube]https://www.youtube.com/watch?v=T6d5C3rLeFY[/youtube]

Source 1: http://brackets.io/

How to fix a mono CS0589 Internal compiler error during parsingSystem.FormatException error on the RaspberryPi

When you want to compile some C# code using MONO on Linux on your RaspberryPi and you encounter this strange error message:

error CS0589: Internal compiler error during parsingSystem.FormatException

You need to do:

  1. Update your Debian by running:

    sudo apt-get upgrade
    sudo apt-get update

  2. Upgrade your RaspberryPi firmware:

    sudo rpi-update

  3. Reboot your RaspberryPi
  4. Retry compiling – should work now.

The reason for Mono to crap out like above: Previous Mono versions and RaspberryPi firmwares where not compatible due to one side using HardFP and the other not.

ZFS Tutorial

“ZFS is really the final word in filesystems. With a feature set longer than this tutorial, it can take a while to master. You can set many more options per dataset, enable disk usage quotes and much more. Once you’ve used it and seen the benefits, you’ll probably never want to use anything else. Hopefully this has been helpful to get you on your way to becoming a FreeBSD ZFS master.”

Source: http://www.bsdnow.tv/tutorials/zfs

On-Screen OCR – helps you when all you get is an image…

“You want to extract one paragraph of text from a pdf your coworker sent you? One quote from your professor’s presentation? A couple of code lines from this tutorial clip on your favourite movie platform? It’s just one hotkeypress away. OCR everything on the fly.

Condense is the product of many frustating years of using overly complicated OCR software. “Take a screenshot, boot up your OCR suite, select the area you want to extract, select an output file…” Oftentimes typing out is faster than walking through this procedure.”

[youtube]http://www.youtube.com/watch?v=hLqVLplAD8w[/youtube]

Source 1: http://www.condenseapp.com/

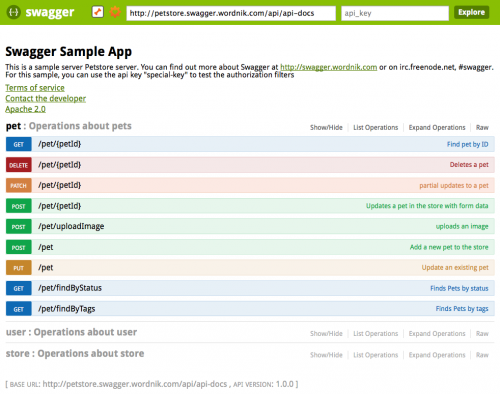
document your REST interfaces with style: Swagger

Swagger is a specification and complete framework implementation for describing, producing, consuming, and visualizing RESTful web services. The overarching goal of Swagger is to enable client and documentation systems to update at the same pace as the server. The documentation of methods, parameters, and models are tightly integrated into the server code, allowing APIs to always stay in sync. With Swagger, deploying managing, and using powerful APIs has never been easier.”

Bildschirmfoto 2014-03-15 um 22.35.09

Source 1: https://helloreverb.com/developers/swagger
Source 2: https://github.com/wordnik/swagger-core
Source 3: http://petstore.swagger.wordnik.com/#!/pet

GraphHopper: blazingly fast routes with OpenStreetMap

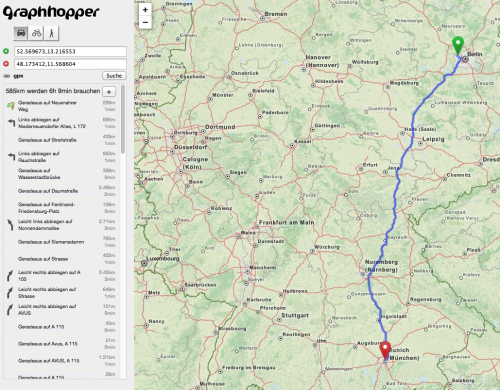
Playing with OpenStreetMap resources lately I came to the point where I wanted to calculate routes between points based on the OSM data. Now there is GraphHopper to the rescue! It’s opensource and awesome!

“GraphHopper offers memory efficient algorithms in Java for routing on graphs. E.g. Dijkstra and A* but also optimized road routing algorithms like Contraction Hierarchies. It stands under the Apache License and is build on a large test suite.”

GraphHopper
Source 1: http://graphhopper.com

setting up boblight with a Raspberry Pi and RaspBMC

Some might know AmbiLight – a great invention by Philips that projects colored light around a TV screen based upon the contents shown. It’s a great addition to a TV but naturally only available with Philips TV sets.

Not anymore. There are several open-source projects that allow you to build your very own AmbiLight clone. I’ve built one using a 50-LEDs WS2801 stripe, a 5V/10A power supply, a RaspberryPi, and the BobLight integration in RaspBMC (this is a nice XBMC distribution for the Pi).

Boblight is a collection of tools for driving lights connected to an external controller.

Its main purpose is to create light effects from an external input, such as a video stream (desktop capture, video player, tv card), an audio stream (jack, alsa), or user input (lirc, http). Boblight uses a client/server model, where clients are responsible for translating an external input to light data, and boblightd is responsible for translating the light data into commands for external light controllers.”

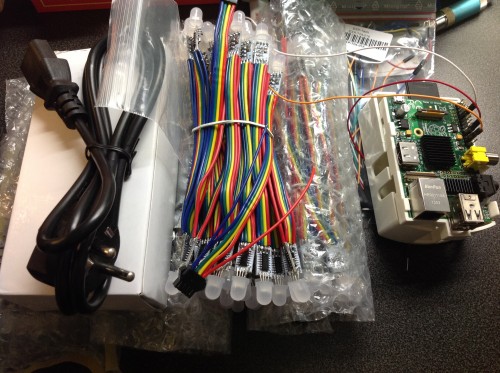
The hardware to start with looks like this:

pre_requisites

I’ve fitted some heat-sinks to the Pi since the additional load of controlling 50 LEDs will add a little bit of additional CPU usage which is desperately needed when playing Full HD High-Bitrate content.

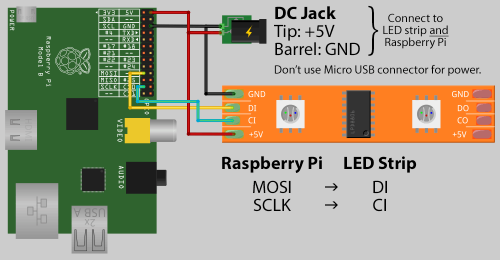
The puzzle pieces need to be put together as described by the very good AdaFruit diagram:

diagramAs you can see the Pi is powered directly through the GPIO pins. You’re not going to use the MicroUSB or the USB ports to power the Pi. It’s important that you keep the cables between the Pi and the LEDs as short as possible. When I added longer / unshielded cables everything went flickering. You do not want that – so short cables it is :-)

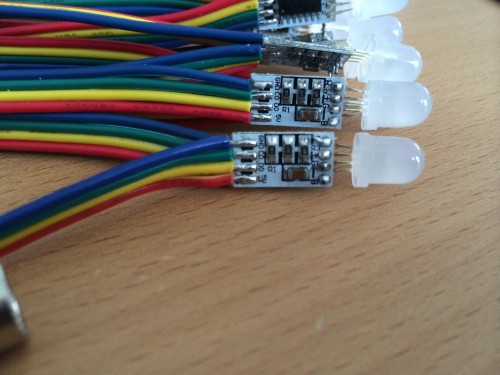
leds

When you look at aboves picture closely you will find a CO and DO on the PCB of the LED. on the other side of the PCB there’s a CI and DI. Guess what: That means Clock IN and Clock OUT and Data IN and Data OUT. Don’t be mistaken by the adapter cables the LED stripes comes with. My Output socket looked damn close to something I thought was an Input socket. If nothing seems to work on the first trials – you’re holding it wrong! Don’t let the adapters fitted by the manufacturer mislead you.

Depending on the manufacturer of your particular LED stripe there are layouts different from the above image possible. Since RaspBMC is bundled with Boblight already you want to use something that is compatible with Boblight. Something that allows Boblight to control each LED in color and brightness separately.

I opted for WS2801 equipped LEDs. This pretty much means that each LED sits on it’s own WS2801 chip and that chip takes commands for color and brightness. There are other options as well – I hear that LDP8806 chips also work with Boblight.

My power supply got a little big to beefy – 10 Amps is plenty. I originally planned to have 100 LEDs on that single TV. Each LED at full white brightness would consume 60mA  – which brings us to 6Amps for a 100 – add to that the 2 Amps for the PI and you’re at 8A. So 10A was the choice.

To connect to the Pi GPIO Pins I used simple jumper wires. After a little bit of boblightd compilation on a vanilla Raspbian SD card (how-to here). Please note that with current RaspBMC versions you do not need to compile Boblight yourself – I’ve just taken for debugging purposes as clean Raspbian Image and compiled it myself to do some boblight-constant tests. Boblight-constant is a tool that comes with Boblight which allows you to set all LEDs to one color.

If everything is right, it should look like this:

working_first_timeNow everything depends on how your LED stripes look like and how your TVs backside looks like. I wanted to fit my setup to a 42″ Samsung TV. This one already is fitted with a Ultra-Slim Wall mount which makes it pretty much sitting flat on the wall like a picture. I wanted the LEDs to sit right on the TVs back and I figured that cable channels when cut would do the job pretty nicely.

To get RaspBMC working with your setup the only things you need to do are:

  1. Enable Boblight support in the Applications / RaspBMC tool
  2. Login to your RaspBMC Pi through SSH with the user pi password raspberry and copy your boblight.conf file to /etc/boblight.conf.

The configuration file can be obtained from the various tutorials that deal with the boblight configuration. You can choose the hard way to create a configuration or a rather easy one by using the boblight configuration tool.

I’ve used the tool :-)

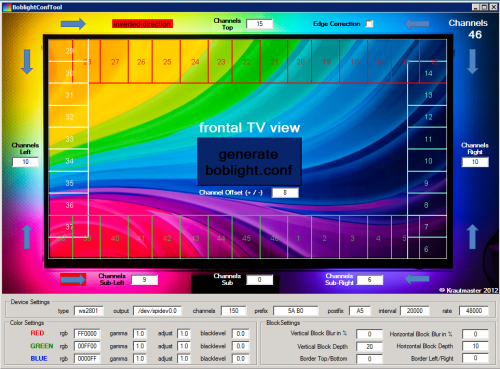
Boblight Config ToolNow if everything went right you don’t have flickering, the TV is on the wall and you can watch movies and what-not with beautiful light effects around your TV screen. If you need to test your set-up to tweak it a bit more, go with this or this.

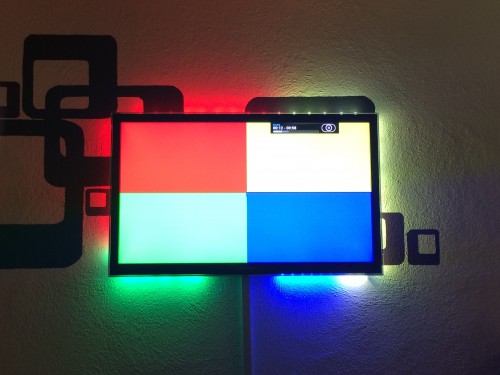
result_1

Source 1: http://en.wikipedia.org/wiki/Ambilight
Source 2: http://www.raspberrypi.org/
Source 3: https://code.google.com/p/boblight/
Source 4: http://www.raspbmc.com/
Source 5: http://learn.adafruit.com/light-painting-with-raspberry-pi/hardware
Source 6: How-To-Compile-Boblight
Source 7: Boblight Config Generator
Source 8: Boblight Windows Config Creation Tool
Source 9: Test-Video 1
Source 10: Test-Video 2

“Compressing” JSON to JSON

JSON_logo
JSON Logo

The internet and all those browsers and javascript applications brought data structures that are pretty straight-forward. One of them is JSON.

The wikipedia tells about JSON:

“JSON (/ˈdʒeɪsɒn/ JAY-soun, /ˈdʒeɪsən/ JAY-son), or JavaScript Object Notation, is an open standard format that uses human-readable text to transmit data objects consisting of attribute–value pairs. It is used primarily to transmit data between a server and web application, as an alternative to XML.”

Unfortunately complex JSON can get a bit heavy on the structure itself with over and over repetitions of data-schemes and ids.

There’s RJSON to the rescue on this. It’s backwards compatible and makes your JSON more compressible:

“RJSON converts any JSON data collection into more compact recursive form. Compressed data is still JSON and can be parsed with JSON.parse. RJSON can compress not only homogeneous collections, but also any data sets with free structure.

RJSON is single-pass stream compressor, it extracts data schemes from document, assign each schema unique number and use this number instead of repeating same property names again and again.”

Of course this is all open-source and you can get your hands dirty here.

Source 1: http://en.wikipedia.org/wiki/JSON
Source 2: http://www.cliws.com/e/06pogA9VwXylo_GknPEeFA/
Source 3: https://github.com/dogada/RJSON

the Miataru Browser Client Application is here!

After getting the server and the iOS client application to the people I’ve sat down and started doing something I have not done yet – writing a web application with no server side except a standard HTTP server.

Here’s a little demonstration which I will explain in more detail below:

[youtube]http://www.youtube.com/watch?v=YHujwbuFwco[/youtube]

The default Miataru service can be accessed through the client application with this URL: http://miataru.com/client – This will open a new browser window with a completely fresh session of the application. Since Miataru is all about control of your own data this webapplication does not store anything on any servers – every access to the internet is read-only and only to the Miataru service (just “GetLocation”). Oh – and by default it uses SSL to encrypt all traffic from and to the Miataru service.

You can start by entering DeviceIDs you know or you can – for test purposes – use a DeviceID I am providing for test purposes: BF0160F5-4138-402C-A5F0-DEB1AA1F4216

Of course, the easiest way is to just embedd the DeviceID into the URL, just like this: http://miataru.com/client/#BF0160F5-4138-402C-A5F0-DEB1AA1F4216

Oh and if you want to see the device moving on your iPhone just use the miataru iOS client and scan this QR code here:

qrcode

So that was easy – but if the application does not store anything on any server, how does it maintain the Known Devices list between browser sessions (open/closes of the browser) you ask? – It’s using HTML5 WebStorage to store these information locally in your browser. This has the advantage of being completely local, but also the disadvantage that it is not shared between browsers or machines.

Like usual this whole application is also available completely free of charge and open-sourced to be used, edited and installed on-premise if you like.

Let me know how you like it!

Source 1: http://miataru.com/client
Source 2: http://miataru.com/client/#BF0160F5-4138-402C-A5F0-DEB1AA1F4216
Source 3: https://github.com/miataru/miataru-webclient
Source 4: http://www.w3schools.com/html/html5_webstorage.asp

full text transcripts of the Apple World Wide Developer Conference (wwdc)

Since I’ve become sort of an iOS developer lately I had my fair share of WWDC recordings to get started with this whole CocoaTouch and Objective-C development stuff.

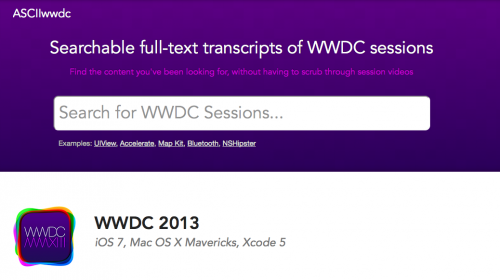
Now a tool that is pretty handy is a this website that offers a full-text transcript search of all WWDC recordings. Awesome!

Bildschirmfoto 2013-11-02 um 00.54.36

Source 1: http://asciiwwdc.com/
Source 2: http://miataru.com/ios

Node.js integrated development environment… sort of

I started working on a Node.js project and so far it’s a quite satisfying experience. But what is Node.js?

Bildschirmfoto 2013-08-25 um 21.38.10

“Node.js is a software platform that is used to build scalable network (especially server-side) applications. Node.js utilizes JavaScript as its scripting language, and achieves high throughput via non-blocking I/O and a single-threaded event loop.

Node.js contains a built-in HTTP server library, making it possible to run a web server without the use of external software, such as Apache or Lighttpd, and allowing more control of how the web server works. Node.js enables web developers to create an entire web application in JavaScript, both server-side and client-side.” (Wikipedia)

There are a lot of things that are approached differently in Node. One of which is how you deal with code and debuggings.

I come from a world of fully integrated development environments. I had that for C#, it’s there for Java, it’s even there for Objective-C.

But with Node and Javascript it’s a bit different. Even the options you have like NetBeans and Eclipse are… well … Netbeans and Eclipse.

So it’s a bit like a toolbox you are supposed to put together yourself. And in this article I want to describe how a 2-week-beginners development environment for Node looks like. If you got anything to improve or add – go ahead, leave a comment!

Source Control

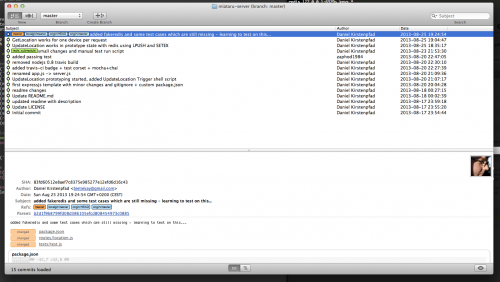
GIT! I am using GitX and command line git to work with the source control. Nothing special really.

Bildschirmfoto 2013-08-25 um 21.29.21

Code Editor

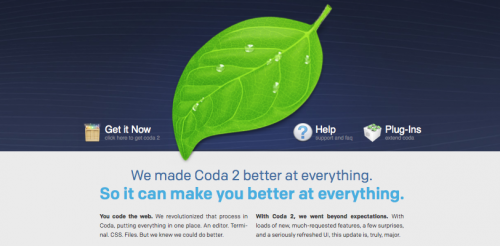
You got a lot of options here. May it be the awesome Sublime Text 2 or Eclipse or NetBeans. I chose Coda 2 since I already got it and was using it for my humble web development intermezzos. It’s awesome and if you’re on Mac you should give it a try!

Bildschirmfoto 2013-08-25 um 22.03.51

Debugging Node.js

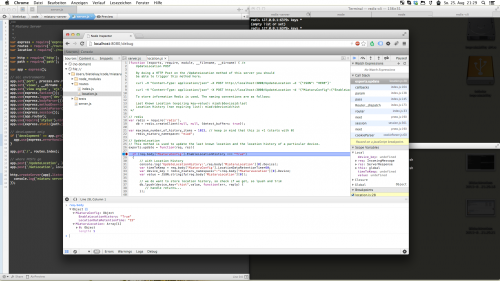
Now things are getting interesting. To debug Node.js applications you have a lot of options from which a lot of them works quite good. Unfortunately I was not able to find the one IDE that provides all in one – great code editing and good debugging. So I chose to use a stand-alone debugging solution that does the trick in the best way I can think of. It’s called node-inspector and is available on all possible platforms as it seems.

It’s basically using the V8 Javascript engine built-in debugging interfaces and making them available through a local website that you can use to debug. And it really works wonders.

Bildschirmfoto 2013-08-25 um 21.29.33

Triggering and Glue

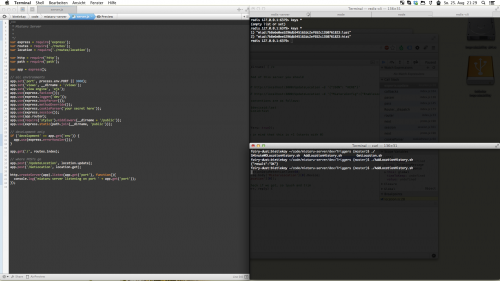
Yeah and the rest of that is a lot of shell. Having at least 4 Terminal windows open and arranged on my desktop alongside the javascript code that I am currently editing.

Bildschirmfoto 2013-08-25 um 21.29.16

There’s only one thing left right now which is hindering the code hacking and debugging. And it’s the fact that Node.js in it’s default state does not reload changed local code files after it loaded them once. And this means: When you edit something you would have to manually restart Node.js to see the changes you just made in effect. And that’s where a little tool called Supervisor comes into play. It watches the files of your project and kills+restarts Node.js automatically for you and takes care of that bugging restart-cycle. It just works!

If course there are some more things in regards of writing tests. But this is going to be another article.

Source 1: http://nodejs.org
Source 2: http://en.wikipedia.org/wiki/Node.js
Source 3: http://panic.com/coda/
Source 4: https://github.com/node-inspector/node-inspector
Source 5: https://github.com/isaacs/node-supervisor

a kilobyte of javascript – js1k

What do you think can you do with 1 kilobyte of javascript? Not a lot you might think. In fact it’s quite a lot!

js1k

Similar to the 4k and 64k demo awards now there is a 1k javascript competition:

“This is a competition about JavaScript scripts no larger than 1k. Starting out as a joke, the first version ended with a serious amount of submissions, prizes and quality.”

So what can you do with 1k of javascript? A lot! Click your way through the demos on the js1k.com site and find a lot like this:

Bildschirmfoto 2013-05-04 um 20.50.54

Source 1: http://js1k.com/
Source 2: http://scene.org/
Source 3: http://awards.scene.org/nominees.php?cat=9

Hyperlapse – a streetview experiment

More and more javascript experiments bubble up on the internets and a particularly interesting one is called “Hyperlapse”:

“Hyper-lapse photography – a technique combining time-lapse and sweeping camera movements typically focused on a point-of-interest – has been a growing trend on video sites. It’s not hard to find stunning examples on Vimeo. Creating them requires precision and many hours stitching together photos taken from carefully mapped locations. We aimed at making the process simpler by using Google Street View as an aid, but quickly discovered that it could be used as the source material. It worked so well, we decided to design a very usable UI around our engine and release Google Street View Hyperlapse.

[vimeo]https://vimeo.com/63653873[/vimeo]

Source 1: http://hyperlapse.tllabs.io/
Source 2: http://labs.teehanlax.com/project/hyperlapse

IPv6 Migrationsleitfaden für die öffentliche Verwaltung

Die verfügbaren IPv4 Adressen neigen sich dem Ende und IPv6 wird kommen. Da gibt es keinen Zweifel! Dieses Weblog beispielsweise ist seit über zwei Jahren nativ über IPv6 erreichbar. Nun wird es mit jedem Monat der ins Land geht immer ‘brenzliger’ und dementsprechend wichtig ist der Schritt unter anderem auch für die öffentliche Verwaltung. Interessante Einblicke gibt dieses umfangreiche Dokument:

Bildschirmfoto 2013-05-04 um 20.15.28
downloadbares 270 Seiten PDF

“Seit den Anfangstagen des Internets wird zur Übertragung der Daten das Internet Protokoll in der Version 4 (IPv4) verwendet. Heute wird dieses Protokoll überall verwendet auch in den internen Netzen von Behörden und Organisationen. Das Internet und alle Netze, welche IPv4 heute verwenden, stehen vor einem tiefgreifenden technischen Wandel, denn es ist zwingend für alle zum Nachfolger IPv6 zu wechseln.

Auf die oft gestellte Frage, welche wesentlichen Faktoren eine Migration zu IPv6 vorantreiben, gibt es zwei zentrale Antworten:

  • Es gibt einen Migrationszwang der auf die jetzt schon (in Asien) nicht mehr verfügbaren IPv4-Adressen zurückführen ist.
  • Mit dem steigenden Adressbedarf für alle Klein- und Großgeräte, vom Sensor über Smartphones bis zur Waschmaschine, die über IP-Netze kommunizieren müssen verschärft sich das Problem der zur Neige gegangenen IPv4-Adressräume. Das Zusammenkommen beider Faktoren beschleunigt den Antrieb zur IPv6-Migration.

Es wird in Zukunft viele Geräte geben, die nur noch über eine IPv6-Adresse anstatt einer IPv4-Adresse verfügen werden und nur über diese erreichbar sind. Schon heute ist bei den aktuellsten Betriebssystemversionen IPv6 nicht mehr ohne Einschränkungen deaktivierbar. Restliche IPv4-Adressen wird man bei Providern gegen entsprechende Gebühren noch mieten können. Bei einem Providerwechsel im Kontext einer Neuausschreibung von Dienstleistungen wird man diese jedoch nicht mehr ‘mitnehmen’ können. Damit bedeutet eine Migration zu IPv6 nicht nur die garantierte Verfügbarkeit ausreichend vieler IP-Adressen, sondern stellt auch die Erreichbarkeit eigener Dienstleistungen für die Zukunft sicher ohne von einem Anbieter abhängig zu sein.”

Source 1: IPv6 Migrationsleitfaden für die öffentliche Verwaltung
Source 2: IPv6-Best Practice für die öffentliche Verwaltung

the Panic Status Board is here!

Last year in June I wrote about the concept of a ubiquitous status display of the business in every office. Especially for development and operations it’s pretty important to have important measurements, status codes and project information in front of them all the time.

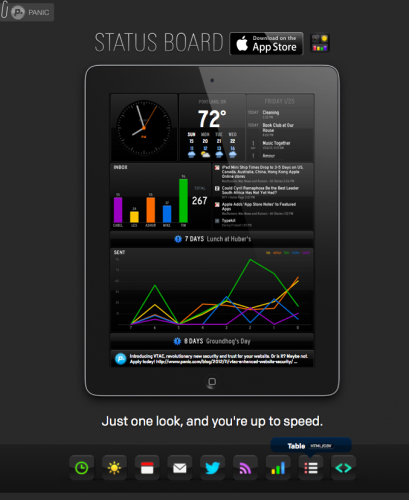
Back then I already wrote about the Panic status board which gives a great looking example of a status display. Now there is a software from the company Panic which offers anyone the ability to create such a status board. It’s for iOS and looks awesome!

Bildschirmfoto 2013-05-04 um 19.56.56

Source 1: Mirror, Mirror on the wallSource 2: http://panic.com/statusboard/

Adobe Photoshop version 1 source code

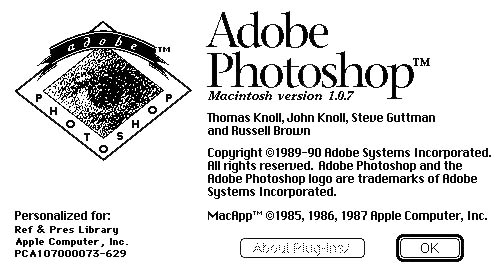
It’s becoming a fashion lately to release the source code of older but legendary commercial products to the public. Now Adobe decided to gift the source code of their flagship product Photoshop in it’s first version from 1990 to the Computer History Museum.

splashscreen

“That first version of Photoshop was written primarily in Pascal for the Apple Macintosh, with some machine language for the underlying Motorola 68000 microprocessor where execution efficiency was important. It wasn’t the effort of a huge team. Thomas said, “For version 1, I was the only engineer, and for version 2, we had two engineers.” While Thomas worked on the base application program, John wrote many of the image-processing plug-ins.”

Source: http://www.computerhistory.org/atchm/adobe-photoshop-source-code/

Automated Picture Tank and Gallery for a photographer

Since my wife started working as a photographer on a daily basis the daily routine of getting all the pictures off the camera after a long day filled with photo shootings got her bored quickly.

Since we got some RaspberryPis to spare I gave it a try and created a small script which when the Pi gets powered on automatically copies all contents of the attached SD card to the houses storage server. Easy as Pi(e) – so to speak.

IMG_2322

So this is now an automated process for a couple of weeks – she comes home, get’s all batteries to their chargers, drops the sd cards into the reader and poweres on the Pi. After it copied everything successfully the Pi sends an eMail with a summary report of what has been done. So far so good – everything is on our backuped storage server then.

Now the problem was that she often does not immediately starts working on the pictures. But she wants to take a closer look without the need to sit in front of a big monitor – like taking a look at her iPad in the kitchen while drinking coffee.

So what we need was a tool that does this:

  • take a folder (the automated import folder) and get all images in there, order them by day
  • display an overview per day of all pictures taken
  • allow to see the fullsized picture if necessary
  • work on any mobile or stationary device in the household – preferably html5 responsive design gallery
  • it should be fast because commonly over 200 pictures are done per day
  • it should be opensource because – well opensource is great – and probably we would need to tweak things a bit

Since I did not find anything near what we had in mind I sat down this afternoon and wrote a tool myself. It’s opensourced and available for you to play with it. Here’s a short description what it does:

It’s called GalleryServer and basically is an embedded http server which takes all .jpg files from a folder (configurable) and offers you some handy tool urls which respons with JSON data for you to work with. I’ve written a very small html user interface with a bit of javascript (using the great html5 kickstart) that allows you to see all available days and get a nice thumbnail overview of each day – when you click on it it opens the full-size image in a new window.

It’s pretty fast because it’s not actively resizing the images – instead it’s taking the thumbnail picture from the original jpg file which the camera placed there during storing the picture. It’s got some caching and can be run on any operating system where mono / .net is available – which is probably anything – even the RaspberryPi.

Source 1: my wifes page
Source 2: 99lime html5 kickstart boilerplate
Source 3: https://github.com/bietiekay/GalleryServer

the ZIP file that never ends…

Everybody knows ZIP files. It’s what comes out when you compress something on windows and on OS X. It’s the commonly used format to store and exchange compressed data.

Now there’s a lot of things you can do when you know file formats, especially those with many algorithms involved, inside out. There is a lot of text explaining the ZIP file format, like this one.

With that knowledge it is possible to create a valid ZIP file that never ends. You might already know ZIP bombs bit this one is a different animal. You computer won’t stop decompressing…

Source 1: http://research.swtch.com/zip
Source 2: http://steike.com/code/useless/zip-file-quine/
Source 3: http://en.wikipedia.org/wiki/Zip_bomb

personal annual reports

The report for 2012 is in! Since 2008 Jehiah Czebotar is monitoring his daily life and he is compiling a report from that data for everyone to read. He self says that this is a hat tip to Nicholas Felton who himself is releasing beautiful yearly reports of statistics around his life.

Bildschirmfoto 2013-01-16 um 15.34.15I am a fan of those nice graphics and statistics about the life. It really gives you insights that you wouldn’t be able to get otherwise. Especially with my own home automation and self-monitoring ambitions it’s quite a load of new ideas coming in from these nice graphics.

Source 1: http://jehiah.cz/one-two/
Source 2: http://www.feltron.com/