how about some big data?

If you need data to fill your brand new (graph) database, go ahead, there’s something to load:

“KONECT (the Koblenz Network Collection) is a project to collect large network datasets of all types in order to perform research in network science and related fields, collected by the Institute of Web Science and Technologies at the University of Koblenz–Landau. KONECT contains over a hundred network datasets of various types, including directed, undirected, bipartite, weighted, unweighted, signed and rating networks. The networks of KONECT are collected from many diverse areas such as social networks, hyperlink networks, authorship networks, physical networks, interaction networks and communication networks. The KONECT project has developed network analysis tools which are used to compute network statistics, to draw plots and to implement various link prediction algorithms. The result of these analyses are presented on these pages. Whenever we are allowed to do so, we provide a download of the networks.”

KONECT currently holds 157 networks, of which

  • 36 are undirected,
  • 51 are directed,
  • 70 are bipartite,
  • 68 are unweighted,
  • 72 allow multiple edges,
  • 6 have signed edges,
  • 10 have ratings as edges,
  • 1 allows multiple weighted edges,
  • and 64 have edge arrival times.

Source 1: http://konect.uni-koblenz.de/

0 A.D. – A free, open-source game

0 A.D. (pronounced “zero-ey-dee”) is a free, open-source, historical Real Time Strategy (RTS) game currently under development by Wildfire Games, a global group of volunteer game developers. As the leader of an ancient civilization, you must gather the resources you need to raise a military force and dominate your enemies.”

Source 1: http://play0ad.com/

my home is my castle – CastleOS: the home automation operating system

And once again some smart people put their heads together and came up with something that will revolutionize your world. Well it’s ‘just’ home automation but indeed it looks very very promising. Especially the human-machine interface through speech recognition. First of all let’s start with a short introductory video:

“CastleOS is an integrated software suite for controlling the automation equipment in your home – an operating system for your castle, if you will. The first piece of the suite is what we call the “Core Service” – it acts as the central controller for the whole system. This runs on any relatively recent Windows computer (or more specifically, the computer that has an Insteon PLM or USB stick plugged in to it), and creates a network connection to both your home automation devices, and the second piece of the integrated suite – the remote access apps like the HTML5 app, Kinect voice control app, and future Android/iOS apps.” (from the CastleOS page)

So it’s said to be an all-in-one system that controls power-outlets and devices through it’s core service and offering the option to add Kinect based speech recognition to say things like “Computer, Lights!”.

Unfortunately it comes with quite high and hard requirements when it comes to hardware it’s compatible with. A kinect possible exists in your household but I doubt that you got the Insteon hardware to control out devices with.

That seems to be the main problem of all current home automation solutions – you just have to have the according hardware to use them. It’s not quite possible to use anything and everything in a standardized way. Maybe it’s time to have a “home plug’n’play” specification set-up for all hard- and software vendors to follow?

Source 1: http://www.castleos.com

putting h.a.c.s. (or other) sensory data into a motion based webcam image

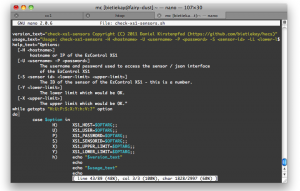
I am using some Raspberry Pis to monitor the areas around the house. Mainly because it’s awesome to see how many animals are roaming around in your garden throughout the day. On the Pi I am using the current Debian image and motion to interface with an USB webcam.

Now I wanted to include sensory data into the webcam images – like the current temperature. The nice thing about h.a.c.s. is that it can deliver every sensors data in nice and easy to use JSON. The only challenge now is to get the number into motion.

First of all I need to get the URL together where I can access sensor data for the right sensor. In this case it’s the sensor called “Schuppen” – an outdoor sensor measuring the current temperature around the house.

Bildschirmfoto 2012-12-16 um 00.37.37

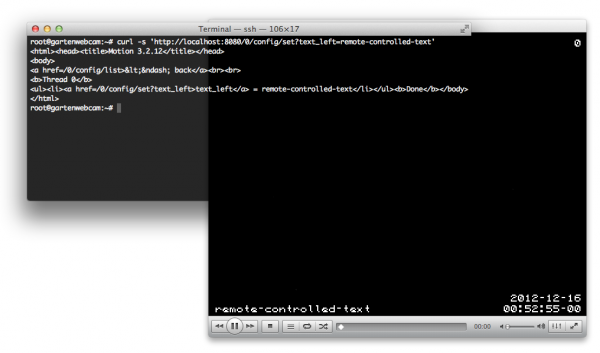
Now there is an easy way to ‘feed’ data into a running motion instance. Motion offers a control port and allows to set the text_left and text_right properties. Doing a simple GET request there allows us to set the text to – in this example – “remote-controlled-text”:

Bildschirmfoto 2012-12-16 um 00.52.56

So – that’s how the text is set – now how to get the temperature value, and just that, out of the JSON response of h.a.c.s.? Easy – use jsawk!

Bildschirmfoto 2012-12-16 um 01.02.07

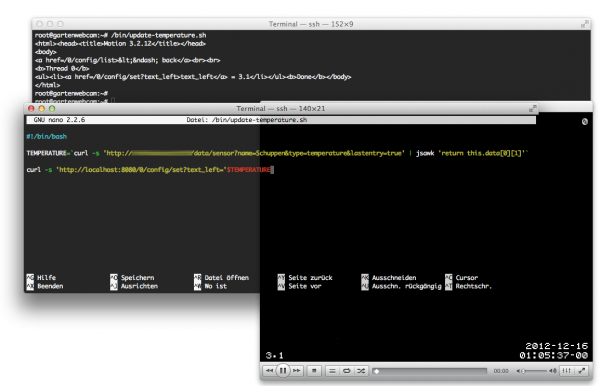
With all that a very small shell script is quickly hacked:

Bildschirmfoto 2012-12-16 um 01.05.38

If you want to copy that into your editor, here’s the code:

#!/bin/bash
TEMPERATURE=`curl -s 'http://hacs/data/sensor?name=Schuppen&type=temperature&lastentry=true' | jsawk 'return this.data[0][1]'`
curl -s 'http://localhost:8080/0/config/set?text_left='$TEMPERATURE

Localhost port 8080 is the port and adress of the motion control server .

To have the webcam updated regularly, I added it to crontab and from now on the current temperature is in every webcam image – hurray!

Source 1: motion
Source 2: jsawk

Build a Brain – SPAUN

SPAUN or Semantic Pointer Architecture Unified Network is a promising next step in the pursuit to simulate a human brain. Built upon the Nengo Neural Simulator scientists at the University in Waterloo/Ontario were able to report on their first break-through results.

In 2013 there will be a book from Oxford University press called ‘How to build a brain’ which will describe in depth what made the astonishing results possible.

But what are the results?

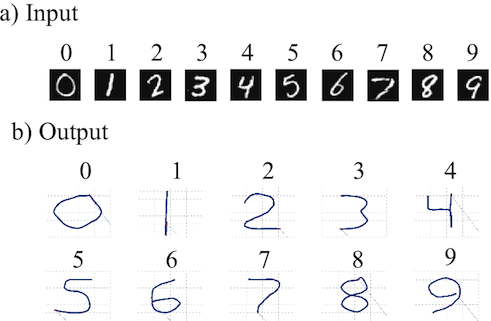
Well that looks like number recognition. In fact that’s what it is. SPAUN – that’s how the scientists refer to their frankenstein-brain – is capable of solving 8 different tasks now. One of them is number recognition. There are videos of all 8 tasks being performed.

The Semantic Pointers are named after the pointers usually common in computer science:

“Higher-level cognitive functions in biological systems are made possible by semantic pointers. Semantic pointers are neural representations that carry partial semantic content and are composable into the representational structures necessary to support complex cognition.

The term ‘semantic pointer’ was chosen because the representations in the architecture are like ‘pointers’ in computer science (insofar as they can be ‘dereferenced’ to access large amounts of information which they do not directly carry). However, they are ‘semantic’ (unlike pointers in computer science) because these representations capture relations in a semantic vector space in virtue of their distances to one another, as typically envisaged by connectionists. “

Source 1: http://nengo.ca/build-a-brain
Source 2: http://nengo.ca/build-a-brain/spaunvideos/


ELV MAX! Cube C# Library – control your cube!

I was asked if it would be possible to get the ELV MAX! Cube interfacing functionality outside of h.a.c.s. – maybe as a library. Sure! That is possible. And to speed up things I give you the ELV MAX! Cube C# Library called: MAXSharp

It’s a plain and simple library without much dependencies – in fact there’s only some threading and the FastSerializer. Since I am using this library with h.a.c.s. as well I did not remove the serializer implementation.

There’s a small demo program included which is called MAXSharpExample. The library itself contains the abstractions necessary to get information from the ELV MAX! Cube. It does not contain functionality to control the cube – if you want to add, feel free it’s all open sourced and I would love to see pull requests!

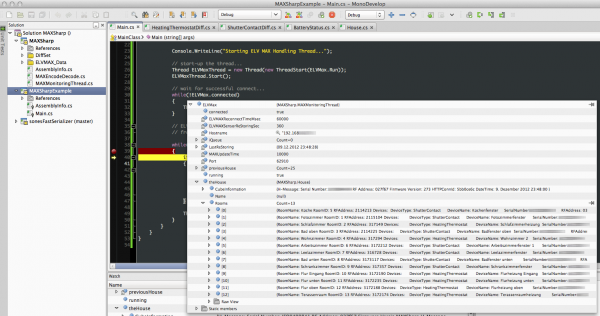
The architecture is based upon polling – I know events would make a cleaner view but for various reasons I am using queues in h.a.c.s. and therefore MAXSharp does as well. The example application spins up the ELV MAX interfacing / handling thread and as soon as you’re connected you can access all house related information and get diff-events from the cube.

Any comment is appreciated!

Source 1: State of Reverse Engineering
Source 2: https://github.com/bietiekay/MAXSharp

extending the house storage

In times when mobile phone cameras produce pictures of 2 MBytes each and decent DSLR cameras produce pictures in the range of more than 20 Mbytes each – not speaking of the various sensors around the house the question of how all of this is going to be stored is an interesting one.

Prices for mass storage is dropping for years and sized of hard disks are getting bigger and bigger. 3 Tbyte drives are fairly cheap now. Cheap enough to consider serious redundancy even for home use.

Having that home automation hobby and having very specific needs when it comes to home entertainment or even watching TV (we don’t watch live-tv…) we have a relatively huge demand for storage space. That way we are already storing over 10 Tbyte of data, fully encrypted, redundant and backed-up.

Our file server infrastructure grew with the needs over the years.

It started way back in 2003 when I set-up the first fileserver for my apartment back then. It was a fairly huge 19 inch case with 5 hard disks (100 Gbyte each). This machine was filled in 2005 and needed replacement.
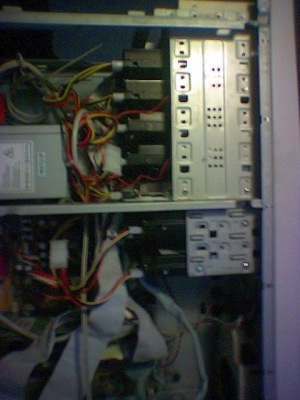
We’re in IDE land back then. Because the system hardware died on me due to a power surge all the disks and a new mainboard were seated in a new case with room for a lot of disks.

One interesting detail might be that I consistently used Windows Server for that purpose.
The machine always wasn’t just a fileserver. It was smtp, imap, nntp and media server all the time. That lead to a growing demand of CPU and memory resources. It started with an 800 Mhz AMD Athlon (which died quickly) and for the next years to come I used a 2.8 Ghz Intel Pentium 4. Everything started with Windows Server 2003 – bought in the Microsoft Store when I was a Microsoft employee.

Diskspace demand kept growing and in 2009 a new case, new mainboard + memory and new disks where due.

Since 2009 a Core4Quad Q9550 with 2.8 Ghz and 16 Gbyte of Memory is the heart of our fileserver. Since we’re frequently live-transcoding video streams to feed iPads and iPhones around the house that machine has plenty of grunt to feed the demand. We can have 2 iPhones and 2 iPads playing 720p content without getting stutters. Back in 2009 we also switched to a mixed IDE and SATA setup as you can see in the picture:
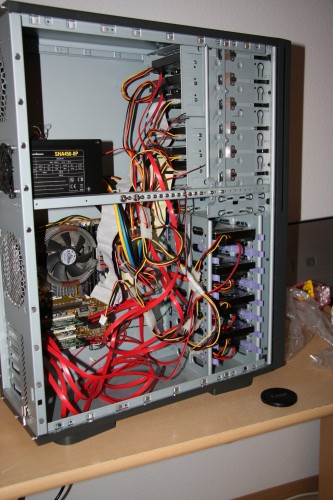
Plenty of room when the new case arrived – it was getting crowded just 2 years later in 2011. Every seat was taken – which means 13 disks are in that case and 1 attached through USB.
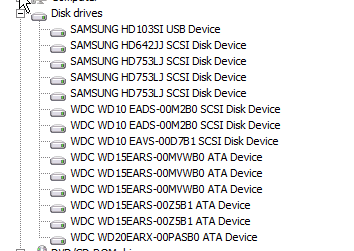
That adds up to more than 16 Tbyte of raw storage. In 2011 we also upgraded to Windows Server 2008. We never lost a bit with that operating system, not under the heaviest load and even through serious hardware malfunctions. A lot of disks of those 13 died throughout the years: Almost 1 every 2 months was replaced – most of them through extended waranties – of course we have a spare always ready to take the place. Only one time I had to rush to a store to get a replacement drive when two disks failed short after each other. That’s why there’s that 2 Tbyte drive in the 1.5 Tbyte compound…
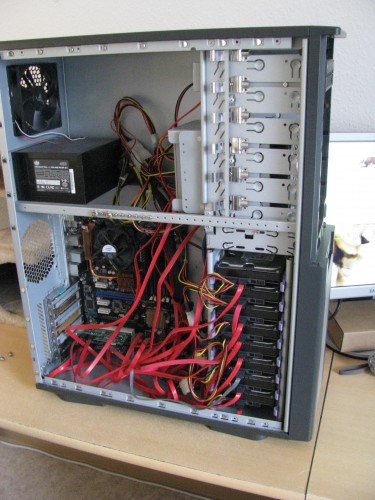
So it’s getting full again. Since that case isn’t really holding more disks and replacing them is getting harder because of the tight fit the idea was born to now add a bigger case but to just add a NAS/SAN which holds between 6 to 8 disks at once, comes with it’s own redundancy management and exports one big iSCSI volume.

That said a network card was added to the fileserver and a QNAP TS-859 Pro+ 8-bay appliance was bought. This one is a shiny black device which uses less power then an aditional case with extra cpu and memory would have use and after calculating through a number of combinations it’s even the cheapest solution for an 8 drive set-up.
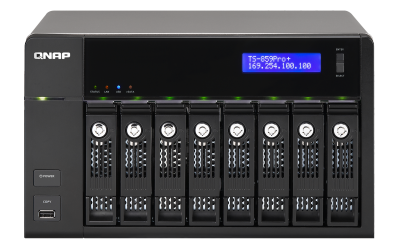
After some intensive testing it seems that the iSCSI approach is the most robust one. Since I am just done with testing the appliance the next step is to buy drives. So stay tuned!

Source 1: http://www.qnap.com/de/index.php?lang=de&sn=375&c=292&sc=528&t=532&n=3486
What happened to: realtime Radiosity lighting

Back in 2006 I wrote about a new technology which the also new company Geomerics was demoeing.
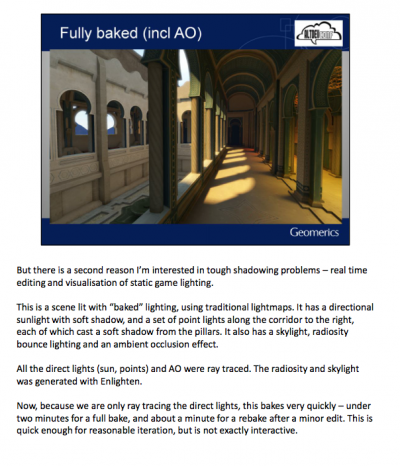
Back in 2006 everything was just a demo. Now it seems that Geomerics found some very well known customers and without noticing a lot of the current generation games graphics beauty comes from the capabilities real time radiosity lighting is adding to the graphics.

“Geomerics delivers cutting-edge graphics technology to customers in the games and entertainment industries. Geomerics’ Enlighten technology is behind the lighting in best-selling titles including Battlefield 3, Need for Speed: The Run, Eve Online and Quantum Conundrum. Enlighten has been licensed by many of the top developers in the industry, including EA DICE, EA Bioware, THQ, Take 2 and Square Enix.” (Source)

There even is a more updated version of the demo video:

Source 1: real time radiosity lighting article from 2006
Source 2: Geomerics Presentations
Source 3: More Geomerics Media

open source audio codecs getting better

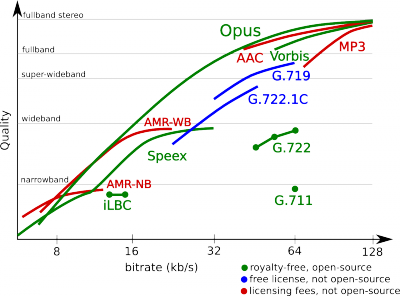
Some weeks ago I heard about a new audio codec which is being developed as open source – very similar to vorbis – the previous open source approach to audio codecs.

This time it seems that they’ve got some standardization into the play so it might be more successful than vorbis was.

“Opus is a totally open, royalty-free, highly versatile audio codec. Opus is unmatched for interactive speech and music transmission over the Internet, but also intended for storage and streaming applications. It is standardized by the Internet Engineering Task Force (IETF) as RFC 6716 which incorporated technology from Skype’s SILK codec and Xiph.Org’s CELT codec.”

Source 1: http://www.opus-codec.org/
Source 2: http://auphonic.com/blog/2012/09/26/opus-revolutionary-open-audio-codec-podcasts-and-internet-audio/
Source 3: http://tools.ietf.org/html/rfc6716

a font for number people

OpenType is a font format which I personally might have underestimated in the past. Well you know – fonts and stuff. This all seemed not too interesting up until now. Now that changed dramatically when a font came to my attention which can be used for various purposes and as a font does not resemble the normal numbers and characters scheme. But what can it be used then if not to type numbers and characters?

Well. What about typing graphs?

Everything in the above image is generated by a font… like in your Word-processor (if it uses that font)

“Designed by Travis Kochel, FF Chartwell is a fantastic typeface for creating simple graphs. Driven by the frustration of creating graphs within design applications (primarily Adobe Creative Suite) and inspired by typefaces such as FF Beowolf and ­­FF PicLig, Travis saw an opportunity to take advantage of OpenType technology to simplify the process.

Using OpenType features, simple strings of numbers are automatically transformed into charts. The visualized data remains editable, allowing for hassle-free updates and styling.”

Source 1: https://www.fontfont.com/how-to-use-ff-chartwell

baking with the PI

Do you know what happens during the push of the power button and typing your log-in information inside of your computer? No? You should. At least from a software side. Not that it is necessary to use a computer. But in order to understand what this wonderful machine does and why.

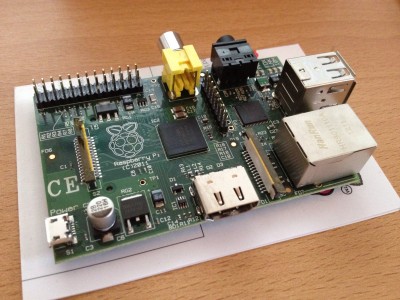
For those teaching and learning purposes the Raspberry Pi is a perfect device. It’s cheap and now there is a course you can take online which shows you – starting from the very beginning – how to get the device up and running and how to make it do what you like. And that’s without installing an operating system. You are about to write your very own.

“This website is here to guide you through the process of developing very basic operating systems on the Raspberry Pi! This website is aimed at people aged 16 and upwards, although younger readers may still find some of it accessible, particularly with assistance. More lessons may be added to this course in time.”

Source: http://www.cl.cam.ac.uk/freshers/raspberrypi/tutorials/os/

a file is a file is a file.

Ever wondered how a software finds out that this file named “filename” is a pdf, jpeg, movie? There are several thousands, probably hundreds-of-thousands of fileformats out there. Some of them are used many times a day without us even noticing. We’re just moving an image from A to B not caring about what constitutes an image file and what makes a jpeg different to a png image.

Now for pure academic reasons there is one file that is many (no, not borg). It’s a file that is:

“CorkaMIX.exe is simultaneously a valid: * Windows Portable Executable binary * Adobe Reader PDF document * Oracle Java JAR (a CLASS inside a ZIP)/Python script * HTML page

It serves no purpose, except proving that files format not starting at offset 0 are a bad idea. Many files (known as polyglot) already combines various langages in one file, however it’s most of the time at source level, not binary level.”

Source 1: http://code.google.com/p/corkami/downloads/detail?name=CorkaMIX.zip

downloading the whole Jamendo catalog

Yesterday @simcup wrote on twitter about that he is currently downloading the whole Jamendo catalog of Creative Commons music. Capture

Although I already knew Jamendo it never occurred to be to download their whole catalog. Since I am a fan of choice I immediately thought about how I could download the catalog too. Since the only clue was a cryptic uri-like text how to achieve that it suddenly sounded like a great idea to write a universal tool and release it as open-source. This tool should allow users to download the whole catalog and keep their local jamendo mirror in sync with the server. So anytime new artists, albums or tracks are added the user does not need to download them all again.

So the only thing I had as a starting point was that cryptic uri pointing me to something I’ve never heard of called Rythmbox. Turns out that this is a GNOME music player application which has Jamendo integration. After some clueless poking around I decided to take a look at the source of Rythmbox, especially the Jamendo module.

This module is written in python and quite clean to read. And just by looking at the first lines I came across the interesting fact that there is a almost daily updated XML dump of the Jamendo catalog available from Jamendo. Hurray! Since Jamendo wants developers to interact with the platform they decided to put a documentation online which allows anyone to write tools and stream and download tracks. After all the clues I found I finally ended up on this page.

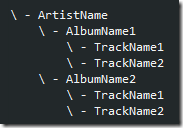
So there are the catalog download, track stream and torrent uris necessary to download the catalog. Now the only thing that is needed is a tool which parses the XML and creates a nice folder structure for us.

folderstructure

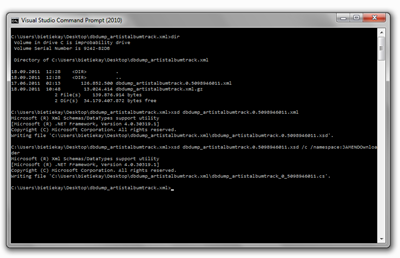
Parsing XML in C# (my prefered programming language) is easy. Basically you can use a tool called XSD.exe and let it generate first the XSD from the XML and then ready-to-use C# classes from that XSD.

generating_xsd_and_csharp

After doing all that actually reading the whole catalog into a useable form breaks down to just three lines of code:

parsingxml

Isn’t it great how modern frameworks take away the complexity of such tasks. At this point I’ve already parsed the whole catalog into my tool and only wrote three lines of code. The rest was generated automatically for me. The best of all – this also works on non-windows operating systems when you use mono.

When the XML data is parsed and available in a nice data structure it’s easy to iterate through all artists, all albums and all tracks and then download the actual mp3 or ogg. And that’s basically what my tool does. It takes the XML, parses it, and downloads. It will check before downloading if the track already exists and will only download those added since the last run.

Additionally since I am deeply involved into the development of the GraphDB graph database at sones I want to make use of the Jamendo data and the graph structure it poses. Since the directory structure my tool is generating is only one aspect how you could possibly look at the data it’s quite interesting to demonstrate the capabilities of GraphDB based on that data.

The idea behind the graph representation of the data is that you could start from almost any starting point imaginable. No matter if you you start from a single track and drill up into genre and artists, or if you start at a location and drill down to tracks.

So what the Downloader does in matters of GraphDB integration is that it outputs a GraphQL script which can be imported into an instance of GraphDB.

The sourcecode of my tool is available on github and released unter the BSD license – feel free to play with it and to contribute.

Source 1: http://www.jamendo.com
Source 2: https://github.com/bietiekay/JAMENDOwnloader

configuring the nano editor to my needs…

Configuring your favourite Editor on OSX (or Linux, or anywhere else) is important – since nano is my editor of choice I wanted to use it’s syntax highlighting capabilities. Easy as pie as it turned out:

I started with a .nanorc file from this guy and modified it to recognize some of my frequent file-types (like .cs files).

You can download my nanorc.tar – just extract it and put it into your user home directory.

Source 1: http://talk.maemo.org/showthread.php?t=68421
Source 2: http://www.nano-editor.org/dist/v2.2/nano.html#Nanorc-Files
Source 3: nanorc.tar

Photosynth now mobile…

It’s been some months years since the once Microsoft Research Project got public and Microsoft started offering it’s great Photosynth service to the public.

I’ve been using the Microsoft panoramic and Photosynth tools for years now and I tend to say that they are the best tools one can get to create fast, easy and high-quality panoramic images.

There is photosynth.net to store all those panoramic pictures like this one from 2008:

The photosynth technology itself contains several other interesting technologies like SeaDragon which allows high quality image zooming on current internet connection speeds.

This awesome technology is as of now available on the iPhone (3GS and upwards) and it’s better than all the other panoramic tools I’ve used on a phone.

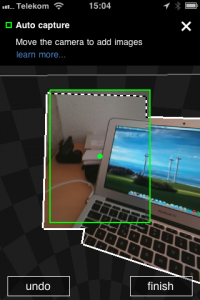
the process of taking the images
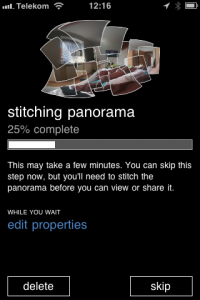
after the pictures are taken additional stitching is needed
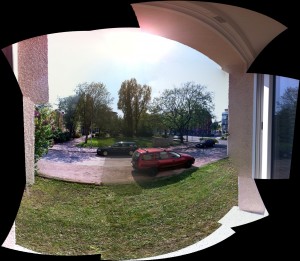
after the stitching completed a fairly impressive panoramic images is the result

Source 1: Photosynth articles from the past
Source 2: Photosynth in Wikipedia
Source 3: Photosynth on iPhone App Store

das außer-Haus Backup

Irgendwie werden es auch privat immer immer mehr Daten – mit immer zunehmender Geschwindigkeit… Alle paar Jahre tausche ich bei uns im Haushalt die Festplatten/Speicherlösung komplett aus – was zwar immer wieder mal eine Investitions bedeutet, gleichzeitig aber auch dafür sorgt dass Daten nicht irgendwelchen ungünstigen mechanischen, chemischen oder magnetischen Effekten zum Opfer fallen… Ja so etwa alle zwei Jahre wird alles einmal umkopiert… Das dauerte beim letzten Mal zwar gut eine Woche, aber naja so ist das eben…

Aus vielerlei Grund haben wir auch für einen Haushalt recht viel Bedarf an Speicherplatz – teilweise wohl auch weil meine Frau Photographin ist – aber ich als “werf-nix-weg”-Typ werd da auch einen guten Anteil dran haben…

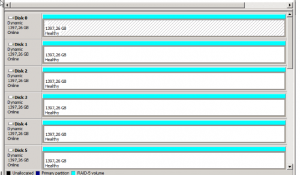
Herr über alle unsere Festplatten (kein Witz, die Rechner bei uns haben ihre Festplatten eigentlich nur um booten zu können) ist seit jeher ein einzelner Rechner welcher ebenso alle paar Jahre komplett ausgetauscht wird. Dieser Rechner verwaltet im Moment zwischen 12-15 Festplatten verschiedener Größe – Hauptarbeit wird zur Zeit durch drei separate (gewachsene) RAID-5 Volumes erledigt…

Nebenbei: Nein ich kann/will da kein RAID-6 fahren ohne entweder Linux zu verwenden (was aus verschiedenen Gründen nicht geht) oder einen Hardware-Controller zu verwenden, was nach einschlägigen Erfahrungen querbeet durch alle möglichen Hardware RAID Controller ausfällt.

Dem ganzen Festplattenstapel liegt dann ein Standard-PC mit Windows Server 2008 zugrunde – zum einen weil ich so eine Lizenz noch herumliegen hatte und zum anderen weil ich in über 10 Jahren File-Server Erfahrungen sammeln noch nie auch nur ein Byte unter Windows verloren habe. Zusätzlich habe ich einen riesigen Haufen Software welche Windows-only ist ud sozusagen ständig laufen muss um Sinn zu machen (Mail-Server Puffer, Newsserver Mirror, Musik und Video Streaming Server, Medienbibliothek, Videorekorder,…

Diese drei großen RAID Volumes schnappt sich dann Truecrypt und ver- und entschlüsselt zuverlässig vor sich hin – im Endeffekt gibt es kein Byte Daten im Haushalt welches nicht verschlüsselt wäre. Gut für uns.

So ein RAID verhindert nun ja aber nicht dass dennoch oben genannte ungünstige Effekte eintreten und man mal eine oder mehrere Defekte zu beklagen hat. Im Normalfall tauscht man die defekte Festplatte, resynct das RAID und alles funktioniert weiter ohne dass man Daten verloren hätte. Allerdings ist das ja kein Backup. Das ist nur eine erste Absicherung gegen mögliche Defekte.

Getreu folgendem kurzen Musikstück:

RAID ist kein Backup

… ist ein RAID eben kein Backup. Backups erledigt bei mir eine Sammlung von Scripten welche jeweils in festen Abständen Vollbackups und Differenz-Backups erstellt. Da kommt dann ein Haufen 1 Gbyte großer Dateien raus welche dann anschliessend per RSync in mühevoller (und dank funktionierendem QoS unbemerkt) Arbeit außer Haus geschafft werden. Die Komplett-Backups dauern aufgrund der großen Menge einfach ewig lang und lassen sich recht einfach dadurch beschleunigen dass man sozusagen das Backup physisch auf einer externen Festplatte zum Server trägt…die Differenz-Backups sind dann meist immer recht flott durchgelaufen. Speicherplatz im Internet wird ja auch immer billiger und so haben wir auch immer ein gutes Off-Site Backup unserer Daten…

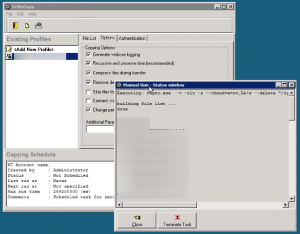
Für Windows gibt es neben den üblichen Cygwin Ports von rsync auch eine gute GUI Version namens DeltaCopy. Das Ding kopiert zuverlässig und auch wenn mal der DSL Router rebootet oder hängt nimmt er selbständig die Kopierarbeit wieder auf sobald Netz wieder verfügbar ist.

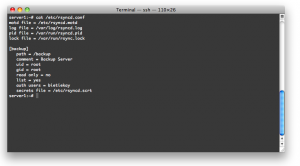
Damit DeltaCopy seine Daten irgendwo abladen kann wird auf der Gegenstelle natürlich ein rsync Server vorrausgesetzt. Die Konfiguration eines solchen ist nicht sonderlich kompliziert – im Grunde muss man nur rsync installieren und die rsyncd.conf Datei anpassen. Zusätzlich dazu muss man eine Konfigurationsdatei anlegen in welchem nach dem Schema “Benutzername:Passwort” entsprechend die Nutzeraccounts angegeben werden – das wars eigentlich schon. Rsync ist sehr robust und vor allem auch gut für geringere Bandbreiten geeignet. Wenn sich an einer Datei nur wenige Bytes geändert haben müssen auch nur die geänderten Bytes übertragen werden.

Source 1: http://www.speichergurke.de
Source 2: http://www.aboutmyip.com/AboutMyXApp/DeltaCopy.jsp
Source 3: http://de.wikipedia.org/wiki/Rsync

Shairport – someone reversed an AirPort Express

Low Latency Network Audio was a dream for the past years (see an article of 2005 and 2008) and with AirPlay it’s finally there.

I am using the Apple AirPlay technology for several years now… after it got implemented into iOS it’s just fantastic to have the option to have whatever sound source I want to playing loud and clear in any room I want to…

Okay it’s not quite as sophisticated as the sonos solution regarding the control of multiple music sources in multiple rooms but it get’s the job done in an apartment.

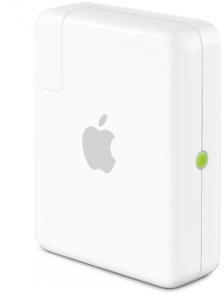
So back to the topic: Apple integrated the AirPlay technology into their wireless base station “AirPort Express”. Basically AirPlay is a piece of software which receives an encrypted audio stream over the network and outputs the stream to the SPDIF or audio jack.

Back in 2005 there already was an emulator of this protocol called “Fairport” but Apple decided to encrypt the AirPlay traffic. This led to the problem that the encryption key was unkown because it’s baked into the AirPort Express firmware. And this is where the good news start:

“My girlfriend moved house, and her Airport Express no longer made it with her wireless access point. I figured it’d be easy to find an ApEx emulator – there are several open source apps out there to play to them. However, I was disappointed to find that Apple used a public-key crypto scheme, and there’s a private key hiding inside the ApEx. So I took it apart (I still have scars from opening the glued case!), dumped the ROM, and reverse engineered the keys out of it.”

So to keep things short: Someone got an AirPort Express, dumped the firmware, extracted the AirPlay encryption keys and wrote an emulator of the AirPlay protocol which uses the key. Voilá!

ShairPort is available in source code on the site of the guy and obviously it’s unsure if Apple will react by changing the encryption key in the future. But for the time being it works as advertised:

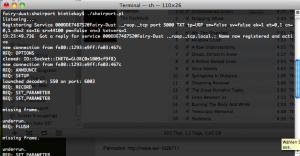
I took one of my computers and followed the instructions to update perl, install Macports and then run ShairPort. So when ShairPort is run it looks not as appealing as expected:

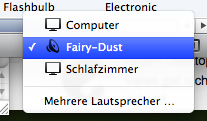
Notably  it uses IPv6 to communicate between iTunes and ShairPort… Oh I almost forgot to show how it looks in iTunes:

On another side note: It works on Linux, Windows and Mac OS X :-)

Source 1: Apple AirPlay
Source 2: Sonos
Source 3: Apple AirPort Express
Source 4: ShairPort

modifying OS X terminal to make it more useable…

Using OS X for the daily work is getting easier every day. And most of the time I am doing work using the Terminal.app.

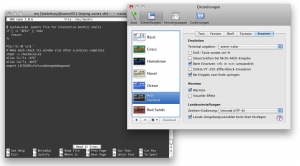
So there are some configuration changes necessary to make it even more useable…

  1. Edit /etc/bashrc and add some alias and color definitions
    1. alias ll=”ls -hfG”
    2. alias la=”ls -ahfG”
    3. export LSCOLORS=fxfxcxdxbxegedabagacad
  2. custom color schemes can be defined using the lscolors tool
  3. install screen (using MacPorts for example) and setup a ~/.screenrc
    1. Download a sample .screenrc

Source 1: http://geoff.greer.fm/lscolors/
Source 2: http://www.macports.org/
Source 3: ScreenRC.tar

my little home automation project has a home

Hurray! One of those EzControl XS1 plus some sensors and actors is on the way to me. So I can finally start the little holiday project which will be called “HACS” (Home Automation Control Server).

The source code and documentation repository is up on GitHub as of now – you can access it here: https://github.com/bietiekay/hacs

If you are interested in working on that project – drop a comment.

great SIP Softphone for Linux and Windows

Thank goodness I can uninstall X-Lite! At sones we are using a SIP based telephony solution. And therefore some times a SIP softphone application is needed along with the obligatory hardware SIP telephones. Till today the only half-working software I knew for that task was X-Lite. But a colleague told me today that there is a better software which not even looks better but also works better than X-Lite.

It’s called “Ekiga” and it’s a GTK based open source application which can run on Windows and Linux. It looks clean and therefore nice and works great.

A special tip from me: Abort the Welcome Wizard because the only thing it does is registering you with ekigas’ own services.

Capture

Source: http://ekiga.org/

FFN-Switcher auf GitHub umgezogen

Es ist ja nun schonwieder einige Zeit her dass ich etwas über meine CB-Funk Software namens “FFN-Switcher” geschrieben habe. Nun ist es immerhin mal wieder soweit dass ich zeit gefunden habe mich mit einigen Bugfixes zu beschäftigen.

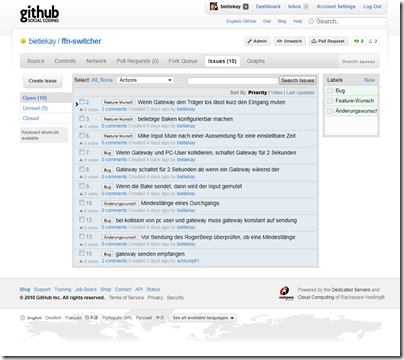
Gleichzeitig habe ich den Sourcecode von meinem privaten Subversion Repository auf den öffentlich zugänglichen GitHub Dienst hochgeladen. Dort kann der Sourcecode und was noch viel wichtiger ist: die Bug- und Wunschliste abgerufen und editiert werden.


github-ffnswitcher

http://github.com/bietiekay/ffn-switcher/ 

Natürlich gab es in der Zwischenzeit auch einige Bugfixes. Sodass mittlerweile Version 111 online steht und über die automatische Updatefunktion abgerufen werden kann.

Source: http://github.com/bietiekay/ffn-switcher/

Mono 2.8 released!

Hurray! Finally the 2.8 version of Mono – the platform independent open source .NET framework is available as of today. I finally don’t have to recompile the trunk every now and then to get my bits running Smiley

The Major Highlights according to the release notes are:

  • C# 4.0
  • Defaults to the 4.0 profile.
  • New Garbage Collection engine
  • New Frameworks:
    • Parallel Framework
    • System.XAML
  • Threadpool exception behavior has changed to match .NET 2.0
    • potentially a breaking change for a lot of Mono-only software
    • See information below in the "Runtime" section.
  • New Microsoft open sourced frameworks bundled:
    • System.Dynamic
    • Managed Extensibility Framework
    • ASP.NET MVC 2
    • System.Data.Services.Client (OData client framework)
  • Performance
    • Large performance improvements
    • LLVM support has graduated to stable
      • Use mono-llvm command to run your server loads with the LLVM backend
  • Preview of the Generational Garbage Collector
  • Version 2.0 of the embedding API
  • WCF Routing
  • .NET 4.0’s CodeContracts
  • Removed the 1.1 profile and various deprecated libraries.
  • OpenBSD support integrated
  • ASP.NET 4.0
  • Mono no longer depends on GLIB

Oh – they even linked my benchmark article.

Source: http://www.mono-project.com/Release_Notes_Mono_2.8

winter 2011 hacking project: Home Automation

In the last 10+ years I was fiddling with different home automation concepts. Mostly without broad use cases because at that time no one seemed to be interested in having sensors and actors like crazy at home. In fact not that many people seem to care these days.

Having more and more hardware and software around us creates the use cases for a broader audience people like me have for 10+ years. Mainstream is a bitch for nerds Smiley

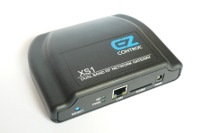
That said I found a nice plastic box I want to use in a winter project. This plastic box is called “EzControl XS1”. It comes with several visible and “invisible” interfaces.

The visible and obvious ones are: power, 100 mbit ethernet, sd card slot. So it takes some power and does something on the network. The not so obvious and therefore “invisible” interfaces are the most interesting ones: the EzControl XS1 comes with the ability to send and receive on 433 Mhz and 868 Mhz.

ezcontrol_xs1-200

Yes that are the ranges used by switchable and dimable power sockets, temperature sensor and AMR. The EzControl XS1 is not that cheap (coming at 189 Euros for the base version and additional 65 Euros per upgrade option). I do not own one yet so it’s the plan to acquire at least one and start of with dimable power sockets and add more sensors and actors on the way

One great feature of the EzControl XS1 is the embedded WebServer with which the users application (the one I want to write) can interact using a HTTP/JSON Protocol. Oh dear: Sensor data and Actor control using JSON. How great is that!

There is some example code available (even a proprietary iPad/iPhone client) but since I want to have some custom features I do not currently see to be available in software I am going to write a set of tools which will get and protocol sensor data and run scripts to controls actors. Oh it’ll be all available as open source (license not yet chosen).

P.S.: If some one from Rose+Herleth is reading this and wants to help – send me a test unit Smiley

Source 1: http://www.ezcontrol.de (in german though)
Source 2: http://en.wikipedia.org/wiki/Automatic_meter_reading
Source 3: http://www.ezcontrol.de/content/view/12/31/

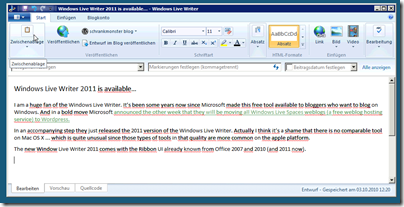
Windows Live Writer 2011 is available…

I am a huge fan of the Windows Live Writer. It’s been some years now since Microsoft made this free tool available to bloggers who want to blog on Windows. And in a bold move Microsoft announced the other week that they will be moving all Windows Live Spaces weblogs (a free weblog hosting service) to WordPress.

In an accompanying step they just released the 2011 version of the Windows Live Writer. Actually I think it’s a shame that there is no comparable tool on Mac OS X … which is quite unusual since those types of tools in that quality are more common on the apple platform.

The new Window Live Writer 2011 comes with the Ribbon UI already known from Office 2007 and 2010 (and 2011 now).

wlw2011

Source 1: http://wordpress.visitmix.com/
Source 2: http://explore.live.com/windows-live-essentials

visualize your source control

There’s a great tool available to create impressive visualizations of source code repositories:

“Software projects are displayed by Gource as an animated tree with the root directory of the project at its centre. Directories appear as branches with files as leaves. Developers can be seen working on the tree at the times they contributed to the project.

Currently there is first party support for Git, Mercurial and Bazaar, and third party (using additional steps) for CVS and SVN. “


Source: http://code.google.com/p/gource/

draw concept maps the easy way

I often have to draw concept diagrams and until now I had to use MindMap tools and tools like Visio. And up until now it wasn’t that much fun… but first things first, what’s a Concept Map?

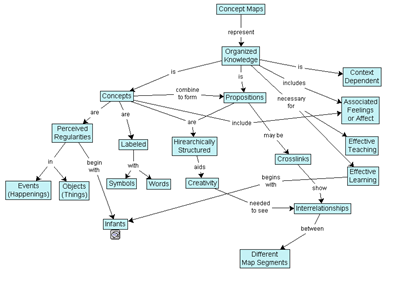
“A concept map is a diagram showing the relationships among concepts. They are graphical tools for organizing and representing knowledge.

Concepts, usually represented as boxes or circles, are connected with labeled arrows in a downward-branching hierarchical structure. The relationship between concepts can be articulated in linking phrases such as "gives rise to", "results in", "is required by," or "contributes to".

For example a concept map might looks like this:

conceptmapsample

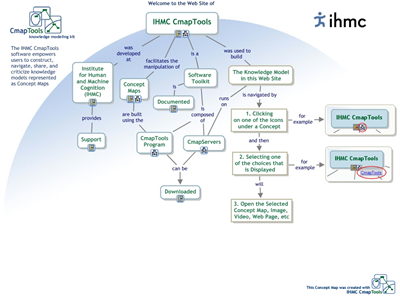
So I found a tool called “IHMC CmapTools” – a great package of software available for Windows, Mac OS X and Linux. And this tool makes it so much easier to create impressive and expressive concept maps. It’s freeware and can be used even for commercial purposes.

cmaptools

Source: http://cmap.ihmc.us/

style your Visual Studio

It’s been some time since I’ve written about a Visual Studio Color Theme Generator. And obviously since then a lot happened in the world of customization tools.

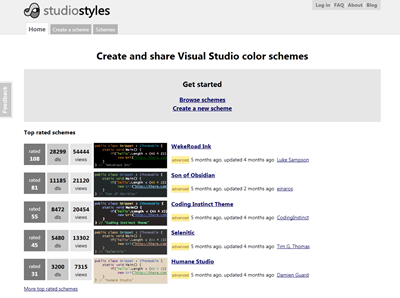
The website studiostyles.info is there to help the day with a lot of previewable Visual Studio styles. Even better: all styles can be exported for Visual Studio 2005, 2008 and 2010.

studiostyles

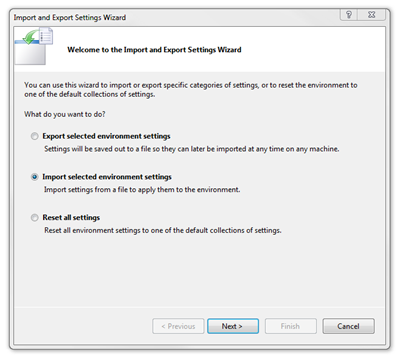
For Visual Studio 2010 you get a .vssettings file which can be imported into Visual Studio using the Tools->Import  and Export Settings… menu item.

importstyle

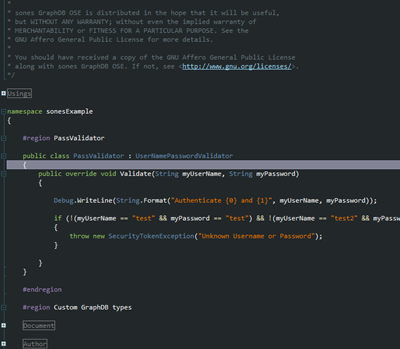
codeeditorstyle

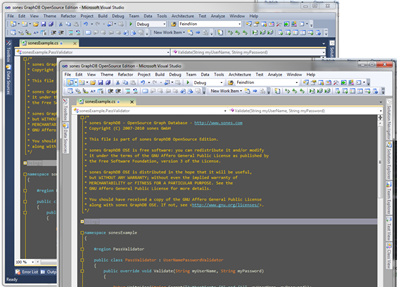
For Visual Studio 2010 there are additional color styling options available. Microsoft offers a plugin for Visual Studio 2010 called Visual Studio Color Theme Editor. Using this tool everything else can be color customized. So you can have something like that:

vs2010colortheme

Source 1: http://www.schrankmonster.de/2008/08/10/visual-studio-color-theme-generator/
Source 2: http://studiostyles.info/
Source 3: Visual Studio Color Theme Editor

How To strip those TFS Source Control references from Visual Studio Solutions

Every once in a while you download some code and fire up your Visual Studio and find out that this particular solution was once associated to a team foundation server you don’t know or have a login to. Like when you download source code from CodePlex and you get this “Please type in your username+password for this CodePlex Team Foundation Server”.

Or maybe you’re working on your companies team foundation server and you want to put some code out in the public. You surely want to get rid of these Team Foundation Server bindings.

There’s a fairly complicated way in Visual Studio to do this but since I was able to produce unforseen side effects I do not recommend it.

So what I did was looking into those files a Visual Studio Solution and Project consists of. And I found that there are really just a few files that hold those association information. As you can see in the picture below there are several files side by side to the .sln and .csproj files – like that .vssscc and .vspscc file. Even inside the .csproj and .sln file there are hints that lead to the team foundation server – so obviously besides removing some files a tool would have to edit some files to remove the tfs association.

strip-files

So I wrote such a tool and I am going release it’s source code just beneath this article. Have fun with it. It compiles with Visual Studio and even Mono Xbuild – actually I wrote it with Monodevelop on Linux ;) Multi-platform galore! Who would have thought of that in the founding days of the .NET platform?

Bildschirmfoto-StripTeamFoundationServerInformation - Main.cs - MonoDevelop

So this is easy – this small tool runs on command line and takes one parameter. This parameter is the path to a folder you want to traverse and remove all team foundation server associations in. So normally I take a check-out folder and run the tool on that folder and all its subfolders to remove all associations.

So if you want to have this cool tool you just have to click here: Sourcecode Download

Using Windows Deployment Services (WDS) to install Linux over Network (PXE)

Developing software is hard work – especially when you target several operating systems. One task that you have to perform quite often would be to deploy a new installation of an operating system as fast as possible on a test machine.

Doing this with Windows is easy – you can use the Windows Deployment Services to bootstrap Windows onto almost every machine which can boot over ethernet using PXE. Everything needed to make WDS work on a Windows Boot-Image is located on that image. Since it’s that easy I won’t dive into more detail here.

What I want to show in greater detail is how you can use WDS to deploy even Linux over your network.

Step 1: Get PXELINUX

What’s needed to boot Linux over a network is a dedicated PXE Boot Loader. This one is called PXELINUX and can be downloaded here.

“PXELINUX is a SYSLINUX derivative, for booting Linux off a network server, using a network ROM conforming to the Intel PXE (Pre-Execution Environment) specification.”

On the homepage of PXELINUX is also a short tutorial which files you need and where to copy them.

Step 2: Setup WDS with PXELINUX

I suppose you got your WDS Installation up and running and you are able to deploy Windows. If that’s the case you can go to your WDS Server Management Tool and right-click on the server name – in my case “fileserver.sones”. If you select “Properties” in the context menu you would see the properties windows like in the screenshot below:

wds_pxelinux

You have to change the Boot-Loader from the standard Windows BootMgr to the newly downloaded PXELINUX bootloader. Since this bootloader comes with it’s own set of config files you can edit this config file to allow booting into Windows.

Step 3: Edit PXELINUX configuration filewds-pxelinux-2 

The first entry I made into the boot menu of the PXELINUX boot loader is the “Install Windows…” entry. Since the first thing the users will see after booting is the PXELINUX loader menu they need to be able to continue to their Windows Installation. Since this Windows Installation cannot be handled by the PXELINUX loader you have to define a boot menu entry which looks a lot like this:

LABEL wds
MENU LABEL Install Windows…
KERNEL pxeboot.0

To add OpenSuSE to the menu you would add an entry looking like this:

LABEL opensuse
MENU LABEL Install OpenSuSE 11.x
kernel /Linux/opensuse/linux
append initrd=/Linux/opensuse/initrd splash=silent showopts

The paths given in the above entry should be altered according to the paths you’re using in your installation. I took the /Linux/opensuse/ files from the network install dvd images of OpenSuSE.

wds-pxelinux-3

That’s basically everything there is about the installation of Linux (Debian works accordingly) over PXE and WDS.

And finally this is what it should look like if everything worked great:


Source 1: http://en.wikipedia.org/wiki/Preboot_Execution_Environment
Source 2: http://syslinux.zytor.com/wiki/index.php/PXELINUX

Developing on a Microsoft Surface Table

At sones I am involved in a project that works with a piece of hardware I wanted to work with for about 3 years now: the Microsoft Surface Table.

I was able to play with some tables every now and then but I never had a “business case” which contained a Surface. Now that case just came to us: sones is at the CeBIT fair this year – we were invited by Microsoft Germany to join them and present our cool technology along with theirs.

Since we already had a graph visualisation tool the idea was to bring that tool to Surface and use the platform specific touch controls and gestures.

surface_visualgraph
the VisualGraph application that gave the initial idea

The good news was that it’s easier than thought to develop an application for Surface and all parties are highly committed to the project. The bad news is that we were short on time right from the start: less than 10 days from concept to live presentation isn’t the definition of “comfortable time schedule”. And since we’re currently in the process of development it’s a continueing race.

Thankfully Microsoft is committed to a degree they even made it possible to have two great Surface and WPF ninjas who enable is to get up to speed with the project (thanks to Frank Fischer, Andrea Kohlbauer-Hug, Rainer Nasch and Denis Bauer, you guys rock!).

surface_simulator
a Surface simulator

I was able to convice UID to jump in and contribute their designing and user interface knowledge to our little project (thanks to Franz Koller and Cristian Acevedo).

During the process of development I made some pictures which will be used here and there promoting the demonstration. To give you an idea of the progress we made here’s a before and after picture:

Surface_Finger2
We started with a simple port of VisualGraph to the surface table…

Surface_Finger
…and had something better working and looking at the end of that day.

I think everyone did a great job so far and will continue to do so – a lot work to be done till CeBIT! :-)

Source 1: http://www.sones.com
Source 2: http://www.microsoft.de
Source 3: http://www.uid.com/

Turning Linux ISO Images into bootable USB sticks

Today was Linux-Distribution-ISO-Install-Day. And it turned out that the only existing external DVD drive was fubar.

So what to do? We had a spare USB stick and it turns out that you can quite easily convert that USB stick into a bootable Linux-Distribution-Install-USB-Stick. Awesome!

Just download the tool called “UNetbootin”, start it and you can turn virtually any ISO Distribution Image into an USB Stick that boots and installs that ISO:

 screenshot

Source: http://unetbootin.sourceforge.net/