Brackets: a multi-platform editor written in javascript – including NodeJS

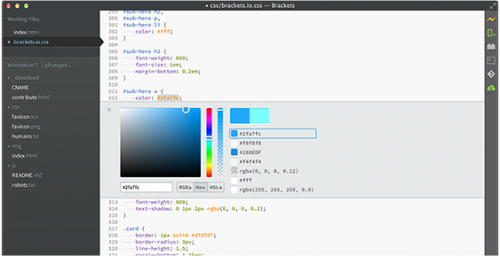
“Brackets is an open source code editor for web designers and front-end developers.”

hero

On the first tries it’s an awesome thing to have all that JavaScript debugging, Live HTML editing and what-not in one place. Give it a spin.

[youtube]https://www.youtube.com/watch?v=T6d5C3rLeFY[/youtube]

Source 1: http://brackets.io/

weave your net of things that have internet…ehm – internet of things

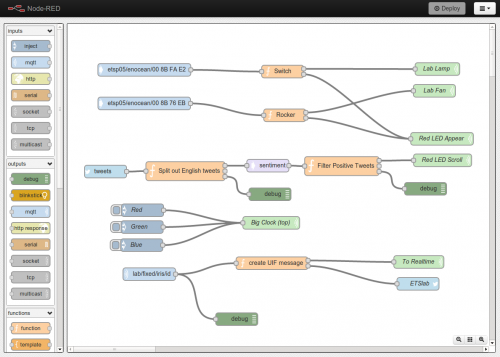
node-red-screenshot

The internet of things” is a buzzword used more and more. It means that things around you are connected to the (inter)network and therefore can talk to each other and, when combined, offer fantastic new opportunities.

Yeah right.

So NodeRed is a NodeJS based toolset that allows you to create so called “flows” (see picture above). Those flows determine what reacts and happens when things happen. Fantastic, told you!

Source 1: http://nodered.org/
Source 2: http://en.wikipedia.org/wiki/Internet_of_ThingsSource 3: http://nodejs.org/

How to fix a mono CS0589 Internal compiler error during parsingSystem.FormatException error on the RaspberryPi

When you want to compile some C# code using MONO on Linux on your RaspberryPi and you encounter this strange error message:

error CS0589: Internal compiler error during parsingSystem.FormatException

You need to do:

  1. Update your Debian by running:

    sudo apt-get upgrade
    sudo apt-get update

  2. Upgrade your RaspberryPi firmware:

    sudo rpi-update

  3. Reboot your RaspberryPi
  4. Retry compiling – should work now.

The reason for Mono to crap out like above: Previous Mono versions and RaspberryPi firmwares where not compatible due to one side using HardFP and the other not.

ZFS Tutorial

“ZFS is really the final word in filesystems. With a feature set longer than this tutorial, it can take a while to master. You can set many more options per dataset, enable disk usage quotes and much more. Once you’ve used it and seen the benefits, you’ll probably never want to use anything else. Hopefully this has been helpful to get you on your way to becoming a FreeBSD ZFS master.”

Source: http://www.bsdnow.tv/tutorials/zfs

I give you: the SONOS Audiobook / Podcast Auto Bookmarker – never lose your Listening Progress again…

Since the SONOS system I’ve bought turned out to be highly hackable I’ve spent some quality-time this weekend fixing the worst downside I’ve found so far that the SONOS system had for me

I am listening to a lot of Podcasts and Audiobooks. And it turns out that those two Genre are not particularly good supported by SONOS. When you’re listening to a 4 hour podcast and you stop it to play a song in between (since you stretch the listening of that podcast to several days) the next time you start that 4 hour podcast the SONOS system did not remember the position that you stopped at the last time and restarts the podcast from the beginning.

If you did not remember where you left of the last time, you’re lost. The same goes for Audiobooks.

Now this is the first feature I am teaching my SONOS system. And I am opensourcing it so you can do it as well.

SONOS Auto Bookmark Tool

Everything you need can be run on a RaspberryPi:

  1. You need NodeJS and node-sonos-http-api installed and running.
  2. You need MONO and sonos-auto-bookmarker (change the configuration.json file in bin/Debug after you xbuilded the .sln file)

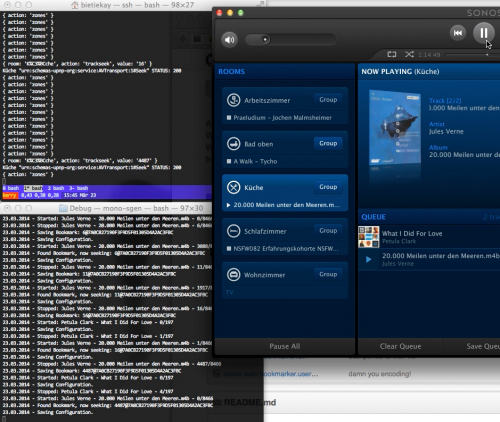
Now the Auto Bookmarker Tool will, with the help of the sonos-http-api, monitor your household and whenever something longer than 10 minutes is played and stopped it bookmarks the last played position. Whenever you restart that track it will then seek to the last known position automatically.

[youtube]https://www.youtube.com/watch?v=Eqk3SyNv8sE[/youtube]

Source 1: https://github.com/bietiekay/sonos-auto-bookmarker

Let the SONOS hacking begin!

I always wanted a networked multi-room audio solution as you can easily see here and here and here and here. Now it seems I’ve finally found something that integrates very well into our music listening habits and our infrastructure. And on top of that it turned out to be highly hackable.

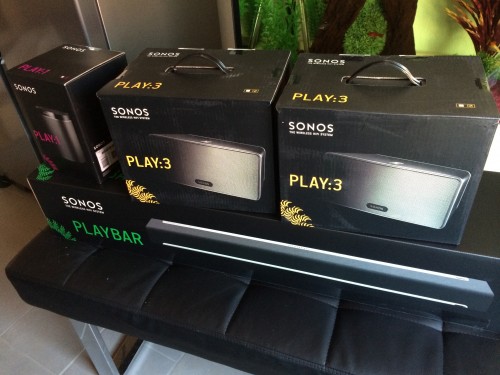
I’ve went with SONOS for that multi-room solution. After trying two speakers for two rooms I’ve invested the budget into the full-house solution (not all speakers on below picture). And finally everything is as I always wanted.

Be warned: If you buy one speaker, you will definitly buy more.

IMG_0367

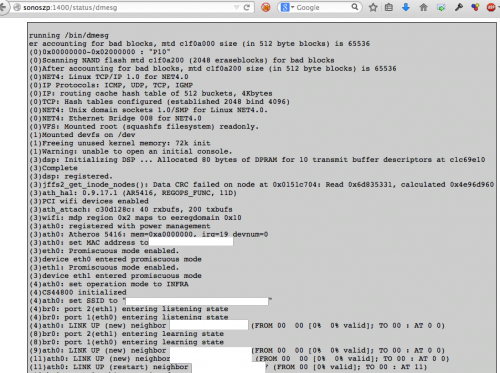
So what’s in those boxes? Besides beautiful and high-quality speakers there’s a 250 Mhz linux powered computer inside each speaker. It got 64Mbytes of memory and wireless adapters to span it’s own wireless mesh network (hidden by default).

Each speaker on it’s own can be controlled and accessed through the SONOS controller applications (Windows/Mac/iOS/Android) or through several tools that open up new possibilities.

Screen Shot 2014-03-22 at 17.52.10

There will be more articles coming on the topic of hacking SONOS, adding functionality and using it for things not officially planned for by the manufacturer. Joy!

Update:

Source 1: http://splok.org/sonos_interface

How to install NodeJS and NPM on the RaspberryPi without getting “Illegal Instruction” error messages

I tried a couple of times to compile NodeJS on the RaspberryPi and failed miserably. It not only takes ages to compile NodeJS on the Pi. After the successful compile and install run most of the time running it just results in an error message “Illegal Instruction” or “Ungültiger Maschinencode”.

Now there’s a pretty easy way to do that on your own. Run these commands:

wget http://node-arm.herokuapp.com/node_latest_armhf.deb

After the download is finished successfully you can install it by running this as root:

sudo dpkg -i node_latest_armhf.deb

This will have installed a relatively new NodeJS built as well as NPM on your RaspberryPi. Don’t panic when NPM is slower than you would expect… just be patient.

Enjoy!

On-Screen OCR – helps you when all you get is an image…

“You want to extract one paragraph of text from a pdf your coworker sent you? One quote from your professor’s presentation? A couple of code lines from this tutorial clip on your favourite movie platform? It’s just one hotkeypress away. OCR everything on the fly.

Condense is the product of many frustating years of using overly complicated OCR software. “Take a screenshot, boot up your OCR suite, select the area you want to extract, select an output file…” Oftentimes typing out is faster than walking through this procedure.”

[youtube]http://www.youtube.com/watch?v=hLqVLplAD8w[/youtube]

Source 1: http://www.condenseapp.com/

document your REST interfaces with style: Swagger

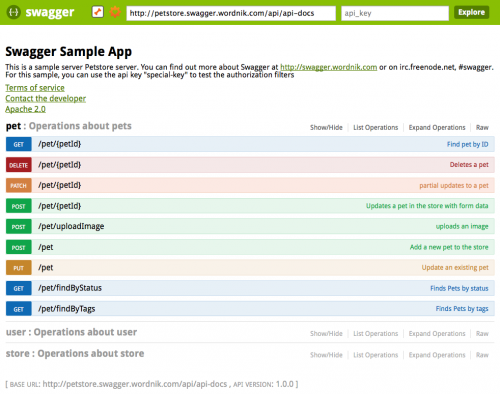
Swagger is a specification and complete framework implementation for describing, producing, consuming, and visualizing RESTful web services. The overarching goal of Swagger is to enable client and documentation systems to update at the same pace as the server. The documentation of methods, parameters, and models are tightly integrated into the server code, allowing APIs to always stay in sync. With Swagger, deploying managing, and using powerful APIs has never been easier.”

Bildschirmfoto 2014-03-15 um 22.35.09

Source 1: https://helloreverb.com/developers/swagger
Source 2: https://github.com/wordnik/swagger-core
Source 3: http://petstore.swagger.wordnik.com/#!/pet

miataru can embed your location into any website now!

An exciting new feature has been added to the Miataru service! It’s now possible to embed the location of a device into any website. Here’s an example:

It’s a pretty easy process. When your device is available on the standard public miataru service you only have to embed an iFrame into the website. Just like this:

<iframe width=”320″ scrolling=”no” height=”240″ frameborder=”0″ src=”http://miataru.com/client/embed.html#BF0160F5-4138-402C-A5F0-DEB1AA1F4216;Demo Device”></iframe>

Source 1: http://miataru.com/client/#BF0160F5-4138-402C-A5F0-DEB1AA1F4216
Source 2: https://github.com/miataru/miataru-webclient

GraphHopper: blazingly fast routes with OpenStreetMap

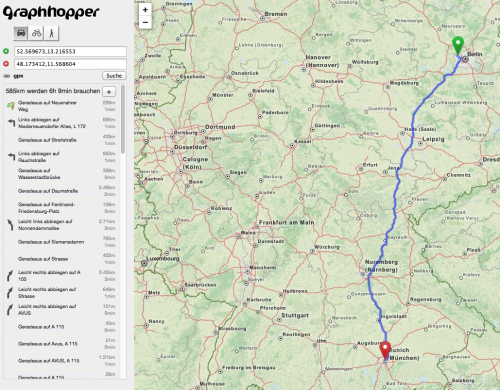
Playing with OpenStreetMap resources lately I came to the point where I wanted to calculate routes between points based on the OSM data. Now there is GraphHopper to the rescue! It’s opensource and awesome!

“GraphHopper offers memory efficient algorithms in Java for routing on graphs. E.g. Dijkstra and A* but also optimized road routing algorithms like Contraction Hierarchies. It stands under the Apache License and is build on a large test suite.”

GraphHopper
Source 1: http://graphhopper.com

setting up boblight with a Raspberry Pi and RaspBMC

Some might know AmbiLight – a great invention by Philips that projects colored light around a TV screen based upon the contents shown. It’s a great addition to a TV but naturally only available with Philips TV sets.

Not anymore. There are several open-source projects that allow you to build your very own AmbiLight clone. I’ve built one using a 50-LEDs WS2801 stripe, a 5V/10A power supply, a RaspberryPi, and the BobLight integration in RaspBMC (this is a nice XBMC distribution for the Pi).

Boblight is a collection of tools for driving lights connected to an external controller.

Its main purpose is to create light effects from an external input, such as a video stream (desktop capture, video player, tv card), an audio stream (jack, alsa), or user input (lirc, http). Boblight uses a client/server model, where clients are responsible for translating an external input to light data, and boblightd is responsible for translating the light data into commands for external light controllers.”

The hardware to start with looks like this:
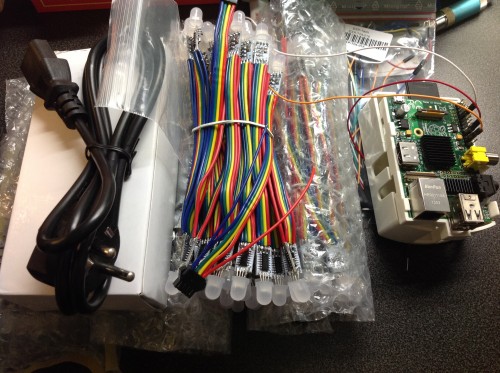
pre_requisites

I’ve fitted some heat-sinks to the Pi since the additional load of controlling 50 LEDs will add a little bit of additional CPU usage which is desperately needed when playing Full HD High-Bitrate content.

The puzzle pieces need to be put together as described by the very good AdaFruit diagram:
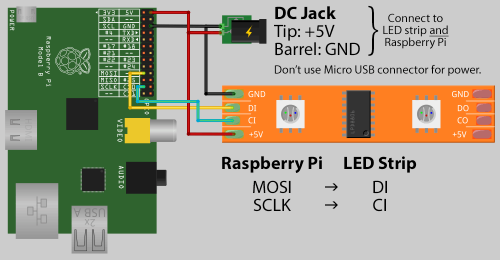
diagramAs you can see the Pi is powered directly through the GPIO pins. You’re not going to use the MicroUSB or the USB ports to power the Pi. It’s important that you keep the cables between the Pi and the LEDs as short as possible. When I added longer / unshielded cables everything went flickering. You do not want that – so short cables it is :-)
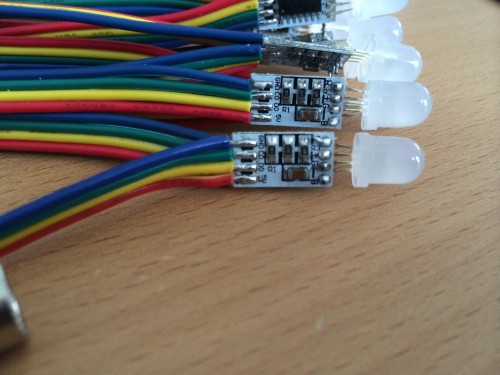
leds

When you look at aboves picture closely you will find a CO and DO on the PCB of the LED. on the other side of the PCB there’s a CI and DI. Guess what: That means Clock IN and Clock OUT and Data IN and Data OUT. Don’t be mistaken by the adapter cables the LED stripes comes with. My Output socket looked damn close to something I thought was an Input socket. If nothing seems to work on the first trials – you’re holding it wrong! Don’t let the adapters fitted by the manufacturer mislead you.

Depending on the manufacturer of your particular LED stripe there are layouts different from the above image possible. Since RaspBMC is bundled with Boblight already you want to use something that is compatible with Boblight. Something that allows Boblight to control each LED in color and brightness separately.

I opted for WS2801 equipped LEDs. This pretty much means that each LED sits on it’s own WS2801 chip and that chip takes commands for color and brightness. There are other options as well – I hear that LDP8806 chips also work with Boblight.

My power supply got a little big to beefy – 10 Amps is plenty. I originally planned to have 100 LEDs on that single TV. Each LED at full white brightness would consume 60mA  – which brings us to 6Amps for a 100 – add to that the 2 Amps for the PI and you’re at 8A. So 10A was the choice.

To connect to the Pi GPIO Pins I used simple jumper wires. After a little bit of boblightd compilation on a vanilla Raspbian SD card (how-to here). Please note that with current RaspBMC versions you do not need to compile Boblight yourself – I’ve just taken for debugging purposes as clean Raspbian Image and compiled it myself to do some boblight-constant tests. Boblight-constant is a tool that comes with Boblight which allows you to set all LEDs to one color.

If everything is right, it should look like this:
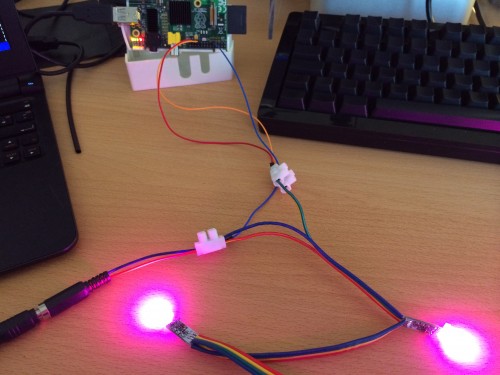
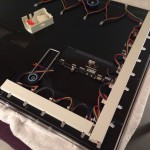
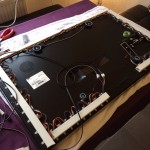
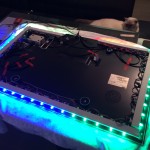
working_first_timeNow everything depends on how your LED stripes look like and how your TVs backside looks like. I wanted to fit my setup to a 42″ Samsung TV. This one already is fitted with a Ultra-Slim Wall mount which makes it pretty much sitting flat on the wall like a picture. I wanted the LEDs to sit right on the TVs back and I figured that cable channels when cut would do the job pretty nicely.

To get RaspBMC working with your setup the only things you need to do are:

  1. Enable Boblight support in the Applications / RaspBMC tool
  2. Login to your RaspBMC Pi through SSH with the user pi password raspberry and copy your boblight.conf file to /etc/boblight.conf.

The configuration file can be obtained from the various tutorials that deal with the boblight configuration. You can choose the hard way to create a configuration or a rather easy one by using the boblight configuration tool.

I’ve used the tool :-)
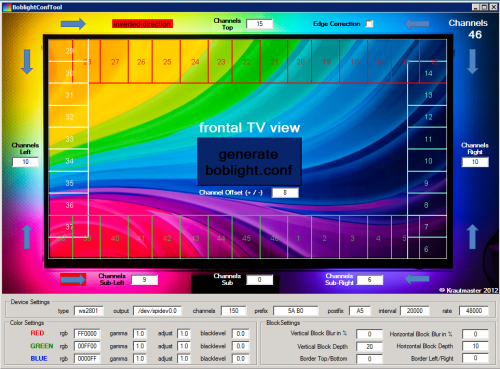
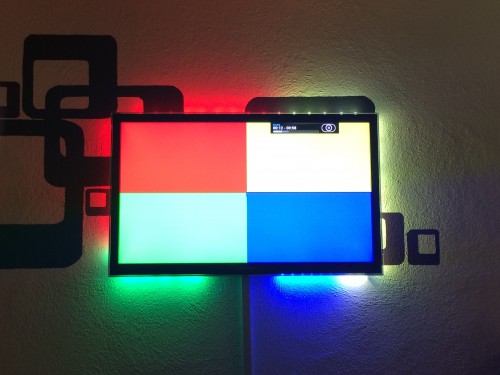
Boblight Config ToolNow if everything went right you don’t have flickering, the TV is on the wall and you can watch movies and what-not with beautiful light effects around your TV screen. If you need to test your set-up to tweak it a bit more, go with this or this.
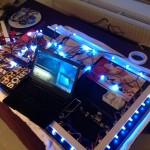
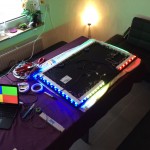
result_1

Source 1: http://en.wikipedia.org/wiki/Ambilight
Source 2: http://www.raspberrypi.org/
Source 3: https://code.google.com/p/boblight/
Source 4: http://www.raspbmc.com/
Source 5: http://learn.adafruit.com/light-painting-with-raspberry-pi/hardware
Source 6: How-To-Compile-Boblight
Source 7: Boblight Config Generator
Source 8: Boblight Windows Config Creation Tool
Source 9: Test-Video 1
Source 10: Test-Video 2

the Google Cultural Institute

A very interesting find that I wanted to blog about for a while now – loads of stuff to read and watch through – let it be art or history.

“Google has partnered with hundreds of museums, cultural institutions, and archives to host the world’s cultural treasures online.

With a team of dedicated Googlers, we are building tools that allow the cultural sector to display more of its diverse heritage online, making it accessible to all.

Here you can find artworks, landmarks and world heritage sites, as well as digital exhibitions that tell the stories behind the archives of cultural institutions across the globe.”

[youtube]https://www.youtube.com/watch?v=LzMXbvBsALo[/youtube]

Source 1: http://www.google.com/intl/en/culturalinstitute/about/
Source 2: D-Day

“Compressing” JSON to JSON

JSON_logo
JSON Logo

The internet and all those browsers and javascript applications brought data structures that are pretty straight-forward. One of them is JSON.

The wikipedia tells about JSON:

“JSON (/ˈdʒeɪsɒn/ JAY-soun, /ˈdʒeɪsən/ JAY-son), or JavaScript Object Notation, is an open standard format that uses human-readable text to transmit data objects consisting of attribute–value pairs. It is used primarily to transmit data between a server and web application, as an alternative to XML.”

Unfortunately complex JSON can get a bit heavy on the structure itself with over and over repetitions of data-schemes and ids.

There’s RJSON to the rescue on this. It’s backwards compatible and makes your JSON more compressible:

“RJSON converts any JSON data collection into more compact recursive form. Compressed data is still JSON and can be parsed with JSON.parse. RJSON can compress not only homogeneous collections, but also any data sets with free structure.

RJSON is single-pass stream compressor, it extracts data schemes from document, assign each schema unique number and use this number instead of repeating same property names again and again.”

Of course this is all open-source and you can get your hands dirty here.

Source 1: http://en.wikipedia.org/wiki/JSON
Source 2: http://www.cliws.com/e/06pogA9VwXylo_GknPEeFA/
Source 3: https://github.com/dogada/RJSON

the Miataru Browser Client Application is here!

After getting the server and the iOS client application to the people I’ve sat down and started doing something I have not done yet – writing a web application with no server side except a standard HTTP server.

Here’s a little demonstration which I will explain in more detail below:

[youtube]http://www.youtube.com/watch?v=YHujwbuFwco[/youtube]

The default Miataru service can be accessed through the client application with this URL: http://miataru.com/client – This will open a new browser window with a completely fresh session of the application. Since Miataru is all about control of your own data this webapplication does not store anything on any servers – every access to the internet is read-only and only to the Miataru service (just “GetLocation”). Oh – and by default it uses SSL to encrypt all traffic from and to the Miataru service.

You can start by entering DeviceIDs you know or you can – for test purposes – use a DeviceID I am providing for test purposes: BF0160F5-4138-402C-A5F0-DEB1AA1F4216

Of course, the easiest way is to just embedd the DeviceID into the URL, just like this: http://miataru.com/client/#BF0160F5-4138-402C-A5F0-DEB1AA1F4216

Oh and if you want to see the device moving on your iPhone just use the miataru iOS client and scan this QR code here:

qrcode

So that was easy – but if the application does not store anything on any server, how does it maintain the Known Devices list between browser sessions (open/closes of the browser) you ask? – It’s using HTML5 WebStorage to store these information locally in your browser. This has the advantage of being completely local, but also the disadvantage that it is not shared between browsers or machines.

Like usual this whole application is also available completely free of charge and open-sourced to be used, edited and installed on-premise if you like.

Let me know how you like it!

Source 1: http://miataru.com/client
Source 2: http://miataru.com/client/#BF0160F5-4138-402C-A5F0-DEB1AA1F4216
Source 3: https://github.com/miataru/miataru-webclient
Source 4: http://www.w3schools.com/html/html5_webstorage.asp

Instruction-less computing: Doing stuff with a CPU without actually executing instructions

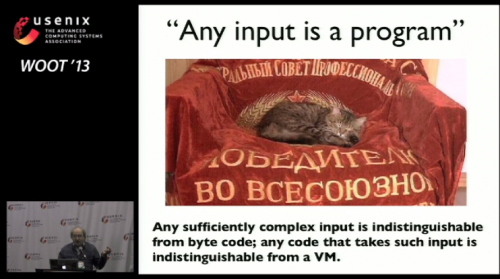
Having fun with hardware is a good way to learn about the machines which soon will become our new overlords. With this pretty interesting presentation you can dive deep into what a CPU does and how it can be exploited to run code by not running it.

Trust Analysis, i.e. determining that a system will not execute some class of computations, typically assumes that all computation is captured by an instruction trace. We show that powerful computation on x86 processors is possible without executing any CPU instructions. We demonstrate a Turing-complete execution environment driven solely by the IA32 architecture’s interrupt handling and memory translation tables, in which the processor is trapped in a series of page faults and double faults, without ever successfully dispatching any instructions. The “hard-wired” logic of handling these faults is used to perform arithmetic and logic primitives, as well as memory reads and writes. This mechanism can also perform branches and loops if the memory is set up and mapped just right. We discuss the lessons of this execution model for future trustworthy architectures.

Bildschirmfoto 2013-11-02 um 01.04.31

Source 1: https://www.usenix.org/conference/woot13/page-fault-weird-machine-lessons-instruction-less-computation

full text transcripts of the Apple World Wide Developer Conference (wwdc)

Since I’ve become sort of an iOS developer lately I had my fair share of WWDC recordings to get started with this whole CocoaTouch and Objective-C development stuff.

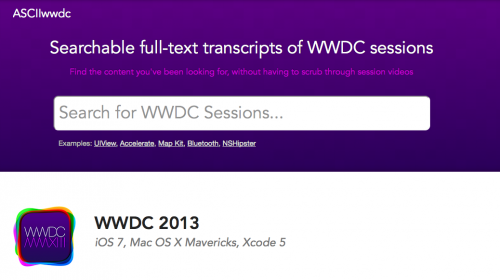
Now a tool that is pretty handy is a this website that offers a full-text transcript search of all WWDC recordings. Awesome!

Bildschirmfoto 2013-11-02 um 00.54.36

Source 1: http://asciiwwdc.com/
Source 2: http://miataru.com/ios

when DVB-T is not interesting, use the hardware for fun and SDR!

SDR – or Software Defined Radio is relatively cheap and fun way to dive deeper into radio communication.

“Software-defined radio (SDR) is a radio communication system where components that have been typically implemented in hardware (e.g. mixers, filters, amplifiers, modulators/demodulators, detectors, etc.) are instead implemented by means of software on a personal computer or embedded system. While the concept of SDR is not new, the rapidly evolving capabilities of digital electronics render practical many processes which used to be only theoretically possible.” (Wikipedia)

So with cheap hardware it’s possible to receive radio transmissions on all sorts of frequencies and modulations. Since everything after the actual “receiving stuff”-phase happens in software the things you can do are sort of limitless.

Now what about the relatively cheap factor? – The hardware you’re going to need to start with this is a DVB-T USB stick widely available for about 25 Euro. The important feature you’re going to look for is that it comes with a Realtek RTL2832U chip.

“The RTL2832U is a high-performance DVB-T COFDM demodulator that supports a USB 2.0 interface. The RTL2832U complies with NorDig Unified 1.0.3, D-Book 5.0, and EN300 744 (ETSI Specification). It supports 2K or 8K mode with 6, 7, and 8MHz bandwidth. Modulation parameters, e.g., code rate, and guard interval, are automatically detected.

The RTL2832U supports tuners at IF (Intermediate Frequency, 36.125MHz), low-IF (4.57MHz), or Zero-IF output using a 28.8MHz crystal, and includes FM/DAB/DAB+ Radio Support. Embedded with an advanced ADC (Analog-to-Digital Converter), the RTL2832U features high stability in portable reception.” (RealTek)

You’ll find this chip in all sorts of cheap DVB-T USB sticks like this one:

3948543_b6f7670bc7To use the hardware directly you can use open source software which comes pre-packaged with several important/widely used demodulator moduls like AM/FM. Gqrx SDR is available for all sorts of operating systems and comes with a nice user interface to control your SDR hardware.
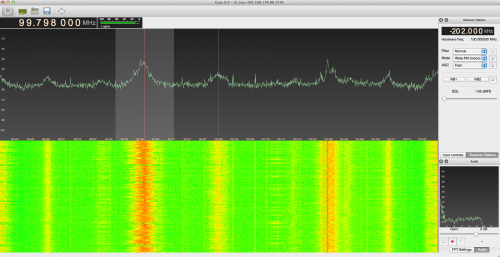
The neat idea about SDR is that you, depending on the capabilities of your SDR hardware, are not only tuned into one specific frequency but a whole spectrum several Mhz wide. With my device I get roughly a full 2 Mhz wide spectrum out of the device allowing me to see several FM stations on one spectrum diagram and tune into them individually using the demodulators:

Bildschirmfoto 2013-11-01 um 23.28.56The above screenshot shows the OS X version of Gqrx tuned into an FM station. You can clearly see the 3 stations that I can receive in that Mhz range. One very strong signal, one very weak and one sort of in the middle. By just clicking there the SDR tool decodes this portion of the data stream / spectrum and you can listen to a FM radio station.

Of course – since those DVB-T sticks come with a wide spectrum useable – mine comes with an Elonics E4000 tuner which allows me to receive – more or less useable – 53 Mhz to 2188 Mhz (with a gap from 1095 to 1248 Mhz).

Whatever your hardware can do can be tested by using the rtl_test tool:

root@berry:~# rtl_test -t
Found 1 device(s):
0:  Terratec T Stick PLUS

Using device 0: Terratec T Stick PLUS
Found Elonics E4000 tuner
Supported gain values (14): -1.0 1.5 4.0 6.5 9.0 11.5 14.0 16.5 19.0 21.5 24.0 29.0 34.0 42.0
Benchmarking E4000 PLL…
[E4K] PLL not locked for 52000000 Hz!
[E4K] PLL not locked for 2189000000 Hz!
[E4K] PLL not locked for 1095000000 Hz!
[E4K] PLL not locked for 1248000000 Hz!
E4K range: 53 to 2188 MHz
E4K L-band gap: 1095 to 1248 MHz

Interestingly when you plug the USB stick into an Raspberry Pi and you follow some instructions you can use the Raspberry Pi as an SDR server allowing you to place it on the attic while still sitting comfortably at your computer downstairs to have better reception.

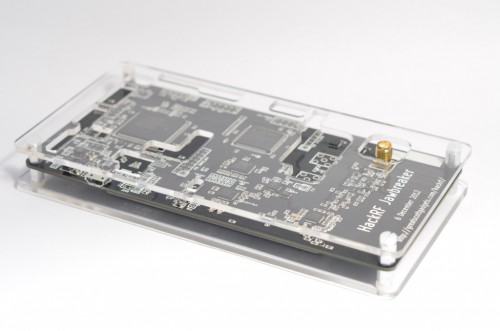
If you want to upgrade your experience with more professional hardware – and in fact if you got a sender license – you can take a look at the HackRF project which currently is creating a highly sophisticated SDR hardware+software solution:

jawbreaker-fd0-145436

Source 1: http://www.realtek.com.tw/products/productsView.aspx?Langid=1&PFid=35&Level=4&Conn=3&ProdID=257
Source 2: http://gqrx.dk/
Source 3: www.hamradioscience.com/raspberry-pi-as-remote-server-for-rtl2832u-sdr/
Source 4: http://ossmann.blogspot.de/2012/06/introducing-hackrf.html
Source 5: https://github.com/mossmann/hackrf

Miataru for iOS is available in the iOS AppStore

After roughly 1,5 months of learning Javascript and Objective-C the iOS application and the publicly available Miataru service launched this week.

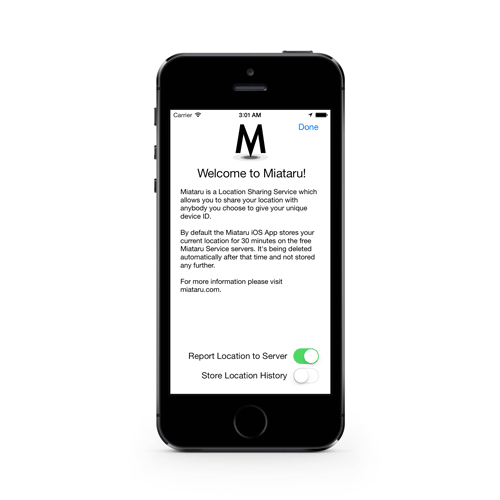
If you want to interface with the publicly available instance of the miataru server you can use the URL: http://service.miataru.com. This URL also is pre-configured with the iOS client that got recently available in the AppStore.

featurerette-1

appstorebadge_small

Source 1: Miataru for iOS
Source 2: iOS AppStore

Node.js integrated development environment… sort of

I started working on a Node.js project and so far it’s a quite satisfying experience. But what is Node.js?

Bildschirmfoto 2013-08-25 um 21.38.10

“Node.js is a software platform that is used to build scalable network (especially server-side) applications. Node.js utilizes JavaScript as its scripting language, and achieves high throughput via non-blocking I/O and a single-threaded event loop.

Node.js contains a built-in HTTP server library, making it possible to run a web server without the use of external software, such as Apache or Lighttpd, and allowing more control of how the web server works. Node.js enables web developers to create an entire web application in JavaScript, both server-side and client-side.” (Wikipedia)

There are a lot of things that are approached differently in Node. One of which is how you deal with code and debuggings.

I come from a world of fully integrated development environments. I had that for C#, it’s there for Java, it’s even there for Objective-C.

But with Node and Javascript it’s a bit different. Even the options you have like NetBeans and Eclipse are… well … Netbeans and Eclipse.

So it’s a bit like a toolbox you are supposed to put together yourself. And in this article I want to describe how a 2-week-beginners development environment for Node looks like. If you got anything to improve or add – go ahead, leave a comment!

Source Control

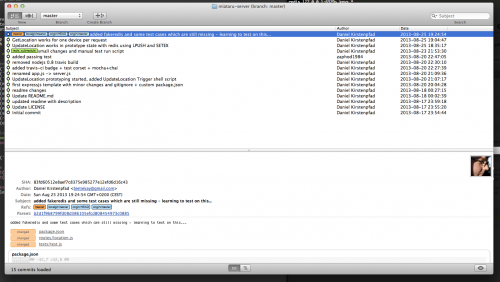
GIT! I am using GitX and command line git to work with the source control. Nothing special really.

Bildschirmfoto 2013-08-25 um 21.29.21

Code Editor

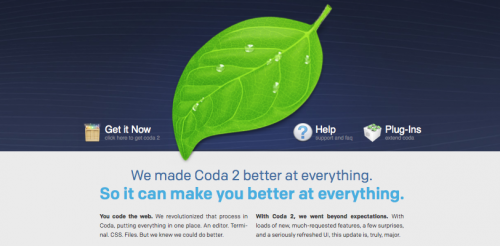
You got a lot of options here. May it be the awesome Sublime Text 2 or Eclipse or NetBeans. I chose Coda 2 since I already got it and was using it for my humble web development intermezzos. It’s awesome and if you’re on Mac you should give it a try!

Bildschirmfoto 2013-08-25 um 22.03.51

Debugging Node.js

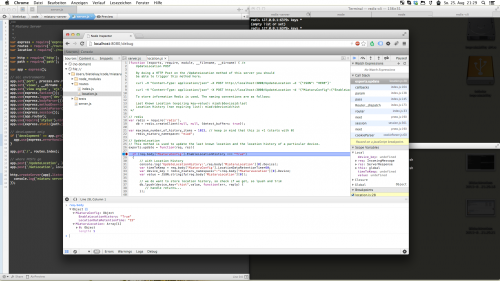
Now things are getting interesting. To debug Node.js applications you have a lot of options from which a lot of them works quite good. Unfortunately I was not able to find the one IDE that provides all in one – great code editing and good debugging. So I chose to use a stand-alone debugging solution that does the trick in the best way I can think of. It’s called node-inspector and is available on all possible platforms as it seems.

It’s basically using the V8 Javascript engine built-in debugging interfaces and making them available through a local website that you can use to debug. And it really works wonders.

Bildschirmfoto 2013-08-25 um 21.29.33

Triggering and Glue

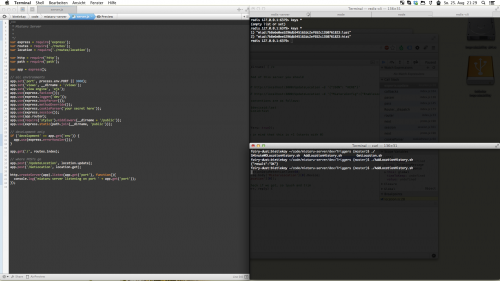
Yeah and the rest of that is a lot of shell. Having at least 4 Terminal windows open and arranged on my desktop alongside the javascript code that I am currently editing.

Bildschirmfoto 2013-08-25 um 21.29.16

There’s only one thing left right now which is hindering the code hacking and debugging. And it’s the fact that Node.js in it’s default state does not reload changed local code files after it loaded them once. And this means: When you edit something you would have to manually restart Node.js to see the changes you just made in effect. And that’s where a little tool called Supervisor comes into play. It watches the files of your project and kills+restarts Node.js automatically for you and takes care of that bugging restart-cycle. It just works!

If course there are some more things in regards of writing tests. But this is going to be another article.

Source 1: http://nodejs.org
Source 2: http://en.wikipedia.org/wiki/Node.js
Source 3: http://panic.com/coda/
Source 4: https://github.com/node-inspector/node-inspector
Source 5: https://github.com/isaacs/node-supervisor

Google Latitude is dead, long live Miataru!

I am a long time user of Google Latitude – and since I added a Google Latitude Module to h.a.c.s. almost the whole family started using this service. It’s all about tracking your location.

Google says:

“Latitude has been retired

Google Latitude was retired on August 9th, 2013. Products retired include Google Latitude in Google Maps for Android, Latitude for iPhone, the Latitude API, the public badge, the iGoogle Gadget, and the Latitude website at maps.google.com/latitude.

What does this mean for me?

  • You are no longer able to share your location using Latitude….”

We used it for a lot of use cases. If just to know if the other is en-route to a meeting-point or to know if someone arrived safely during a long trip. Or in terms of home automation to let the house know if you are there or somewhere else – for instance to enable or disable the house alarming system or to power up / shutdown the heating if necessary.

After the retirement of Latitude on the 9th of August all those use cases where not doable anymore. Yes there are some tools that do this and that for Location tracking. But when Google Latitude was still active it did not fullfil all use-cases I would have gotten – it was just “good enough”. Now all those subtitutes are not even close to a fraction of the use cases I would have.

Now what? Easy! If nothing works out, you gotta do it yourself!

So I started a new spare-time project I call Miataru. Weird name, eh?

“Miataru or 見当たる is Japanese and means “be found” or “to come across” and it’s meant to be a set of tools to allow the user to track locations and choose how to work with the data as well as how data is stored if at all.” (Miataru.com)

So – this should not be a replacement for anyone for Google Latitude. But the goal is to create a client+server toolset that allows you to cover a lot of use cases around location tracking and the interfacing with other software like home automation.

The server will be written in Javascript using the awesome Node.JS technology and some frameworks along with that. The clients will be written in a mobile client specific language – like Objective-C for iOS.

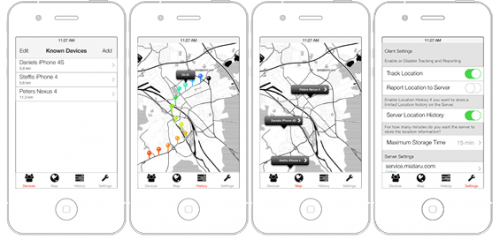
iOSAppViewsWireframeFor about two weeks I am working on implementing the server and the iOS client. If you want to take part you’re invited! Especially the server and maybe a Webinterface / Web-App will need more love from savvy web developers – certainly more than I am able to give. I am slowly learning my way into all those new (for me) technologies – diving deeper into Javascript and Objective-C was a plan for the longest time now.
So expect some articles here about all the funny things and learnings about NodeJS and Objective-C / iOS development.

Some quick words to all you readers:

If you want to participate in an open source project in NodeJS and Mobile devices you’re invited to join anytime!

Source: http://www.miataru.com

SMS Alarming for h.a.c.s.

I’ve added Alarming to hacs a while ago and I’ve now extended the built-in SMS gateway providers with the german telekom services called “Global SMS API”.

This API is offered through the Telekom own portal called developer garden and is as easy to use as it can possibly be. You only need to set-up the account with developergarden and after less than 5 minutes you can send and receive SMS and do a lot more. They got APIs for nearly everything you possible want to do … fancy some “talk to your house”-action? Would be easy to integrate into h.a.c.s. using their Speech2Text APIs.

They have a short video showing how to set it all up:

[youtube]http://www.youtube.com/watch?v=caRSafzMDK0[/youtube]

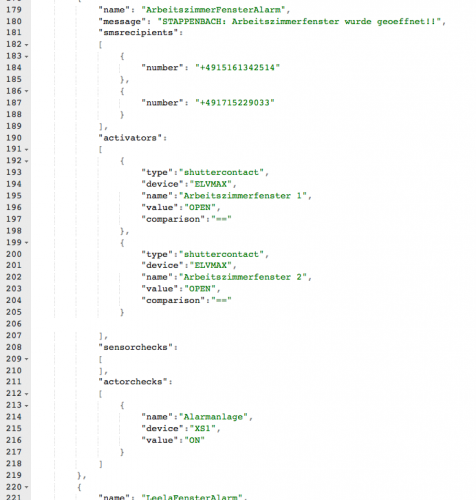
So I’ve added the SMS-send capabilities to the hacs internal alarming system with it’s own JSON configuration file looking like this:

Bildschirmfoto 2013-07-11 um 23.08.46

And this simple piece of configuration leads to SMS getting sent out as soon as – in this example – a window opens:

sms-alarming-ahcs

Before the Telekom Global SMS API I’ve used a different provider (SMS77) but since the delivery times of this provider varied like crazy (everything from 30 seconds to 5 minutes) and the provider had a lot of downtimes my thought was to give the market leader a try.

So now here it is – integrated. Get the source here.

Source 1: https://github.com/bietiekay/hacs
Source 2: https://www.developergarden.com/de/apis/apis-sdks/global-sms-api/

how a code repository can be visualized

Most development projects are relying on a source code repository these days to have control over the constant changes by many team members. The source code repository is therefore the complete history of a software project.

With the great tool called “gource” you can visualize it! This for example is the project a team from Rakuten Germany (where I work) worked on for the last couple of months:

[youtube]http://www.youtube.com/watch?v=sjX7Icom6k8[/youtube]

Source 1: Visualize your source-control
Source 2: Gource

working around MacOS X bugs: multiple “open with” context menu entries

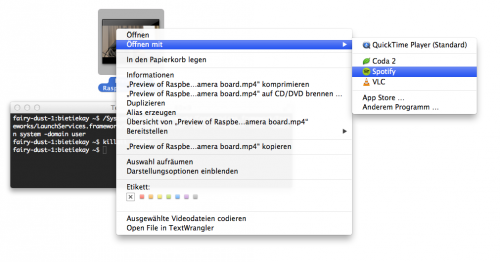
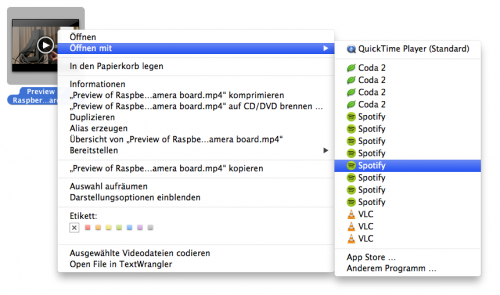
Obviously it’s impossible for Apple to fix that quite annoying bug in their operating system that leads to double/tripple/… program entries in the “Open with…” menu. Everytime an application is updated it adds a new entry but does not remove the old one.

This makes your open-width menu look like this:

Bildschirmfoto 2013-05-12 um 18.11.38To fix this you need to run a simple command in your terminal.app:

/System/Library/Frameworks/CoreServices.framework/Frameworks/LaunchServices.framework/Support/lsregister -kill -r -domain local -domain system -domain user;killall Finder

This simple command will kill the double/tripple/… entries and restarts your finder.app to make the change visible. Your “Open with…” menu should now only show singular entries per application:

Bildschirmfoto 2013-05-12 um 18.14.11

a kilobyte of javascript – js1k

What do you think can you do with 1 kilobyte of javascript? Not a lot you might think. In fact it’s quite a lot!

js1k

Similar to the 4k and 64k demo awards now there is a 1k javascript competition:

“This is a competition about JavaScript scripts no larger than 1k. Starting out as a joke, the first version ended with a serious amount of submissions, prizes and quality.”

So what can you do with 1k of javascript? A lot! Click your way through the demos on the js1k.com site and find a lot like this:

Bildschirmfoto 2013-05-04 um 20.50.54

Source 1: http://js1k.com/
Source 2: http://scene.org/
Source 3: http://awards.scene.org/nominees.php?cat=9

Hyperlapse – a streetview experiment

More and more javascript experiments bubble up on the internets and a particularly interesting one is called “Hyperlapse”:

“Hyper-lapse photography – a technique combining time-lapse and sweeping camera movements typically focused on a point-of-interest – has been a growing trend on video sites. It’s not hard to find stunning examples on Vimeo. Creating them requires precision and many hours stitching together photos taken from carefully mapped locations. We aimed at making the process simpler by using Google Street View as an aid, but quickly discovered that it could be used as the source material. It worked so well, we decided to design a very usable UI around our engine and release Google Street View Hyperlapse.

[vimeo]https://vimeo.com/63653873[/vimeo]

Source 1: http://hyperlapse.tllabs.io/
Source 2: http://labs.teehanlax.com/project/hyperlapse